I want to introduce you to one of my favorite workshop tools – the Kreg pocket hole jig. If you don’t own at least one pocket hole jig, you really ought to consider getting one. There is a jig for every price point and/or frequency of use.
(This post may contain affiliate links (*). That means that I make a small commission from sales that result through these links, at no additional cost to you. You can read my full disclosure here.)
I love these tools because they have really opened the door to woodworking for many people who previously thought they had no skills in this area.
They make it easy to create strong connections without needing a lot of specialty equipment.
This tool is also a much-loved tool for DIYers, but even expert carpenters love the way that they can produce high-quality products at a much faster pace.
What is a Pocket Hole Jig

Essential woodworking tool that creates a strong joint without the need for advanced skills.
In addition to providing an easy joining technique, the screws themselves can act as a clamp, aligning and drawing butt joints together. You just can’t get that benefit from biscuits or dowels.
When is a Pocket Hole Jig Useful?
Pocket hole joinery is an excellent choice for building cabinets. You can quickly throw together strong boxes that are ready for framing and finishing.
In fact, pocket hole joints are wonderful for any type of plywood construction where the joints will not show.
You can also use these jigs to make a lot of different furniture and decor pieces as long as you are mindful of the movement of the wood.
What About Downsides?

These jigs leave holes that must either be plugged or hidden. Usually, this is not a problem, but it may be unacceptable for carpenters who are particular about the aesthetics of their joinery.
Pocket holes are not appropriate for all woodworking jobs. If you look around, you will find some DIYers using them in projects with little to no understanding of wood movement.
This leads to all sorts of problems that the user is left to deal with years, months, sometimes just weeks later.
Make sure you understand when you should NOT use pocket holes before you start your build.
I have received countless emails seeking answers to why woodworking projects fail, cracked, or split. Quite often the answer lies in incorrectly using a pocket hole jig.
When used correctly, these are amazing tools. But I can’t stress strongly enough that you should exercise caution when following free plans or instructions that you find online.
Sometimes even paid plans are faulty. A good place for beginners to start developing basic understanding is by clicking those links in the above paragraph.
How to Use a Pocket Hole Jig
Each jig is slightly different in the specifics on how it will be used, but they all are the same in a few basic factors.
1) You must use the proper screw.
2) You must set the jig to the proper width for the wood, and 3) you must set the stop collar before drilling.
Keep in mind that wood has two different measurements – nominal and actual. You will be using the actual wood thickness to make determinations for your jig.
Choosing the Screws
Pocket hole screws come in two thread options, three finishes, and multiple lengths. To determine the screws that are needed, first decide what environmental conditions your finished piece will need to endure.
Screw Finishes
Kreg pocket hole screws come in zinc, blue Kote, and stainless steel.
The zinc screws are good for interior locations with little to no humidity.
The stainless steel screws are for excessive water exposure and/or corrosive environments.
The blue Kote screws are the most widely used of all the options. They are coated with anti-corrosive layers and are designed for both indoor and outdoor applications.
Screw Threads and Lengths
The course threads are for softwoods such as pine. The fine threads are for harder wood species such as oak and maple.
After determining the thread for the screws, you then need to choose the proper length.
The manual explains the proper length options, and once you get used to the jig the correct screws become second nature.
For a quick reference, Kreg has a handy screw wheel that you can buy.
Steps For Joining Wood
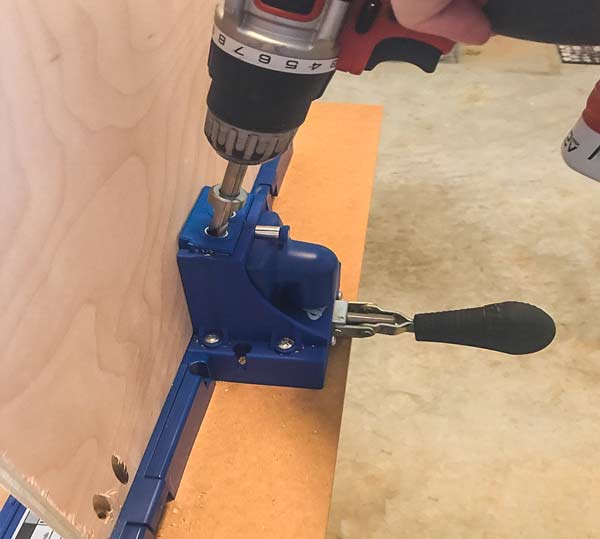
After setting up the jig for the proper thickness, adjust the stop collar for the correct drilling depth. Most jigs come with a guide to make this easy.
Just slide the collar to the correct depth and lock down the nut with the provided Allen wrench.
To join two pieces of plywood or solid wood, set the jig to the proper dimensions for the thickness being used. Drill the pocket holes into one side of the two pieces being joined.

Align the pieces to be joined making sure that the pieces are square. Kreg has a nifty pocket hole clamp that is useful for holding pieces together at the holes but is not necessary.
Insert the proper screw into each hole and, using the bit provided, tighten down the screw just until it is snug. Avoid over-tightening as this can strip the wood.
Projects Created Using Pocket Hole Joinery:
- Easy Christmas Lamppost that is perfect for both inside and outside use.
- Add garage shelving for more storage. Fast, do-it-by-yourself project!
- Fast and easy Kitchen Island
- Quick build for Portable Workshop Tables. These are also great for craft rooms. Plus, I detail how to make it convertible into three different sizes!
- Learn how to build cabinet boxes like a pro. Plus, learn to quickly build cabinet boxes and assemble face frames.
- Recreate my Kitchen island with a cedar tabletop!
Which Pocket Hole Jig Should I Buy?
This is the most common question that I get about this topic. There are several brands available.
I am a big fan of the Kreg line of pocket hole jigs. Mostly because there is something for everyone, but also because they put thought into their product designs.
Kreg Mini Jig
The Kreg Mini* is smaller than the other jigs. This allows the jig to fit in tight spaces where other jigs won’t work.
Because of this, it is considered the “repairing” jig of their line.
The price point makes it an affordable option for those who are just getting started with woodworking.
When in doubt about whether or not a pocket hole jig will benefit you, I always recommend trying this version first.
However, there are some areas where this jig is lacking. For one, the kit does not come with the driver bit. This could be an extra expense if you don’t already have the proper sized bit.
Also, this jig requires a clamp. You can use any type of clamp, but if you choose to go with Kreg’s face clamp,* you would take another small hit to your wallet.
It also doesn’t offer the built-in positioning fence that comes with some of the other versions.
Most of the other pocket hole jigs have adjustable fences and guides that allow you to set the jig for the wood thickness and to set the stop collar for the drilling depth.
With the fenced versions, you can feel confident that you are getting precise hole placement. Other versions also have a guide to help with the stop collar.
With the mini jig, you are in charge of getting the placement just right for both the thickness and the stop collar before drilling the holes.
Depending on how you look at it, this can be a big negative.
It takes time to get the jig set just right for each hole which adds time to your builds. It also leaves room for mistakes which can be costly in the end.
However, some people like the fact that this one doesn’t have a fence. Without it, you can clamp it at any angle or set-back.
This can come in handy when you need a pocket hole in an odd location but isn’t as good for general use or beginning woodworkers.
When is the Mini Jig the Best Option:

If you have a very limited budget or aren’t quite sure if you want to dish out the dough for a more expensive version, the mini-jig may fit your needs.
It is also perfect to have on hand for making repairs in already assembled pieces.
For instance, you can add a pocket hole to tighten a loose joint without having to take apart the piece.
Because of its size, it works great in tighter areas and when the wood width is less than 2” wide. With some of the other jigs, you need a wider resting area to clamp the jigs in place.
I also like it for those one-off projects. Sometimes, you just need a tool but know you will likely never use it again. If this is you, the mini-jig may just be the perfect option.
However, it may not be a good option for someone who does frequent projects or has a lot of holes to drill.
R3

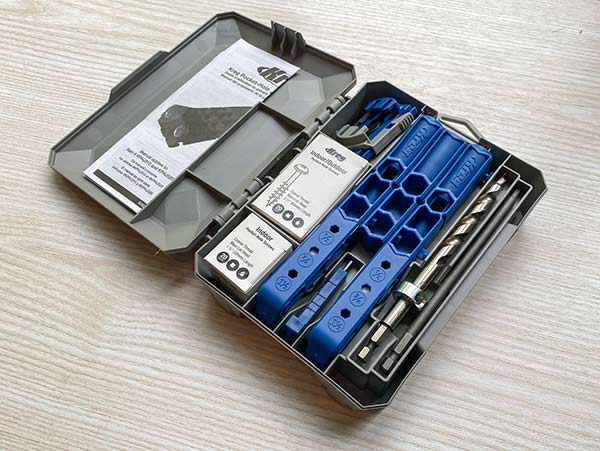
The R3 is a definite upgrade from the mini-jig. It allows for double pocket holes to be drilled with each placement which cuts down on time.
It also comes with a drive bit, a selection of screws to get started with, a clamp pad, and a case.
This is the jig that I like to use when I am working on long planks (like my platform bed).
With the more expensive versions, it is nearly impossible to stand a tall plank vertically in the jig. This version is perfect for this type of situation.

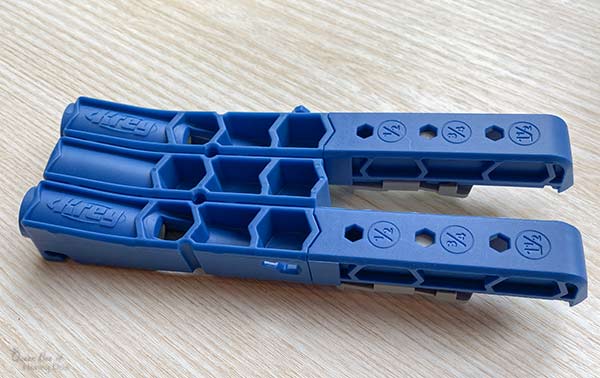
Unlike the mini-jig, the R3 has a fence on the jig. Looking at the bottom of the jig, you will notice the fence has a guide to tell you exactly where to set the fence for each wood thickness.

Inside the case, you will notice that there is a collar stop guide stamped into the drill bit slot. This is to adjust the collar for the right thickness of the wood.
Here I have it set for 1/2″. As you can see, the top edge of the collar is lined up with the mark for 1/2.”
It is also a really good middle ground for an introductory tool.
It’s not nearly as costly as the K4/K5, but is much better for construction than the mini-jig.

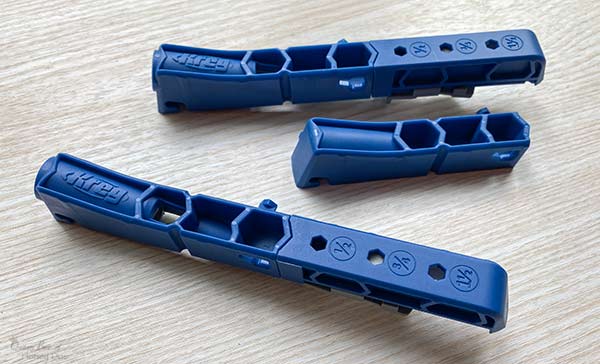
The downsides for this jig are just a few. As with the Mini Kreg, you will still need to provide a clamp* unless you purchase this kit* which comes with the clamp. Above you can see the length of the jig and how the clamping system works.
In most situations, it is not quite as convenient as the K4/K5. However, it is easier when working with large heavy sections that need you to come to wood as opposed to bringing the wood to the jig.
The R3 is Best For
The R3 is best for frequent woodworkers who are not in a position to go with a higher-priced version.
Buy this one to do all of your projects. Even if/when you upgrade, you will find that this one will still come in handy from time to time.
Kreg 320
The 320 jig* came out in 2019 as a sort of in-between option for the mini-jig and the R3.
It offers a dual-hole jig that comes apart to perform similarly to the mini-jig.
The price point is in the middle of the road as well. Some people prefer this jig to the R3 while others are devoted to the slightly more expensive R3.
Initially, there was a bit of speculation about whether the 320 was to be a replacement for the R3.
I can tell you that I received my 320 during a blogger’s conference from the Kreg folks before it went on the market. I inquired about this and they assured me that it wasn’t a replacement.
So what does the 320 jig offer that the others don’t?
For starters, it has a thickness stop to allow the user to get that built-in precision that is lacking with the mini jig.
In addition, it comes with a removable spacer.
With the spacer in place, you get perfect hole spacing for wider width boards that would require the R3 jig to be repositioned for proper spacing.
On smaller width boards, the spacer can be removed to close the gap between holes.
If that isn’t enough, the jig breaks down to just one hole width (similar to the mini-jig) for those really narrow boards.
They also have expansion packs and additional spacers that can be purchased. If you wanted, you could create a jig with infinite holes and spacing.
The 320 kit also comes with some changes to the old clamp adapter design seen on the R3. The old adapter has been replaced with a universal clamp adapter.
With this new adapter, you can adjust it to fit snuggly on any clamp. You can also remove the adapter and clamp it directly to the jig body.
K4/K5 Jigs

The K4 and the K5 jigs* are very similar. They function the same way. The only big difference between the two is that the K5 comes with wings.
These wings are great when working with big sections of plywood such as you would when building cabinet boxes or making shaker cabinet doors.
The difference between these two versions and the previous jigs is that instead of readjusting the jig for each set of holes, with these you move the wood.
These also have built-in vacuum ports and clamps, so the whole process moves along at a much quicker pace.
On the K4 the clamp handle is located at the back. On the K5, the handle is located on the front.
I prefer the front handle as I find it to be a more convenient location.

I love my K5 because of this ease, but also because it works so much better for my smaller stature.
I can set this on the floor and have the leverage to move the plywood around which is much more difficult from the height of a workbench.
Are there any Downsides?
The biggest negative for most people is the expense. While none of these are extremely expensive in terms of what a tool typically costs, a newer woodworker may feel unsure about purchasing the higher-end item within a line.


Please keep it clean. Comments that do not follow the Comment's Policy may be removed.