• Skip to secondary menu
  • Skip to main content
  • Skip to primary sidebar
  • Skip to footer

Queen Bee of Honey Dos

Build - Fix - Do

  • Build It
    • Cabinets
    • Decor
    • Furniture
    • Workshop Talk
  • Renovate & Repair
    • Ceilings & Walls
    • Closets/Shelves
    • Decorating/Design
    • Doors/Windows
    • Electrical/Lighting
    • Exteriors
    • Flooring
    • Paints/Finishes
    • Plumbing
    • Tile
    • Upholstery/Fabrics
    • Weatherproofing
  • Housekeeping
    • Cleaning
    • Storage & Organization
  • Lawn & Garden
  • Seasonal
  • About Me
  • Resources
    • Contact
    • Free Printable Gallery
    • Shop My Amazon
    • Visit my “Start a Blog” site
    • Visit My Crafting/Recipe Site
Home » Build It » DIY Island Build

DIY Island Build

525 shares
  • Share
  • Tweet

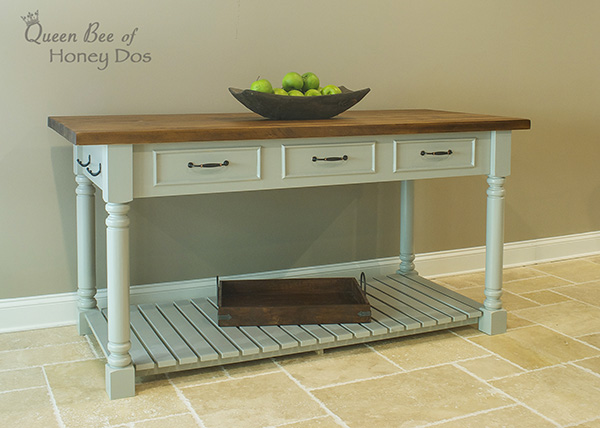
Just recently I decided to build a DIY island to go in my guest house. I really wanted a cedar topped island, but knew that this was not the typical countertop material for an island. But, I decided that I would go ahead with the project and try to demonstrate how to easily throw one of these together using only wood materials that can be found at any big box store. Because this project is so in depth, I have also decided to separate it into two parts. This is part one (the island). I will be placing a link to part two (the table top) at the end of this article.

DIY Island Build - Easy DIY island with step by step instructions.

Materials Used for the DIY Island…

  • 4 legs cut to 34″ high (I used some old stair posts, but even a simple 4×4 post will work)
  • 2 pieces of 1″x7″ cut to  58″ in length (You can just get a 6′ section and leave it, if you prefer)
  • 2 pieces of 1″ x 7″ poplar cut to 24″ in length
  • 2 pieces of 1″ x 7″ wood cut to size for center support
  • 4 corner braces (can be cut from scrap wood or metal braces can be used)
  • 2  pieces of 1″x 2″ poplar cut to 61″ (for bottom rails)
  •  19 pieces of 1″ x 3″ wood cut to  27″ for bottom slats (I just used scrap whiteboard, but just about any wood will work if you are painting, as long as it is straight and blemish free)
  • 2 pieces of 1″ x 3″ wood cut to size (for outer bottom slats – if everything is square these should be right at 24″, but because the post blocks can vary slightly, measure each piece individually)
  • 1 piece of 1″ x 3″ wood cut to size (for rails’ support)
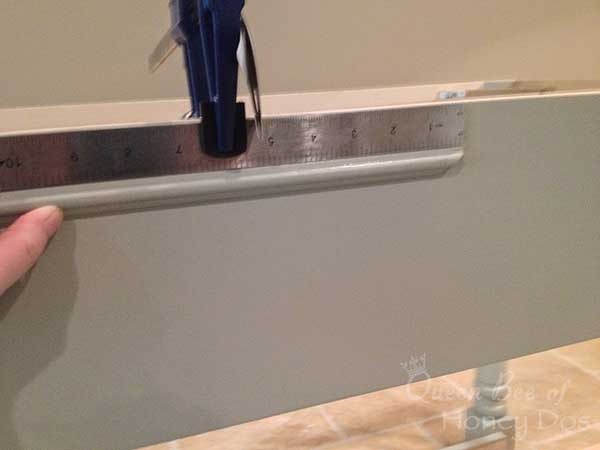
  • decorative trim (optional)
  • pulls and hooks (optional)
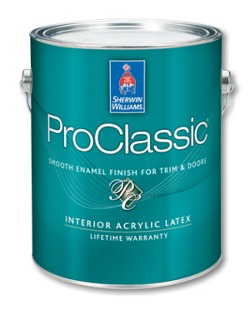
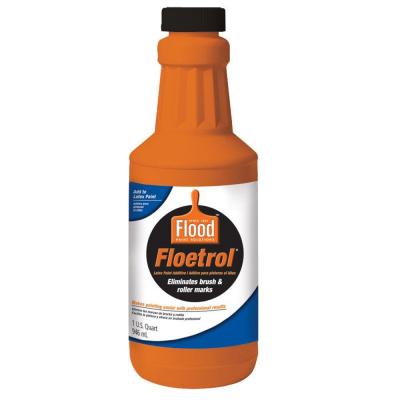
  • primer and paint (more about this below)
  • wood putty

Tools that I Used for the DIY Island…

  • miter saw (If you have everything precut at the hardware store you can probably get by with just a manual miter box or even a circular saw
  • nail gun (you could also get by with a hammer and finishing nails)
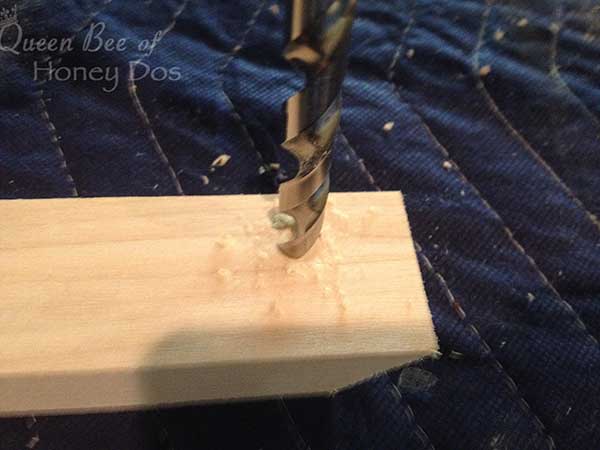
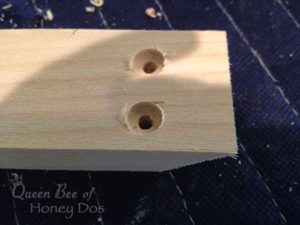
  • Kreg Pocket Hole jig
  • drill/screw driver
  • 3M sanding blocks in medium grit
  • 2″ kreg pocket hole screws
  • 1 1/4″ kreg pocket hole screws
  • square
  • paint brushes
  • tack cloth

DIY Island Build…

DIY Island


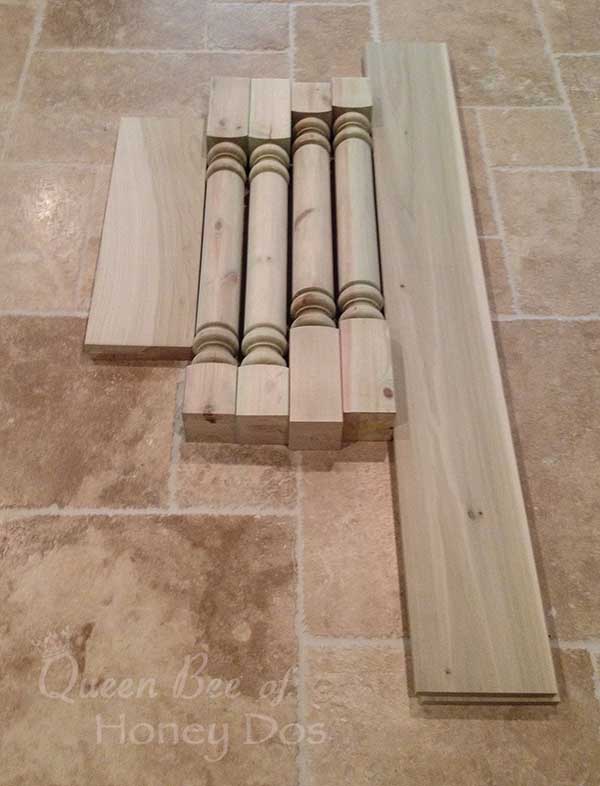
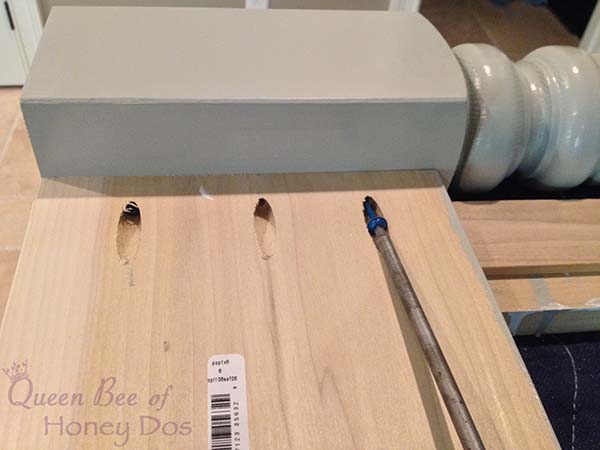
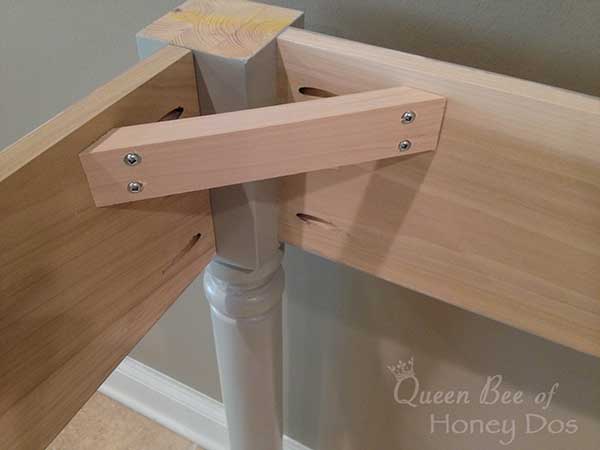
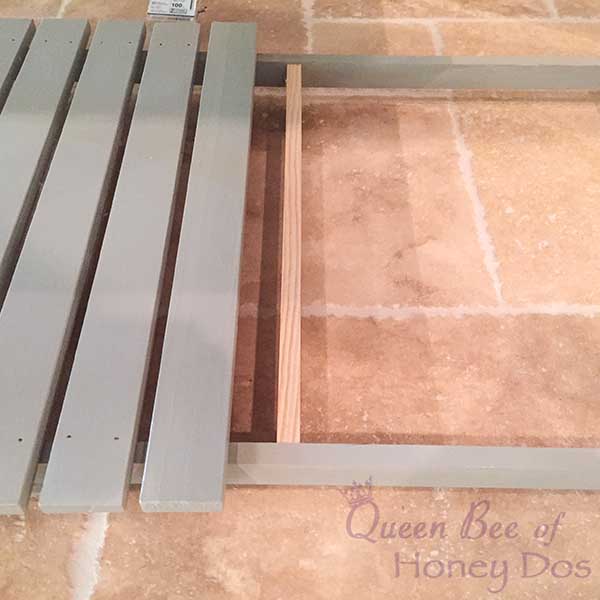
These are my posts and aprons after I had cut everything down to size. As noted above, I used some old stair posts for my legs. I simply removed enough from the longer blocked end to allow my apron to comfortably attach.  I then removed the amount needed from the shorter block to get the post down to 34″. (Note – if you are using a post that has a top block portion that is less than  7″, you will need to use a different width for the apron. The apron must be able to fit completely on the flat surface). If you want to get posts that are like mine and can’t find any – try these legs from Osborn’s. The poplar wood that I used came from Lowe’s (Home Depot also carries these). I made sure that each piece was in perfect condition – straight with no bowing or defects. These are in the top choice (furniture) wood section. pocket holes After I cut everything to size, I then drilled all of the pocket holes in the ends of the apron boards. 3-4 pocket holes per end will be enough.  


knots The next step was to putty over any knots or blemishes in the wood. Mostly, I just had to putty the posts, because they were a knotty pine. Then, I sanded down the surfaces of the wood with the sanding blocks. They didn’t require enough sanding to justify pulling out the orbital sander. I just made sure that everything was reasonably smooth and free of splinters, rough areas, etc. (image shows a knot that has been puttied)  

primer
 

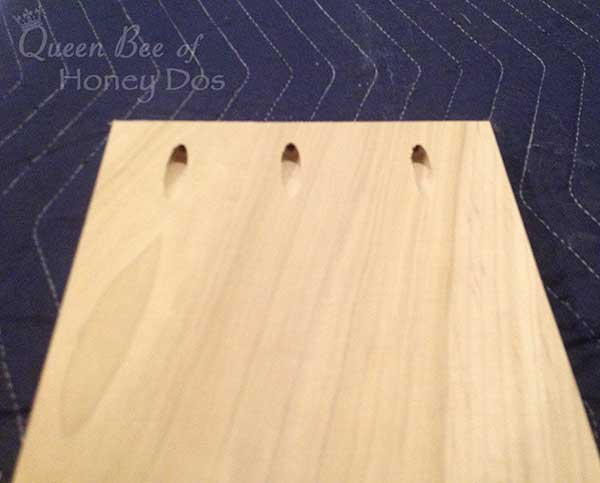
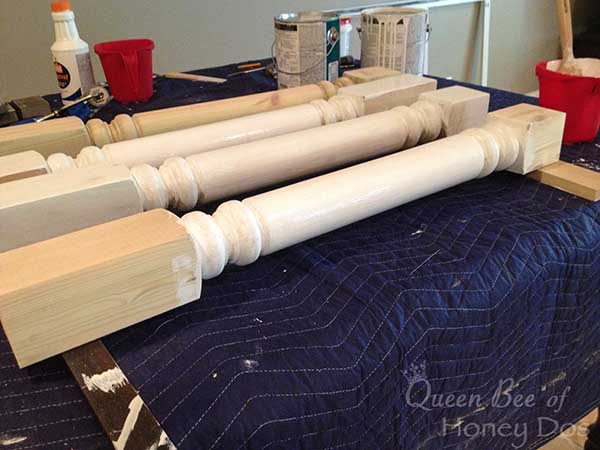
Next I primed and painted the wood. Yes, that’s right. I painted before assembling. To get a good finish on the posts, I set the block ends on scrap wood. This allowed me to rotate the posts as I painted the curved centers. paint legs


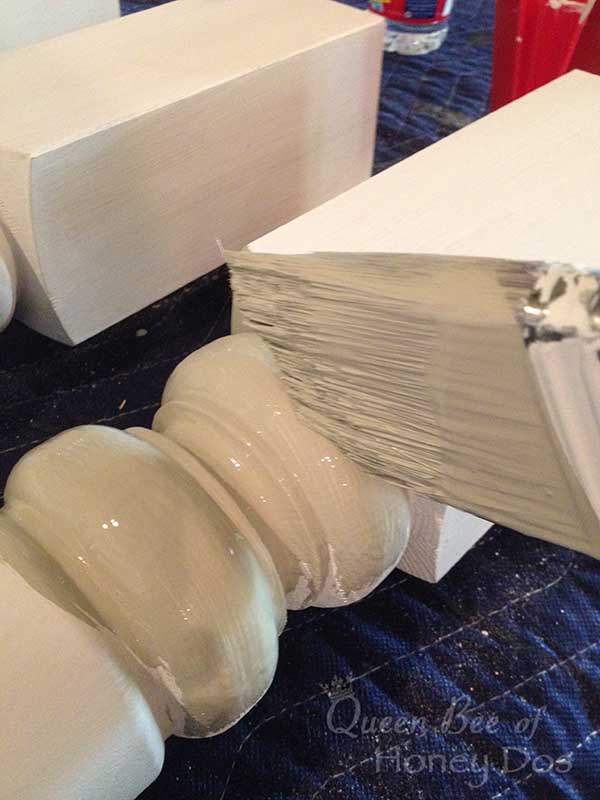
Here, you can see how I painted around the rounded areas of the post. I did not try to go up and down the length at all. I just rolled the post and kept steady pressure with the brush.

 
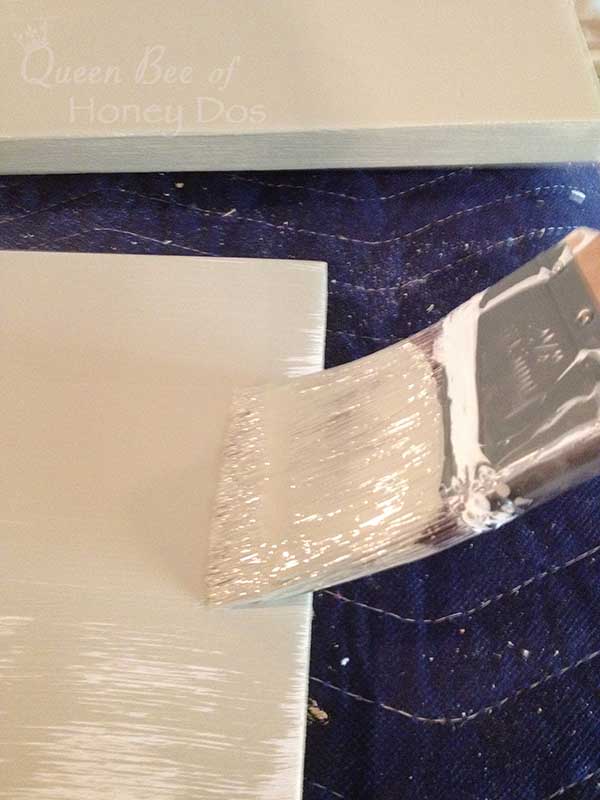
A note on How I Paint…

paint_template-1One thing to note: everyone always asked how I get a nice finish when hand painting cabinets or furniture. Well, these are the products that I use. For the paint, I prefer Sherwin William’s ProClassic Acrylic Latex. This is just my preference. If you have a different paint that you are comfortable with, go with that. But, I find that this paint has a nice creamy texture that flows well. floetrolI also use Floetrol. It is a paint additive that helps to blend away brush strokes and lengthen the drying time. I make a mixture of around 60% paint and 40% Floetrol, but I don’t bother with precise measurements. I just eyeball it each time. A few other tips. 1) Use good brushes. I like Purdy, but as long as it is a good quality any brand  will work. 2) Don’t go over previously painted areas. I always cover the area, then tip off with a loaded brush. If you try to reapply paint to an area that has already begun to set, it will show brush marks every time. Wait until it is completely dry and then get the missed areas on the next round. paint tipping 3) Don’t start painting at the ends of wood. This will cause the paint to puddle over the edges. Instead start a few inches in and then brush back to the edge.    

Moving On…


DIY Island Okay, now that I have painted and allowed it to thoroughly dry, I  will move on to assembly. I started by attaching the aprons to the posts. To do that, I used a scrap piece of wood as a spacer to keep the apron at the center of the post block. I wanted to have the apron recess about half of the depth of the block. So, using a spacer like this kept each apron and post connection exactly the same.

DIY Island
 

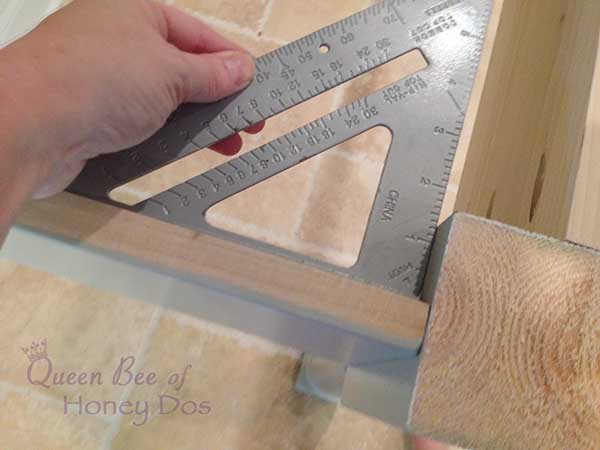
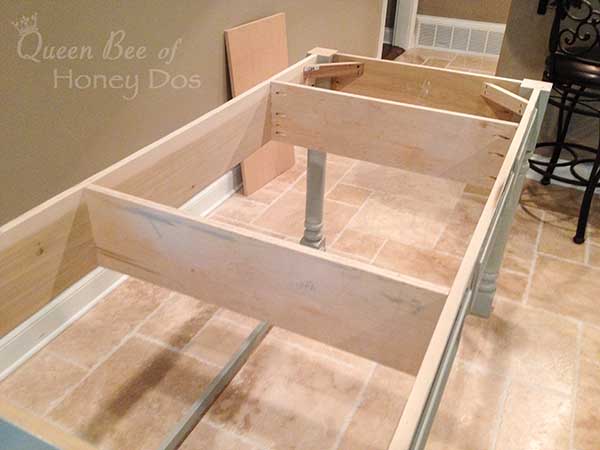
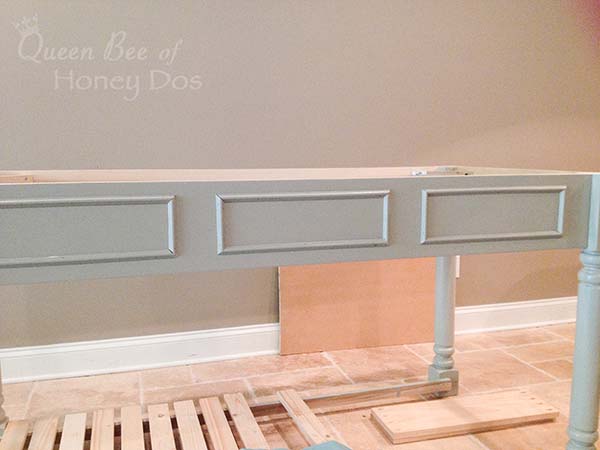
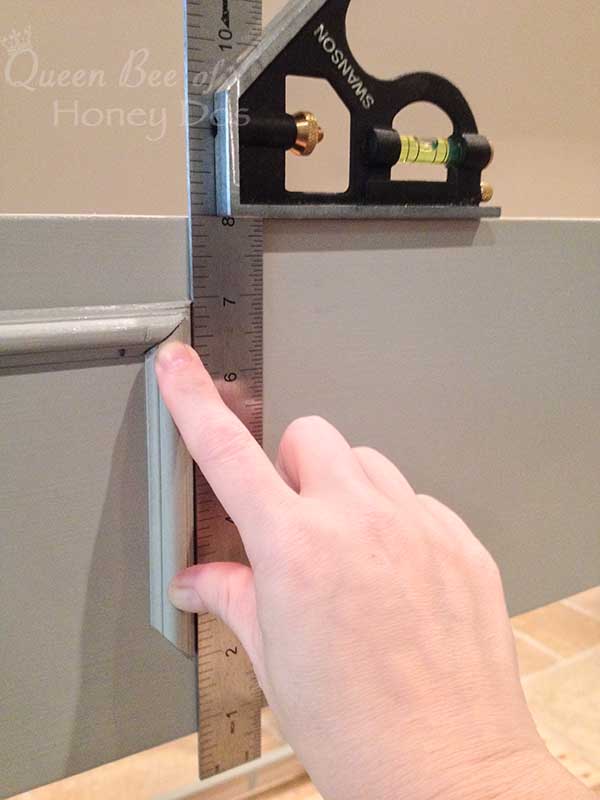
Repeat for each end, and then the front and back apron sections. I used a square to check each section. (It is very important to make sure that the frame is completely square before preceding). DIY Island This is what the apron looks like from the interior. (Nope, I didn’t paint the unexposed side). bracesNext, I cut the corner braces from some scrap wood that I had lying around. All you need is a solid piece of wood that is at least 1″ x 2″ and long enough to clear the post corner. Cut them to have  a 45 degree angle at each end.


recessed holesTo attach these, I used my Kreg drill bit to make a recessed hole for the screws. (Be careful if doing this because the Kreg drill bit will really grab and go deep before you even know what has happened. Try practicing on a scrap piece of wood to get a feel for when to stop). i just did this because I already had this bit handy, and just didn’t want to go to the garage to get the correct bit. Plus, I was planning to use the kreg screws anyway.


recessed holes2I placed my recessed hole right at the starting edge of the 45 degree cuts.


DIY Island I used the 1 1/4″ pocket hole screws to attach these, but any wood screw will work as long as it is this size. Because the hole in the braces was placed right at the angle, the screws went in at the perfect angle as well. DIY Island After getting the corner braces in place, I moved on to the center supports. (Actually, I did a bit of decorative trim work first, but I recommend installing the support at this point). I used pine board for this because they are cheaper than poplar and won’t show anyway. To install these, I measured from the interior back apron to the interior front apron. On mine, the measurement was 28″, but this will vary depending on how far in the apron is recessed, and how wide the posts are in relation to the placement. So, just measure and cut for  your particular size requirements. Then, drill the pocket holes the same way as you did for the aprons. Then, place the supports so that they are evenly spaced inside the frame. You’ll also notice that I have already attached the rails on the bottom blocks. DIY Island For the bottom shelf assembly, I used my nail gun. The rails are attached to the inside of the posts. I placed them so that they do not extend all the way to the edge of the post block, but instead only come to the center of each block. (Sorry, I accidentally deleted the image for that). Between the center of the rails (exactly in the middle of the bottom shelf area) I added a support. It is a 1’x3″ scrap piece that I nailed in place between the rails. This is the piece of wood in the above image that is unpainted. It actually rests on the floor as if it were one long table foot. But, if you don’t want to have the wood resting on your floor, you can put some of those furniture glides on the bottom of the support before attaching it to the rails. (I recommend the glides that have the tacks on one side, so that you can hammer them in place). After the rails were in place, I nailed in the slats. I placed the slats 1/2″ apart and used a piece of 1/2″ piece of wood to keep them spaced accurately while I nailed them in place. DIY Island Finally, I added the decorative trim. (Actually, this is the step that I skipped ahead to when I should have been adding the support. So, that is why this image shows the unfinished slats in their preliminary space. Notice the supports are also laying on the floor. (Oh, and I just noticed that you can see how the rails are attached to the posts in this image. Yay!)

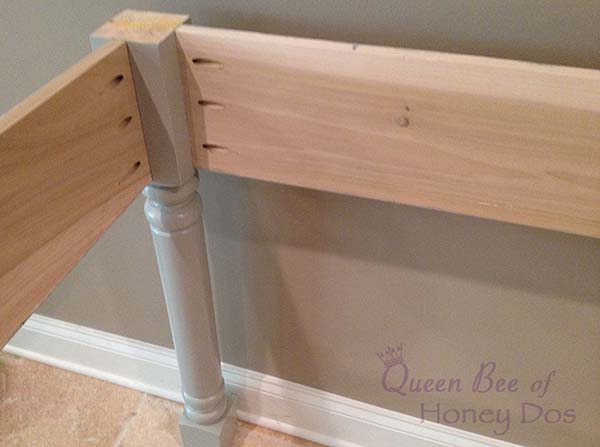
ANyway, Back to the DIY Island…

DIY IslandFor the trim, I used some decorative strips that I picked up at Home Depot. I wanted to create the look of drawers, but I just don’t actually need them for this piece. So I just miter cut some shadow boxes. I used one of my rulers from a square as a spacer. it is exactly 1″ wide and that is how far I wanted to be from the top edge. (if you want real drawers, you will need to make those adjustments to the instructions)


DIY IslandFor the side pieces, I replaced the ruler into the square and used it to line everything up. If you are interested in this trim, these are generally located in the top choice (furniture grade) section. In every Home Depot that I have been in, they are in small compartments on the middle shelf. They are vey lightweight and come in 2′ sections. You can easily cut these with a hand saw, if needed.   DIY Island Finally, I puttied all the little holes and did some touch up paint. The last thing that I did was to add the hardware. I thought it was a nice final touch and added a lot of style to the piece. For those of you that are curious about the color – I used a color called Aged Stucco in a Gloss finish. It is a green gray tone by Glidden that, while not exactly minty, it leans a little in that direction. You can get the sample at HomeDepot. If using Sherwin William’s Pro Classic, they can color match anything that you bring to them. I holt that you all enjoyed this DIY Island tutorial. Happy building! Go To Part 2 – The Cedar Table Top. DIY IslandDIY Island Rachel Lynn

– PIN IT –

DIY Island Build - Easy DIY island with step by step instructions.

– PIN IT –


Linked up with Remodelaholic

525 shares
  • Share
  • Tweet

June 16, 2016, by Rachel Lynn Leave a Comment

Stay in the Loop!

Don’t miss a thing! Subscribe to my newsletter to get the inside scoop! As a free gift, you’ll receive access to my Printable’s Gallery!


About Rachel Lynn

Rachel is a home improvement expert with more than 20 years of experience in renovations, carpentry, and interior design and has more than 10 years experience in graphic and web design. She used the combination of her experience and knowledge to start her own digital media publishing company where she shares her knowledge across three different websites.

You may also like the following posts:

plate rack with plates.
18 DIYs for a Designer Kitchen
microwave
Microwave Location Options

Kreg Pocket Hole Jig
navy island in white kitchen
Navy Cabinets – Popular Cabinet Color Trend

Reader Interactions

Please keep it clean. Comments that do not follow the Comment's Policy may be removed.

Leave a Reply Cancel reply

Your email address will not be published. Required fields are marked *

Primary Sidebar

author's imageHi & welcome to my blog. I’m Rachel – Southern gal, DIY addict & Organizing fanatic; Woodworking enthusiast, Mom of two, Wife of one. (Read more about me!)

  • Bloglovin
  • Facebook
  • Instagram
  • Pinterest
  • Twitter
  • YouTube

Footer Widget Header

AS SEEN ON:

media features

Footer

Permission

Terms of Use

Privacy Policy

Copyright © 2015–2023 · Queen Bee Of Honey Dos · Built on the Genesis Framework


Queen Bee of Honey Dos® is a participant in the Amazon Services LLC Associates Program, an affiliate advertising program designed to provide a means for us to earn fees by linking to Amazon.com and other affiliated sites.