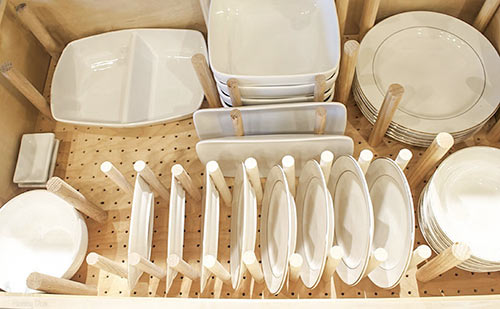
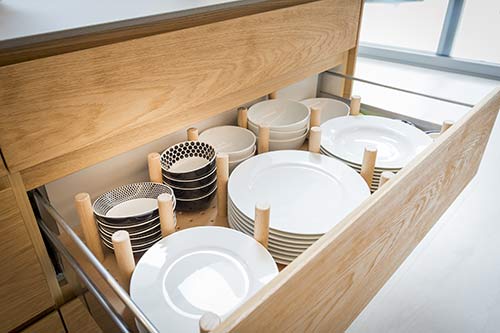
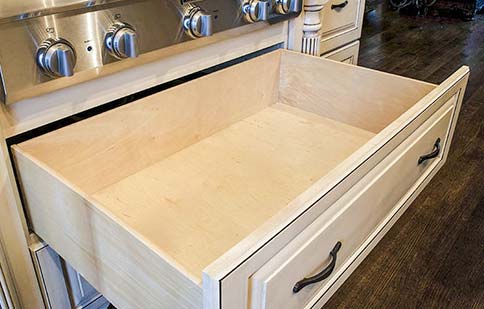
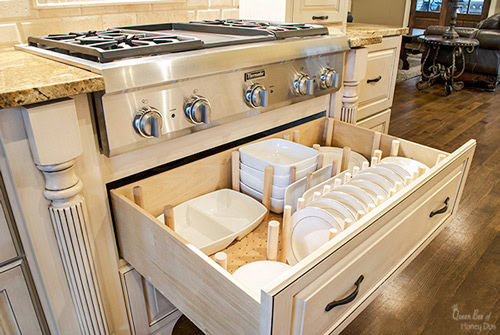
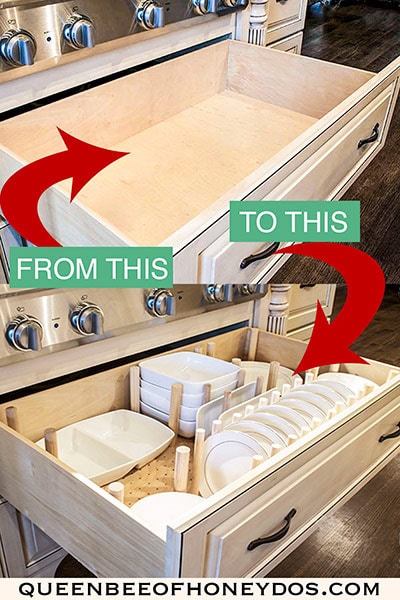
Efforts to get my kitchen completely organized are starting to pay off. I just love to open these plate drawers and see everything looking so beautifully organized. I have finally created a low-budget but high-quality peg drawer system. Today, I am providing the details for making a custom dish drawer organizer.
(This post may contain affiliate links (*). That means that I make a small commission from sales that result through these links, at no additional cost to you. You can read my full disclosure here.)
I have been on this perpetual adventure to create kitchen drawer storage.
After finishing with my utensil drawer organizer, I moved on to building a custom knife and cutting board insert.
Just recently, I decided to move on to organizing the plate drawer. Yet, another project that would have cost several hundred dollars to have customized by the manufacturers. However, I have saved 75% by doing this myself.
I really love the efficiency that comes with having custom drawer organizers and cabinet pull-outs. But, I just don’t like paying for these customizations when they are so easy to do.
(UPDATE – This post has been updated. The original publish date was in 2015. I am happy to announce that my kitchen drawer insert is still working perfectly!)
One of the most popular trends for a dish organizer is a peg drawer organizer. I am sure you have seen them around.
If you have had the opportunity to catch one in a kitchen showroom, you know that they are quite impressive.
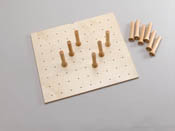
Before getting started building my own plate drawer organizer, I priced out one of those do-it-yourself pegboard kits. Like this one from Rev-a-Shelf *(above).
For my drawer, I could buy an insert with 16 pegs for around $70. I would still need to buy several more pegs to get the layout that I wanted.
To get these to fit properly, you still have to measure and cut the insert to the size of your drawer.
So, why spend that much money on a drawer peg system if I have to start cutting and adjusting anyway? I figured I might as well do the entire thing myself, get a better quality dish organizer, and save some money while doing so.
Now, you may be asking, “Why not just buy a cheap pegboard and replicate one of the kitchen drawer organizers available to purchase?” Good question. They already have the holes and they are much cheaper than buying a kit.
But, if you are familiar with them, then you know how easy it is for pegboard holes to become distorted and/or torn. You want your dish drawer organizer to be permanent and sturdy.
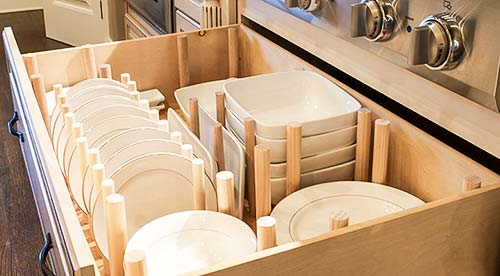
If you look closely at a custom drawer from a high-end manufacturer, like the one above, you will notice that dish drawer inserts are made from cabinet grade plywood. They are at least 1/2″ thick, and they are significantly more stable than a pegboard.
Pegboards, on the other hand, are made from perforated hardboard that is 1/4″ thick. If you look closely, you will notice that they almost look like compressed paper.
Though they are good for many things, I certainly didn’t want to have results that I have seen happen with tool storage. It just doesn’t take much wear and tear to damage these holes.
But, at least in my workshop, I can just move a tool to a different hole. With dishes, you may not be able to move the peg dividers to a new hole and still maintain their layout.
Those holes need to stand the test of time. This is why I chose to avoid pegboards and build the dish drawer organizer myself.
Good news, though! It is super easy to make these!
Materials Needed to Build a Dish Drawer Organizer
- 1/2″ cabinet-grade plywood cut to drawer dimensions. (birch is acceptable and easy to find)
- 7/8″ dowel rods cut to 6″-7″ lengths
- 5/8″ dowel rods cut to 6″-7″ lengths (for plates)
- pegboard section to be used as a template (optional)
- size 8-32 x 1 hanger bolts*
- size 8-32 x 1/4 T-nuts*
- drill
- sandpaper (or sander)
- clamps
- Polycrylic sealer
How To Build a Dish drawer Organizer
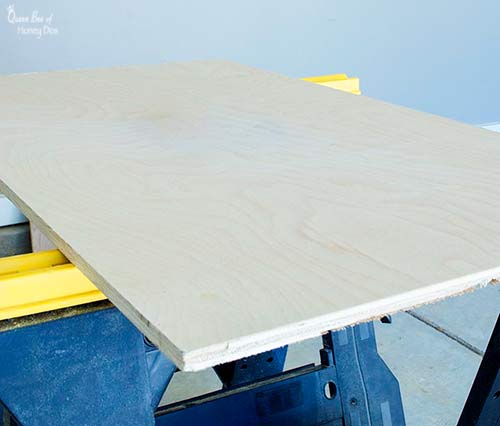
Step 1 – Begin by placing the plywood face up on your work table or space. Because drills tend to splinter as they exit, having the bad side facing down with keep the good side looking nice.
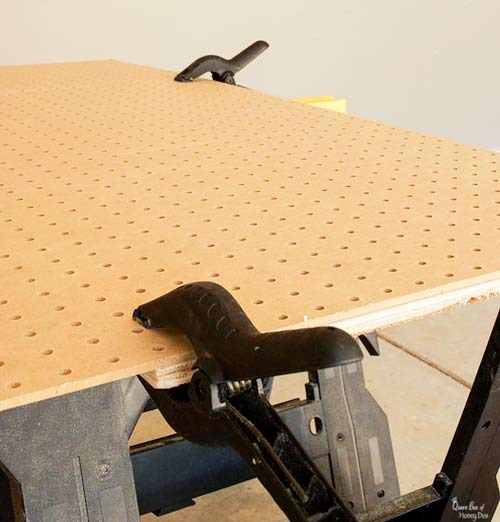
Step 2 – Attach the pegboard template to the plywood panel using the clamps. Make sure that it is held in place tightly. You don’t want it slipping when you begin to drill.
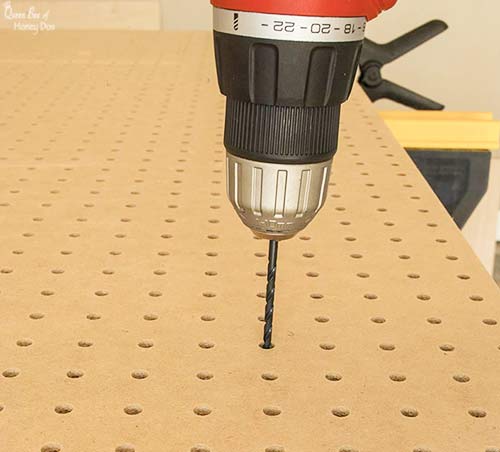
Step 3 – Using a 3/16 size drill bit, begin to drill holes through each peg hole. This is probably the most tedious part of the project. It may seem like it is taking a long time, but that is just because it is repetitious.
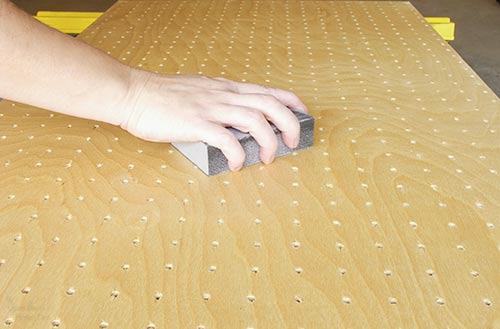
Step 4 – Once you have finished drilling all of the holes, remove the pegboard and flip the plywood panel over.
If you have rough edges around the holes on the bottom, you will need the sander/sandpaper. If you have an orbital sander, this will take just a few seconds. Just knock all of the rough edges off to make the bottom smooth.
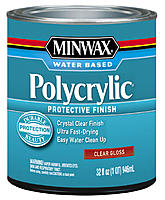
Step 5 – Apply a light coat of Polyacrylic to the top side of the panel board. Allow it dry thoroughly. Then, lightly sand the finish to remove any rough areas. Wipe down the panel to remove any stray dust. Repeat two more times omitting the sanding on the final coating.
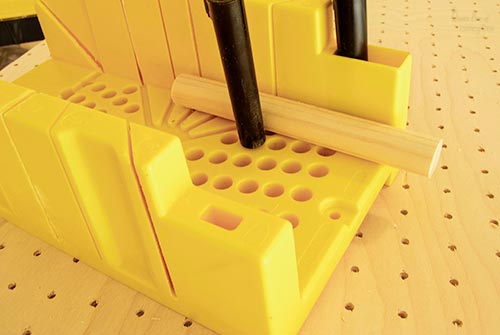
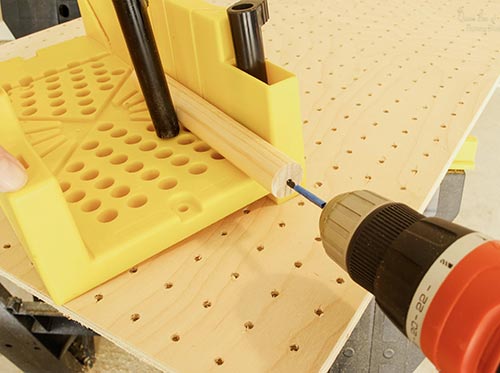
Step 6 – To prepare the dowels, secure them in a vice clamp. If you do not have a vice clamp, you can use a miter box to secure them. Just clamp the miter box to your table and lock the dowels down.
It is very important to have these secure before attempting to drill into the ends. This is just one method that you can use as an alternative to a vice clamp. Regardless of what method you use, make sure they are secure before drilling.
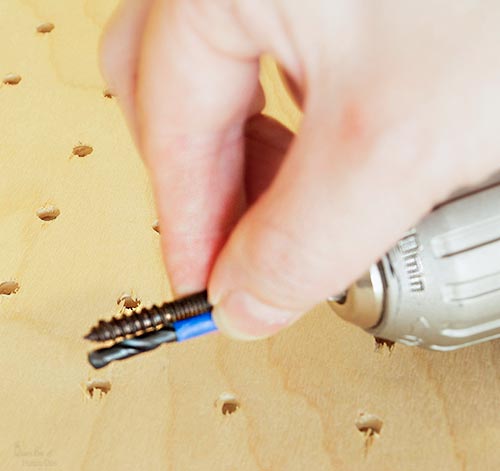
Step – 7 Attaching a piece of tape to the bit can help as a guide for the proper depth. Attach the tape so that the bit and the wood screw end of the hanging bolt are the same depth.
Step – 8 Next, drill a hole into the center of one end on the dowels, using a 9/64 drill bit. Then, screw the hanging bolt into the hole. Wood screw threads should go into the dowel with the machine threads protruding.
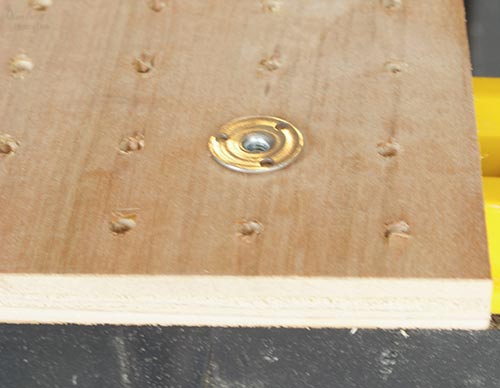
Step 9 – You will be inserting the T-nuts in the bottom side of the custom pegboard organizer so that you can screw the dowels in place later. You will want to decide on a layout before inserting the T-Nuts.
The best way to do this is to turn the panel over so that the back is facing up. Place your plates and dishes where you want it, and insert the T-Nuts accordingly. Tap the T-nuts in place with a hammer.
NOTE – Remember that when choosing your layout, you are looking at the backside. Everything will be flipped. So, set your layout in reverse. Once you flip the panel back to the front side, everything should be in the location that you want.
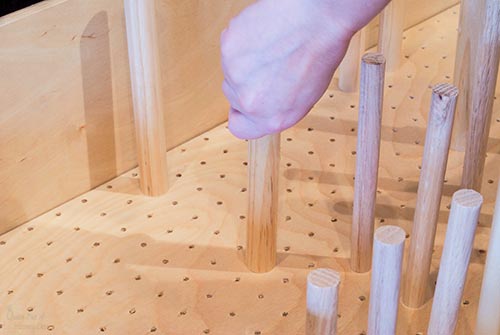
Step 10 – Insert the panel in the drawer face up and screw the dowels into the holes where you placed the T-Nuts. Then, add your dishes!
Peg Divider Alternate Instructions
Because I know that some of you are just now saying, “But won’t this be difficult to change the dishes around?” Well, it won’t be as easy as the kits that allow you to just unscrew the dowels and screw into a different hole.
I did it this way because I wanted the steel of the T-nuts to be supportive of any pressure made on the dowels. This helps protect the wood from pressure and ensures that the plate organizer will last a good long time.
I am okay with removing the drawer plate organizer and adding more T-nuts if/when I want to make adjustments to my layout. I don’t usually move things once they are organized anyway, but just in case, I have a few extra dowels and T-nuts on hand.
But, if you prefer a bit more ease over structure, I would recommend this. Instead of using hanging bolts, use dowel pins (AKA double-sided screws). This will eliminate the need for the T-nuts, and it will allow you to move the dowels around easily.
However, keep in mind that unscrewing and re screwing the dowels with this method can eventually wear out the holes, even in a plywood panel.
Also, if you plan to use this method, you will need to use the 9/64 drill bit for both the holes in the panel and the holes in the dowels.
Final Comments
My dish drawer organizer ended up costing less than buying. But the biggest benefit comes from knowing that it is a quality piece.
Good luck, and I hope that you enjoy your organizer. Be sure to check out my post on dowel rod projects to get more great ideas!


Justjayma says
Did you need to reinforce the drawer to take the weight of the dishes? It turned out lovely!
Rachel says
Thanks. Glad you like it!
No, I did not need to reinforce my drawers in any way. But I suppose the plywood could be seen as a type of reinforcement. It doesn’t bend the way a pegboard would, and it distributes the weight across the the surface.
Bobby says
Thank you so much for posting this.
Rachel Lynn says
Your welcome!
Stew says
How did you attach it to the drawer? Or is it just sat in there?
Rachel Lynn says
It is not attached to the drawer.
Lenora Everett says
Thank you for the article! What do you think is the best drawer width for storing dishes? I will have 42″ available. For ability to store the most dishes easily, would you recommend one 36″ drawer with a little something extra, 30″ + 12″, or 21″ + 21″? (I want to do what makes the most sense for everyday dishes. I can store extras in the china cabinet.)
Rachel Lynn says
Lenora, mine are 36″. I would say, go with at least 30″ if you want to store a standard set. But you can organize just about any decent size drawer to work with a set.
Plamen says
Thanks for this. At what distance each hole is drilled? Have some standart or?
Rachel Lynn says
You can use the peg board as your template. If you want the most versatility, you should drill at every hole, or you can skip and just do every other.
Jen says
How deep do you recommend the drawers be? This is so clever! Definitely going to try it in my new kithchen!
Rachel Lynn says
Any two drawer setup for a cooktop or range top will work for a standard dish set. Likewise, the deep drawers from any basic 3 drawer cabinet should be deep enough as well. There really is no requirement as long as the drawer is deep enough to hold your thickest dish.
Joan Jenkins says
Do you have tips for drilling the plywood? When I did so – it really messed up the birch veneer. Any tips?
Rachel Lynn says
Place the birch on top of a scrap piece of wood with the good side (top) facing down against the scrap. Drill through the wood from the side that will not show down into the visible side and into the scrap. The scrap will help prevent tear out.
Joan says
Thank you!
Joan
Robin Thomas-Johnson says
Why not drill a hole larger enough for dowel to fit in tight?
Rachel Lynn says
You could certainly do it that way if you want. However, that would require a much thicker plywood base to provide the needed support/depth. The addition of thicker plywood would also add unnecessary weight to the drawer. You would also have to place the holes further apart to allow enough material to be left for side-to-side support. Keep in mind, the holes will eventually wallow out and become loose. This will not happen with the machine screws.
Robin Thomas-Johnson says
Thank you. Following your instructions.
Robin Thomas-Johnson says
Purchased 3/4 plywood before finding and reading your instructions. Thought to use for bottom drawer but get 1/2 inch for the above that. Don’t want to waste too much wood already purchased.
Tammy says
Absolutely love this & planning on replicating. How far apart are each hole please? I don’t have a pegboard to use as a template & feels a waste to buy one. I was hopi g to mock up a template using a bit of scrap wood.
Thanks so much!
Tammy