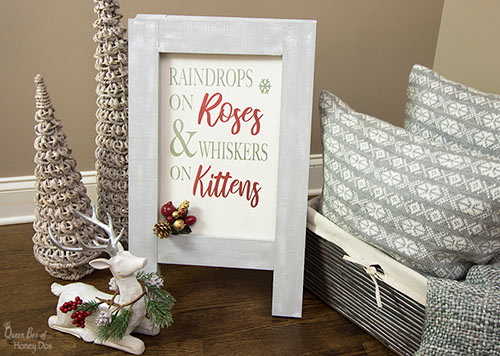
This year I am joining up with Remodelaholic and 21 other bloggers for the Remodelaholic Creative Christmas Challenge! And as my contribution to the challenge, I have created a reversible interchangeable DIY easel.
To challenge myself, I wanted to make something that a lot of people want, but add a spin to it – hence the reversible/interchangeable part. However, I didn’t stop there, I decided to also make this with no power tools. Yes, you heard me right! Absolutely no power tools.
The Creative Christmas Challenge!

and My DIY Easel…
So far this year, I have built two different types of wooden stars – a 2D star and one that I think of as a farmhouse star. I also have flocked my tree and videoed a tour of my home with all the decor in place. But with this piece, I wanted to try a project that didn’t require the use of my power tools.
The reason why I wanted to make it without power tools, is so that as many people as possible can join in. You don’t have to be a woodworker to recreate this decor piece. Don’t believe me? Well, keep reading!
And when you finish reading through this project, make sure to check out the entire playlist at the end of this post. There are some amazing DIYs in this year’s Creative Christmas Challenge!
Easel – Materials:
- 1/2″ x 3″ craft board (I bought these from Lowe’s in 24″ sections. They are furniture grade wood. They also have them in Pine, Poplar, or Oak. (actual dimensions are 1/2″ x 2 1/2″) I recommend sticking with the craft board or the pine unless you have access to a power drill.
- 1/2″ x 2″ (actual dimensions are 1/2″ x 1 1/2″)
- 1/4″ plywood (or any flat material that you choose for your artwork)
- foam poster board (I recommend choosing a color that matches your easel finish)
- wood glue
- masking tape
- hinges
- eyelet hooks
- decorative chain
- Flush wing clips (AKA – turn buttons) Tip – Buy galvanized if you plan to use your easel outside.
- sandpaper or sanding block
- Optional (If you have some clamps, you can use those in place of the masking tape)
DIY Easel – Cuts:
Now for the cuts. I know, I know! I said no power tools! But, I didn’t say we wouldn’t be using any tools at all. Obviously, we will need some sort of tools to build this. Luckily, you can get the hardware store to cut your plywood for you.
The rest of the cuts are straight cuts. You can do them with a manual hand saw. If this is your first woodworking project, I recommend that you purchase a miter saw box.
I would normally provide you with a link to get one at Amazon. However, I am not happy with the choices, and you can pick one up for around $10 at your local hardware store.
Grab one when you buy your wood! I used mine for this project. So, I am not just pulling your leg about this being a power tool-free project.
- 4 @ 24″
- 4 @ 4″
- 4 @ 15″
- 4 @ 10″
From your 1/2″ x 2″ boards: - 2 @ 20″
- 2 @ 12″
From your plywood and poster board: - 12″ x 17″
From your 1/2″ x 3″ boards:

DIY Easel – Assembly:
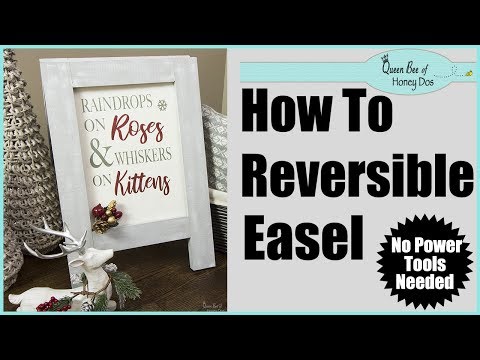
To assemble the easel, we are going to be working on it in two sections – the front and the back. To make things easier to understand, I recommend watching the video above.
Then, read the written instruction below to get further clarification. Also, don’t forget to check out the entire Creative Christmas Challenge Playlist at the end of this post.
Plus, I have even more great Christmas decor projects available! Subscribe to my Youtube channel and you won’t miss a thing!
Back Section:

- Take one of your 3″ X 24″ boards and attach one of the 3″ x 4″ pieces to the bottom. Make sure that it aligned on all sides. Glue it in place and use masking tape to hold it until it dries. (Tip – spread the wood glue evenly, but don’t apply too much, or you will need to wipe away the excess). Repeat for the other 24″ boards. (This is all four legs. Set two aside for now, and keep two for the back of the easel).
- Now on two of those legs, make a line that is exactly 2 1/2 ” from the 4″ piece that you just attached, and a second line that is exactly 2 1/2″ from the top of the leg. Repeat for the other leg.
- Glue the 3″x15″ pieces between the guide marks and tape them in place. You should now have two back sections that look like the image above.
- Next, take another 3″x15″ section and attach it to a 3″ x 10″ section. Make sure that you align the centers up precisely. You should have 2 1/2″ of the 15″ piece overhanging on each end. Repeat for the last 3″ x 15″ board. Allow everything to dry completely.
- After these have dried, we will glue them together like a puzzle piece. The short boards create the rails (top and bottom) of the easel. (joining instructions listed below)
Front Section:
Now, we are going to assemble the front in a similar manner.

- On the two remaining legs left from the 1st step above, attach the 2″ x 20″ sections along the outer edge of the legs. Again, make sure that it is flush with the tops and outer edge.
- Now, take a 3″ x 10″ section and attach a 2″ x 12″ section to the outer edge. It should be perfectly centered and should have an overhang of 1″ on each end.
- Allow all these pieces to dry.
Joining Sections:

Once all the pieces from the back and front sections have dried, you can begin the final assembly. Start by gluing together the back, sides, and rails at the half-laps that were created in the above steps. Tape everything together nice and tight, and allow it to fully dry.
Next, join the front sections together in a similar manner. Once dry, you can attach the turn buttons and hinges.
NOTE – If your hinges come with those tiny screws, throw them away unless you have a drill so that you can pre-drill a hole. They are nearly impossible to work with, and a 1/2″ wood screw will be easier to manually screw in place.
Finishing…
After everything has dried overnight, you can paint the easel and insert the plywood panel. On my panel, I painted word art for Thanksgiving on one side and Christmas on the other.
The images that you see on my easel are available in the Printables’ Gallery! (access exclusively for subscribers). But, you can sign up and gain access by clicking the button below.


Creative Christmas Challenge!
As mentioned at the beginning of this post, my project was part of the Remodelaholic Christmas Challenge. 22 bloggers came together to present a collection of Christmas DIYs to celebrate the holidays.
Check out the links below. We have some amazing projects that you can recreate for your own Christmas decor.
- Nutcracker Christmas Tree Decorating | Remodelaholic
- Copper Christmas Ornaments | From House to Home
- DIY Rustic Carved Wood Ornaments | Ugly Duckling House
- Snowman Globe Ornaments | Kailyn Williamson
- Dollar Store Snow Globe Ornaments | Our Crafty Mom
- Wood Disc Ornaments | Everyday Party Magazine
- Button Christmas Ornaments | Girl Just DIY
- Handlettered Ornaments 3 Ways | Lemon Thistle
- Wood Slice Snowman Ornament | Creative Ramblings
- Mini Wreath Ornaments | Love Create Celebrate
- Buffalo Plaid Ornaments | Leap of Faith Crafting
- Easy DIY Geometric Ornaments | Practical and Pretty
- 7 Cheap and Easy Christmas Ornaments | Toolbox Divas
- Macrame Ornaments | Frazzled JOY
- Grapevine Christmas Wreaths | Grace in My Space
- DIY Apple Candle Village | Life on Summerhill
- Festive DIY Christmas Card Holder | Red Cottage Chronicles
- Lettered Tree Sign | Smiling Colors
- Modern Christmas Wreath | Sister’s What!
- Pretty Decorative Clothespins | Sustain My Craft Habit
- DIY Wooden Triangle Christmas Tree | Adventures of a DIY Mom


Wanda | From House To Home says
What a great idea, Rachel! I love that it can be customized for any decor style…and it’s a bonus that you don’t need to break out the power tools to make it :)
Rachel Lynn says
Thanks Wanda, Just trying to make it doable for as many people as possible! :-)
Sarah says
What a great tutorial, thanks for showing how to do it without power tools. Your finished holiday sign is so pretty.
Rachel Lynn says
Thanks, Sarah! I enjoyed your Christmas project, as well!
Sarah says
I just love how you thought outside the box and made this double sided!
Rachel Lynn says
Thank you, Sarah!
Lorene @Remodelaholic says
This is such a great idea, Rachel, and I love that it’s all straight cuts, nothing fancy! Thanks for joining Creative Christmas!
Rachel Lynn says
Thanks, Loren. It was a blast!
Josef says
What an great idea. Just loved it.