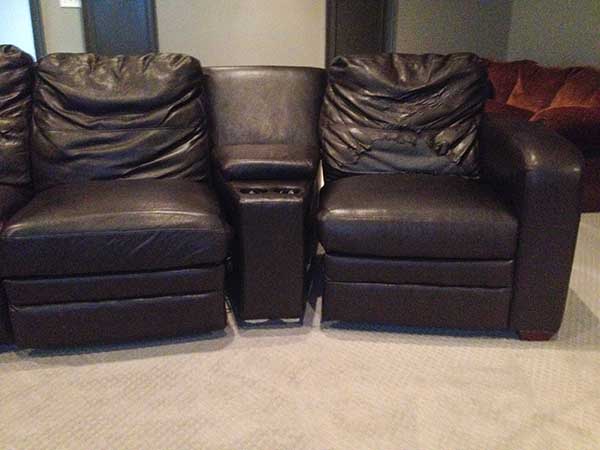
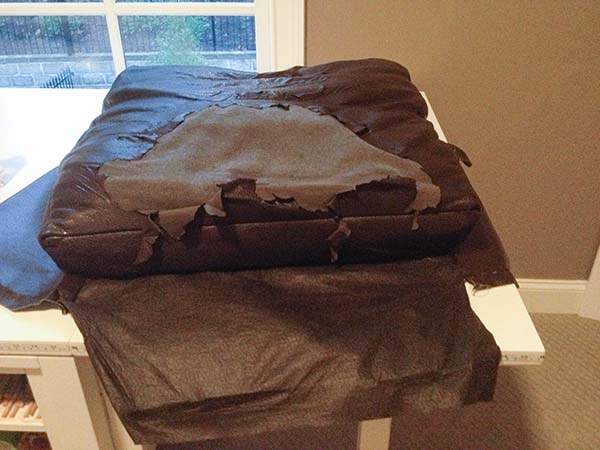
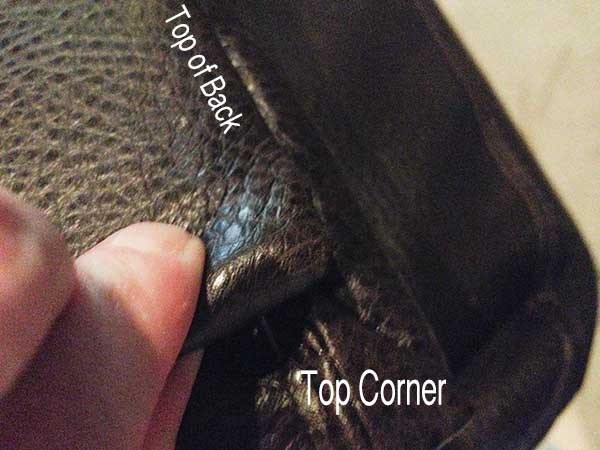
Not long ago, I replaced the leather (or pleather) on the seat cushions in my theater room. They had become worn and were beginning to peel. I thought that I could get away with just reupholstering the seats, because everything else looked fine. But, wouldn’t you know it. Just a few months after completing the seat cushions, one of the backs began to peel, as well. This is what it looked like just before I got around to reupholstering it. So, I guess technically this article is on how to replace the back cushions more so than on how to reupholster leather chair (s).
First of all, please excuse the quality of the photos used for this article. They were taken with my iPhone during the process. In addition, this is a theater room, so the lighting is less than desirable.
I should also note that if you have never reupholstered a sofa before, you may want to read my article “Upholstery for Beginners.” But, I digress…
Reupholster Leather Chair – Tools & Materials Used…
- Hammer
- Staple puller
- Needle Nose Pliers (but any pliers will work)
- Manual Staple Gun with Heavy weight staples
- Tack Strips
- Fabric
- Fiber Fil (as needed)
- sewing machine (I used leather machine needles with heavy weight thread and standard thread for the bobbin)
Matching Fabric to Reupholster Leather Chair…
It took me a few weeks to locate an exact match for my seats. I searched through several local stores, online fabric stores, and ebay. I ended up ordering about $10 worth of swatches, from various places, before getting a perfect match. I would suggest to always buy the swatches before committing to an online purchase. Even if it looks like a perfect match online, photos can be deceiving. All of my swatches were just slightly different shades that all looked correct on my computer screen. However, only one was an exact match. Incidentally, I found the perfect fabric on ebay.
So, if you need to reupholster a leather, vinyl, or pleather sofa, don’t think that it is necessary to reupholster the whole thing. Usually, the backs and sides will look good. It is just the seats that suffer wear and tear. With a little patience and research, you can probably find the exact fabric that was originally used on your sofa. This will make the job much easier, quicker, and cheaper. (On the other hand, if you want a whole new look, go for it!)
Steps to Reupholster Leather Chair
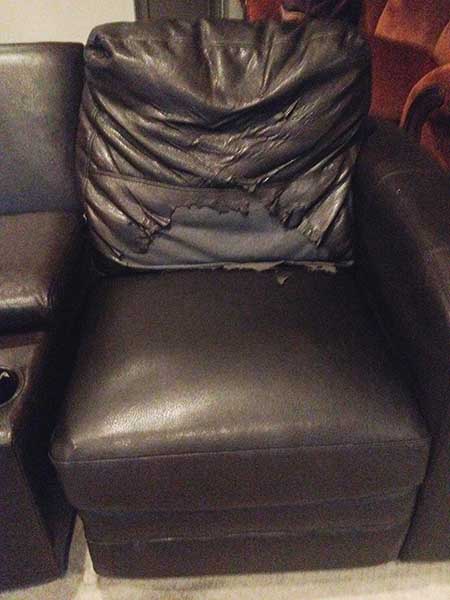
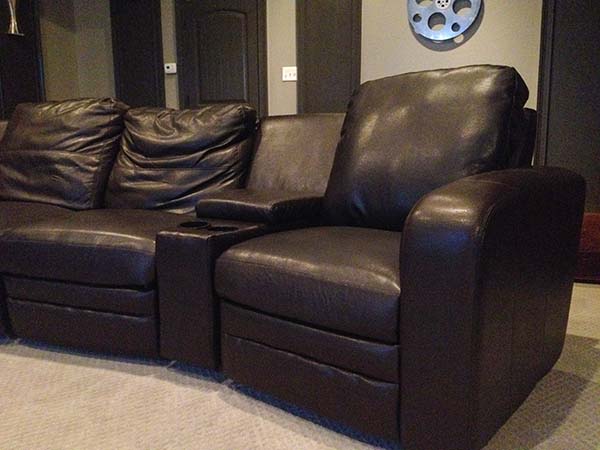
A better view of what I was dealing with. As you can see, the seat is nice and plump without any wear or tear. The entire sofa is about 7 years old, but the seat is just 6 months old. So, now I am repairing the back cushions as well. This one here is in the worst condition, so this is where I will begin.
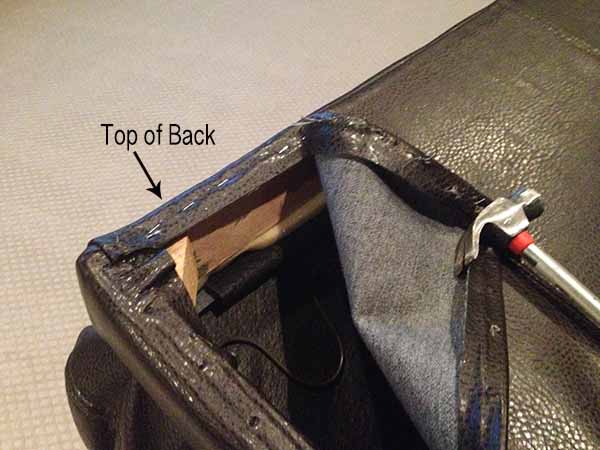
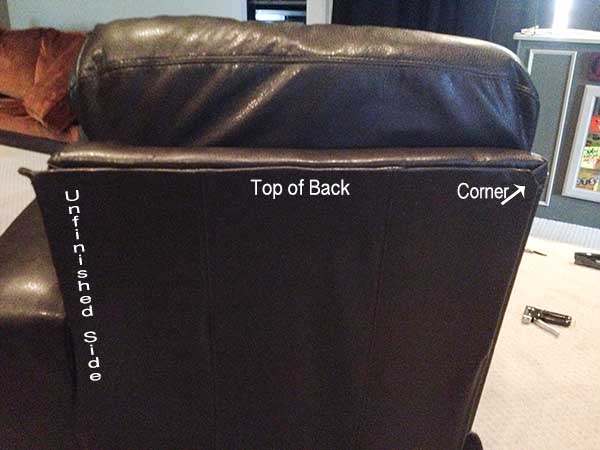
I have tipped the chair forward to allow easier access to the back. Because I am not reupholstering the entire chair, I will not be removing the dust cover from the bottom. I am simply taking the back fabric off as far as needed to access the interior. So, I start by prying the tack strips from the top back and side backs. A hammer and flat head screw driver will work for this part. Just make sure to be careful if you plan to reuse the back fabric. You don’t want to rip it.
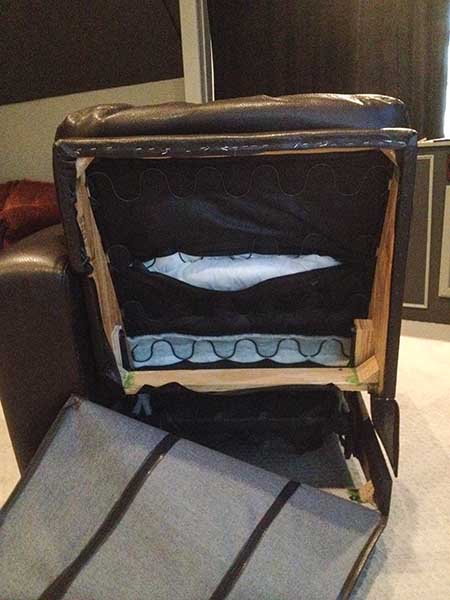
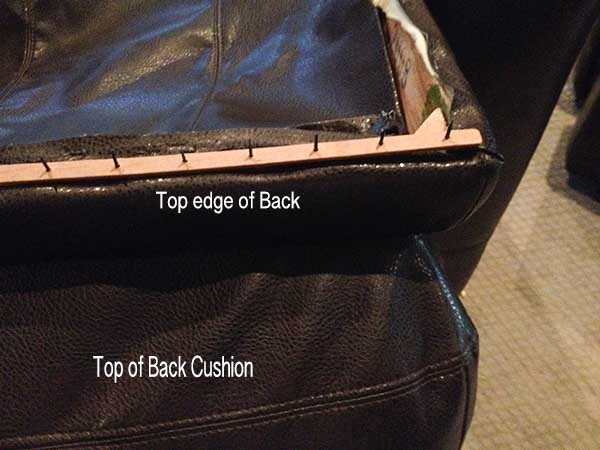
This is what my chair looks like with the back fabric detached. Note the bottom edge of the fabric is still attached, but you can now see how the back cushion is stapled around the perimeter. What you are now seeing is the interior of the chair.
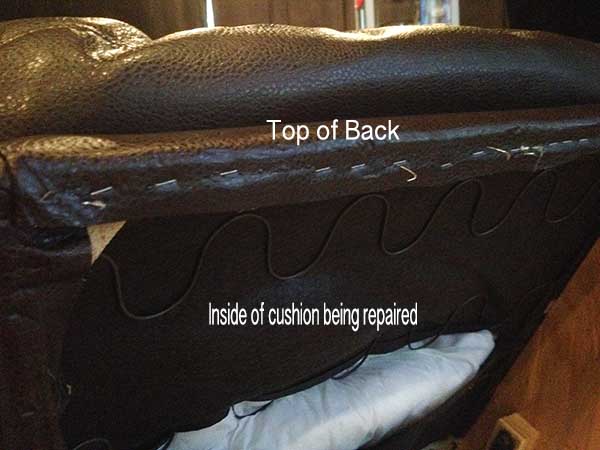
The black fabric that you see is the backside of the back cushion. The white in the center is the foam cushion. (No this is not a tear in the fabric. What you are seeing is that the back cushion was sewn in a fashion similar to a pillow sham. If your cushion has been sewn completely into the back fabric, I would suggest changing it into this style. It is very hard to sew a cushion with a home machine, so this style makes it easy to complete the reupholster)
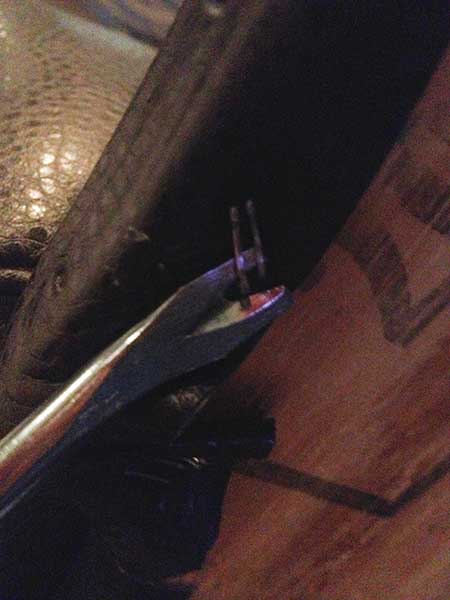
Next, start removing all of the staples that are holding the back cushion in place. I use a staple puller, hammer and pliers. Tap the staple puller beneath the staples and twist. If the staple breaks or doesn’t come out completely, use the pliers to pull if free.
This is my back cushion after it has been removed. What you see is the cushion with all the fabric flaps that were wrapped around the seat. I will be removing the front face of the cushion (the damaged section). Since, there is no need to replace any of the other parts, I will leave them as is.
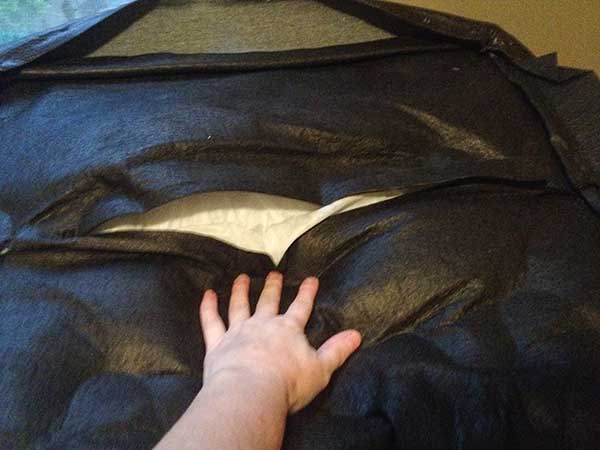
This is the back of the cushion. Here, you can see the opening where the foam cushion can be removed and later reinserted. I will take this out and then proceed to remove the front face.

This is the damaged face that I removed from the cushion. As you can see, there is a center decorative stitch on this. I do not plan to add this decorative stitch back. Therefore, I am not going to separate these pieces. Instead, I will use this entire old front as a pattern for my new piece.
Cut and sew the new piece in place.
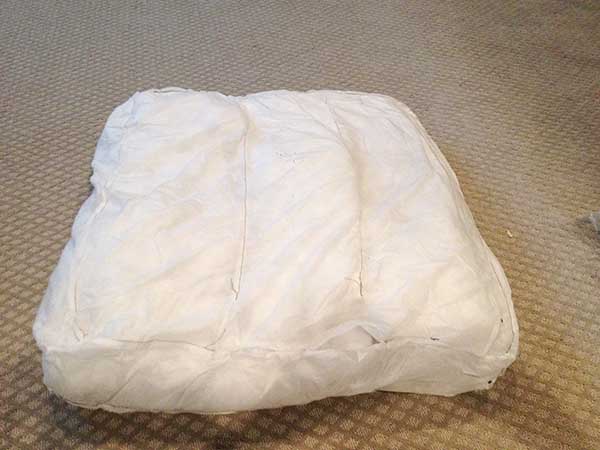
After finishing sewing the new piece in place on my cushion cover, I will move on to the foam cushion insert. As you can see, it is a bit lopsided and deflated.
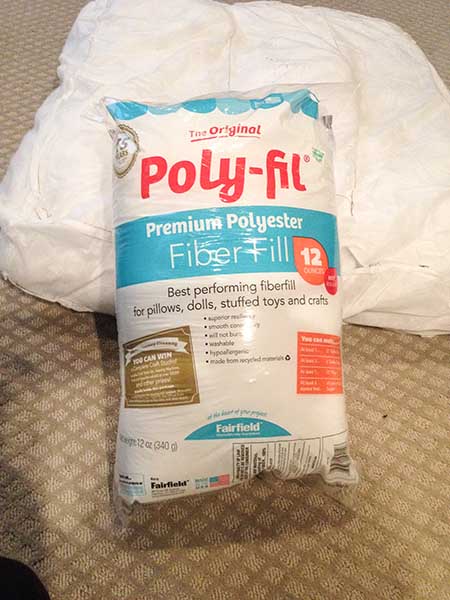
This is the Fiber Fill that I will be using to re-plump my cushion. (I ended up using 2 bags).
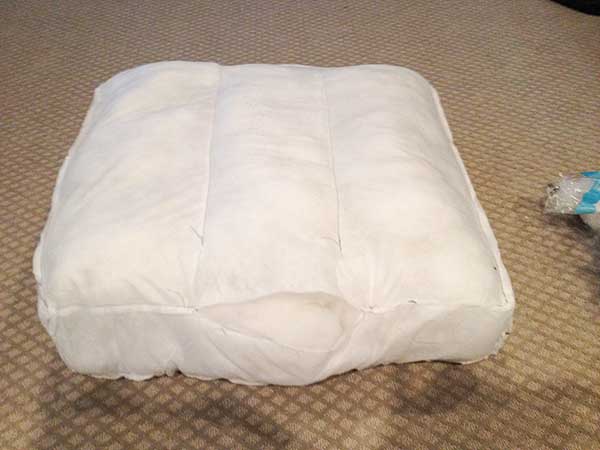
And here is the new and improved cushion insert. I just need to stitch up the opening in the bottom and shove this sucker back into the cushion cover.
Reattach Cushion and Back Fabric….
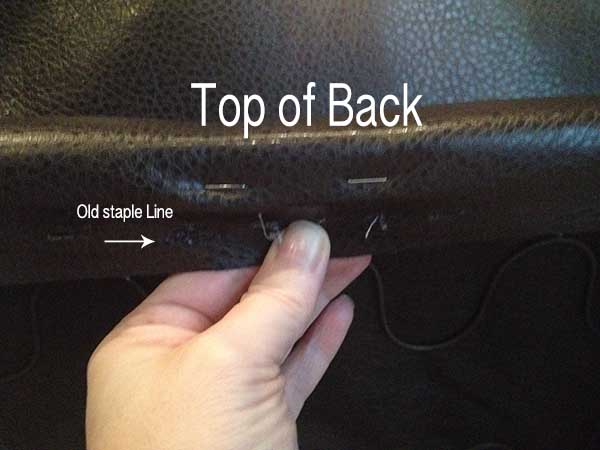
After the cushion is repaired, slip it back into place on the chair and begin to staple it down around the entire perimeter. Make sure to pull it tightly into place. You will probably need to staple beyond the location of the previous staples on the tops and sides. This is because the fabric is looser now than it was when the chair was new. So, to get a good tight finish, move the staple line an inch or two into fresh space.
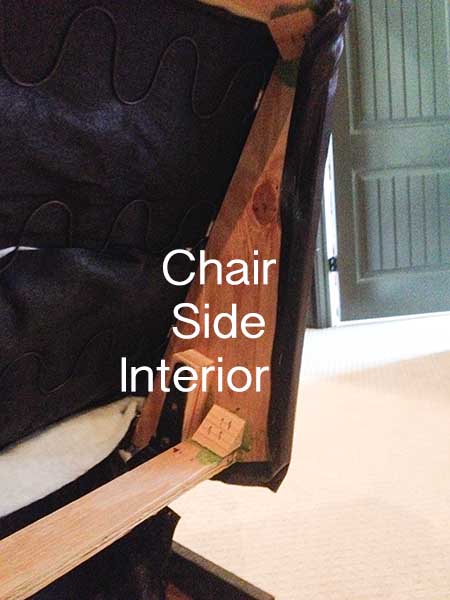
This is the interior of the side of the chair. As you can see, I have pulled the fabric tight and now need to staple to the interior of the side instead of the back edge.
Reattach Back Fabric…
To reattach the back fabric, I am using tack strips. It will make the job easier, and it will give me a nice straight edge. To do this, I lay a strip down on the top edge of the back to measure it. Cut the tack strip so that it is about 1″ shorter than the edge on both sides.
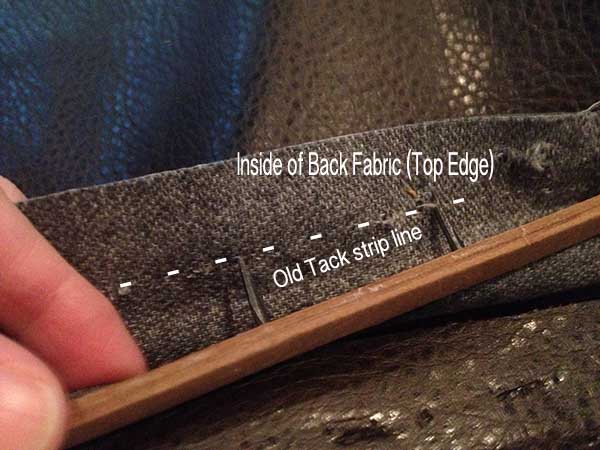
Next, I will insert the tacks through the wrong side of the fabric, following the old tack marks as a guide. (If your fabric was loose before you removed it, you will need to adjust the tack strip line down to take up the slack). My back was still nice and tight, so I am staying with the old placement.
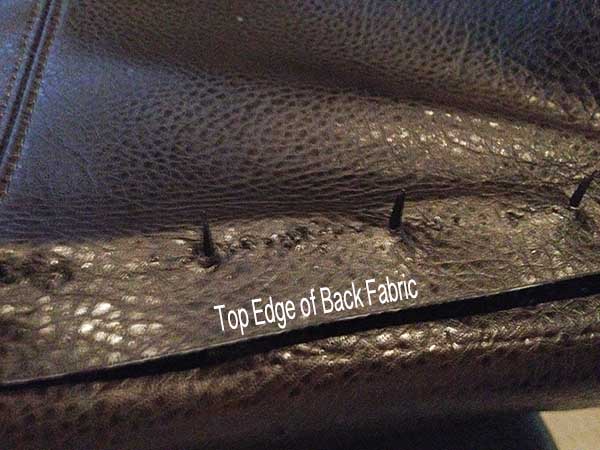
This is how the tacks will protrude through the right side of the fabric.
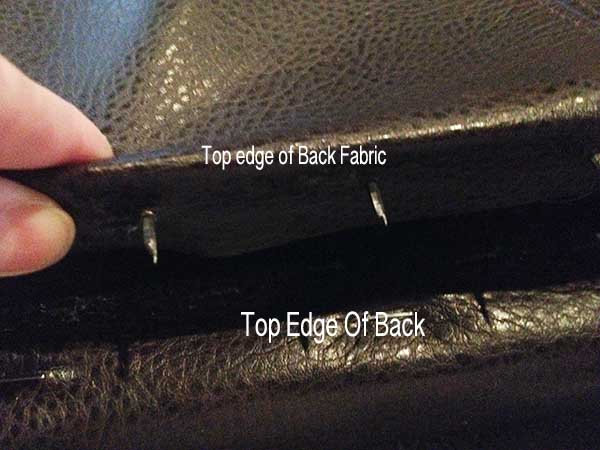
Next, roll the fabric and tack strip so that it is facing down toward the top edge of the back of the chair. You should have to apply a bit of force to line the strip up with the edge of the back. This is normal and will give a nice and tight finish.
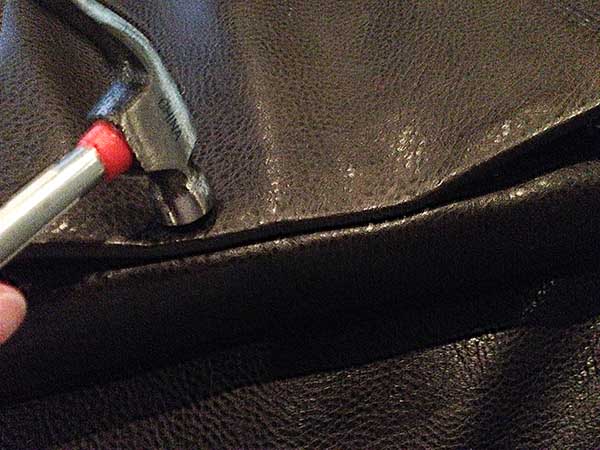
Using a hammer or mallet, drive the tacks into the back of the chair.
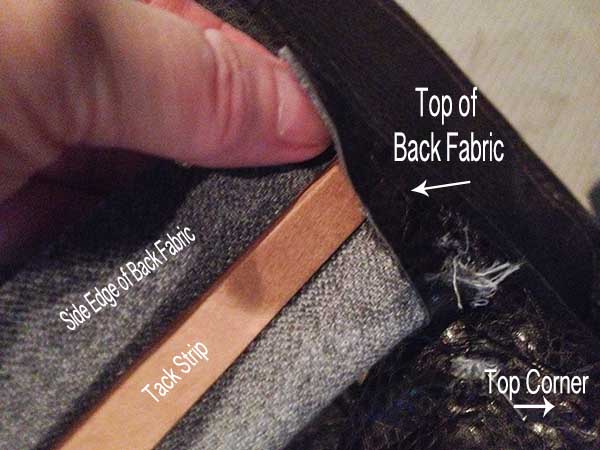
Now, repeat the above steps to attach the fabric to the side edges of the back. The 1″ left on each end of the previous step will allow the tack strip to tuck into the top edge. Make sure it is folded down and over the strip.
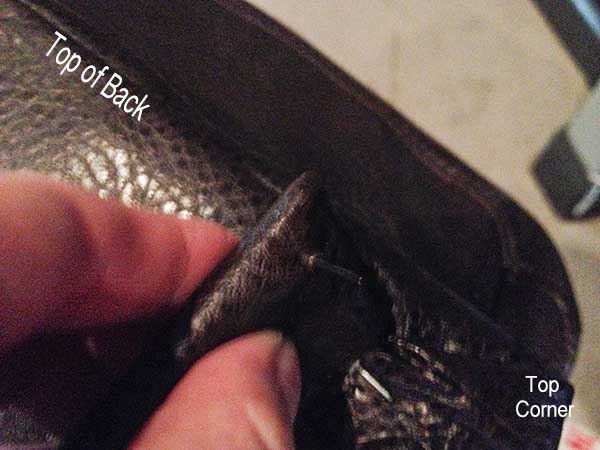
Fold the tack strip and fabric over and tack in place.
The chair should look something like this after attaching the top and side back. Complete the remaining side as above.
The back should have nice straight edges when finished and the fabric should be pulled snug. There should not be any wrinkles or slack in the fabric. (Note – My chair is a reclining chair, so the fabric appears to have a few wrinkles down close to the bottom. This is normal for a recliner because the fabric must be able to move back and forth).
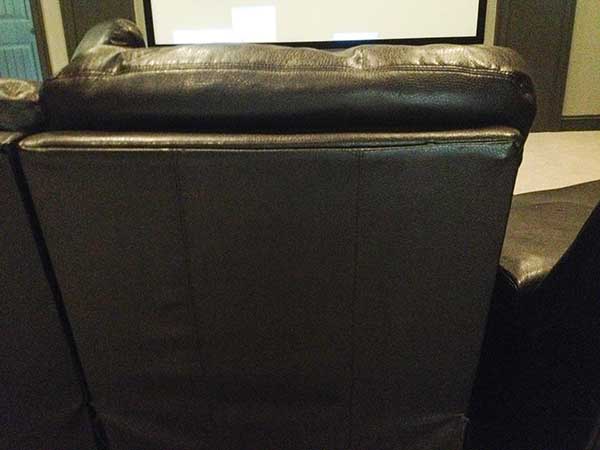
This is the final result for this one chair. As you can see, it now looks much better than the backs on the remaining sections. (Which, I will be getting to soon).
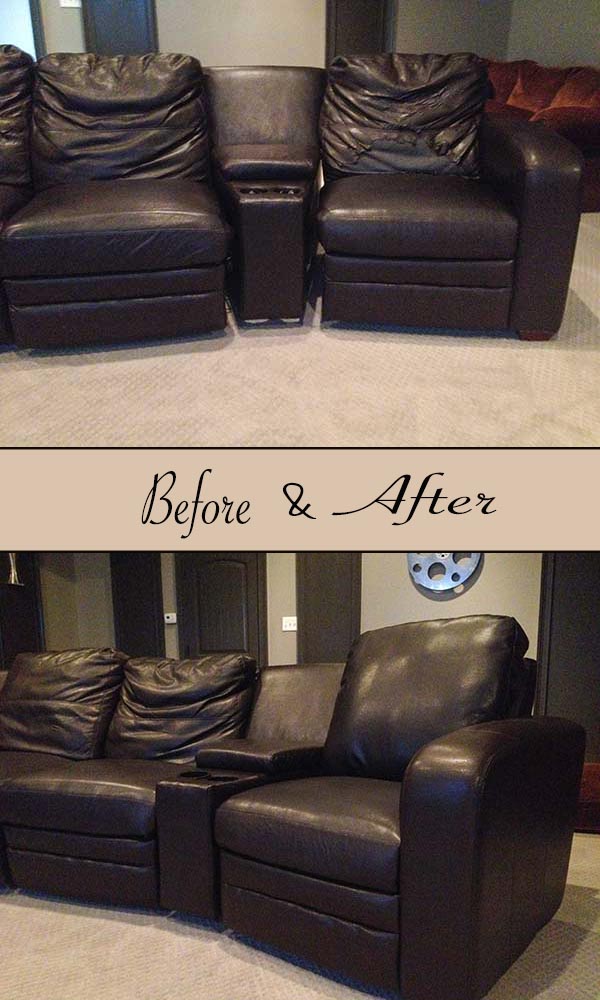
And one final shot for comparison.
Final Thoughts…
I hope that this has helped you to understand the process for repairing or reupholstering a chair. I will update the images with the entire theater seating just as soon as I finish the remaining chairs.


Doreen says
Great job! My husband and I are replacing a chair cover and it has been a few years in the process. This has given me some inspiration to complete the job.
Thanks, Doreen
Rachel says
Thanks Doreen,
Good luck with your chair. Glad I could help!
Krisi says
we just purchased some theater chairs that need refurbishing. The entire chair looks amazing EXCEPT the arm rests. I thought I needed to recover the entire chair but after this I HAVE HOPE!! we will begin searching for matching fabric now!! THANK YOU!!
Rachel Lynn says
So happy to help!