Have you ever wanted to know how to ribbon a Christmas tree like a professional? The first time that I tried to ribbon a Christmas tree I was only 21 years old and knew none of the tricks of the trade. I saw a beautiful tree at a viewing that had ribbon winding around it, and I thought that I would try out the look. Well, what I ended up with was something that looked like it was ready for shipping instead of display?
Fast forward to today, and I finally have my techniques down for all different types of ribboning. Of course, I know that many of you desire a beautifully ribboned tree as well, but are still struggling with developing your own technique. So, I thought that I would show you an easy way to get that perfect ribboned tree.
How To Ribbon a Christmas Tree Like a Professional…
Over the past few years, I have been doing some changes to my nine foot, pre-lit, Vienna Pine. I had to restring my tree with LED lights because I was fighting the dreaded dead bulb disease. And as you know, the dead bulb disease is contagious and quickly spreads to all of the lights.
This year, I decided to flock my tree so that I could at least pretend that it was new. It turned out quite nice and I am pleased with the results. If you are interested in flocking your own tree, you can check out how I did mine.
But all that aside, the cheapest way to get a beautiful Christmas tree is to add ribbon. Of course, how you add that ribbon can mean the difference between beautiful and well… not so great.
How To Ribbon a Christmas Tree Like a Professional – Video
Because it is very difficult to describe what I do with images, I am just going to let you watch my YouTube video. You can skip ahead of the commentary if you like. Usually, my YouTube videos have slightly different information than my posting (sometimes more, sometimes less), so I generally recommend catching both if you are wanting specifics on a topic. For instance, this video doesn’t have details on my other techniques. (below)
How To Ribbon a Christmas Tree Like a Professional – My Old Techniques…
Let me just show you how I used to ribbon my tree, way back in the day, before I developed my skills. I know you have seen this type of ribboning before. I see it everywhere, and maybe you like the way this looks. I’m not here to judge. After all, decor is very subjective.
But, with my first tree, I was very frustrated. I thought this just looked like an amateur, and I was determined to get my trees looking more professional. However, you have to remember that I am a designer, so I judge myself on a “would someone pay for this?” standard. And since you are here, reading about how to ribbon your own tree, I assume that you are wanting to have a tree that looks professional as well.
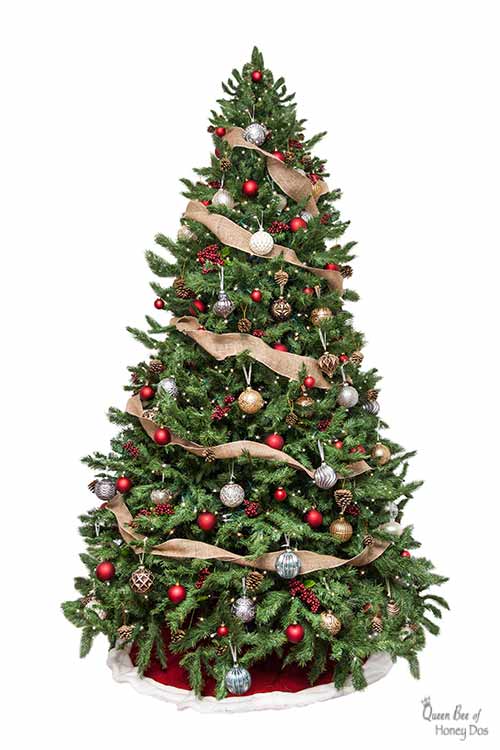
Wrap Technique:
This is a better job of the wrap technique, but still not what I was wanting. I had stopped pulling the ribbon too tight and was loosely twisting it into spirals as I wound. However, the ribbon should not just wind around the tree but should weave in and out as well. When you are standing on a ladder for most of the decorating, this can get quite difficult.
Cascade Technique:
Onto the cascade ribboning! I do like this look, but not so much on a fat tree. It is very easy to achieve if the ribbon is allowed to hang loose. One year, we tried a real tree, but as you know, those need to be trimmed to get a perfectly symmetrical Christmas tree. (Mine was not.) As it turns out, several people in my family have conifer allergies – myself included. Ironic, when you consider that I do so much woodworking with pine.
A similar technique is called the “waterfall”. It also starts at the top of the tree and works downward in a vertical direction. The difference between the two is the waterfall ribbon should be weaved in and out as you go downward. Ribbon works best for the cascade, while netting looks beautiful with the waterfall.
How To Ribbon a Christmas Tree Like a Professional – My New Technique…
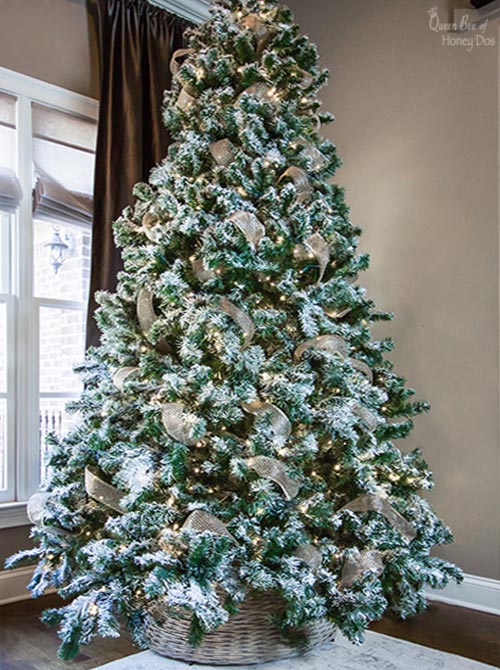
This is how my ribbon looked this year before I start adding ornaments. Normally, I like to do two ribbons, one wide and one narrow, but this year I just went with this wide ribbon. It is not a very good picture. It was snapped as an afterthought without even adjusting the focus.
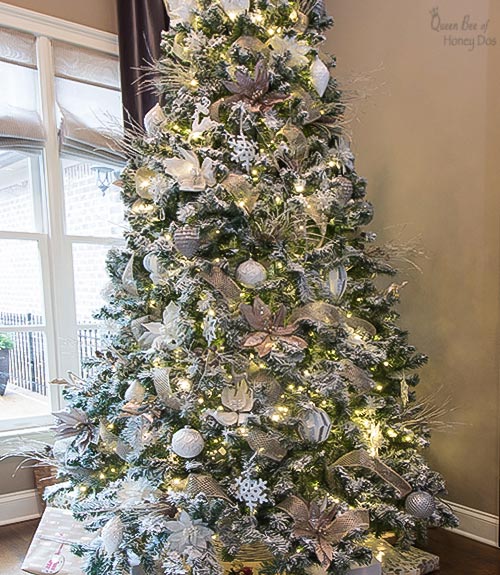
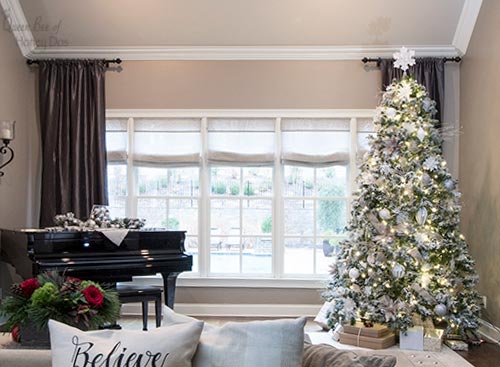
And, after the ornaments were added. A slightly better image, but I am not thrilled with the way this wall color competes with the tree. Next year, I will go back to contrasting colors or possibly repaint this room. But, you can see how the ribbon looks like it has been woven throughout the tree. This is just the look that I prefer, but I do sometimes use some of the other techniques on my smaller trees, or when decorating for others.
Final Comments…
And finally, a full screenshot. I hope that this helped you to figure out how to get your ribbon to lay to achieve your desired outcome. It is getting close to Christmas now, so I don’t have time to post more articles on the other variations of ribboning, but I plan to document those for next year. Please feel free to post your questions in the comments section.
Rachel is a home improvement expert with more than 20 years of experience in renovations, carpentry, and interior design and has more than 10 years experience in graphic and web design. She used the combination of her experience and knowledge to start her own digital media publishing company where she shares her knowledge across three different websites.
I’ve got a 3ft artificial tree and would like to decorate it as I usually do a much larger tree but can’t figure out how to get it done
I love ribbon on any tree and I’d like to use it please can you give me any idea
Thank you
Hello Ms B! I am currently working on several DIYs that address smaller trees and will be adding ribbon to them as well. If you can just check back with me for my home tour which will display each finished project, I am sure you will find several options that you can try. Links will be provided for each instruction. ?
This is just the look that I prefer, but I do sometimes use some of the other techniques on my smaller trees, or when decorating for others. I think you have some good things to display thanks Rachel


Ms B says
I’ve got a 3ft artificial tree and would like to decorate it as I usually do a much larger tree but can’t figure out how to get it done
I love ribbon on any tree and I’d like to use it please can you give me any idea
Thank you
Rachel Lynn says
Hello Ms B! I am currently working on several DIYs that address smaller trees and will be adding ribbon to them as well. If you can just check back with me for my home tour which will display each finished project, I am sure you will find several options that you can try. Links will be provided for each instruction. ?
Christ says
This is just the look that I prefer, but I do sometimes use some of the other techniques on my smaller trees, or when decorating for others. I think you have some good things to display thanks Rachel
Rachel Lynn says
Glad to help! I also have a few other techniques that I like to use for different trees. Variety… it truely is the spice of life!?
Katie says
The tree looks beautiful. At what point do you add the lights please?
Rachel Lynn says
Katie, I put lights on my trees before I assemble them. They are permanent just like pre-lit trees. You can see how I do it, here.