Regardless of what type of shelves that you have, whether they are built-in bookshelves, closet shelves, or kitchen cabinet shelves, it is always a good idea to have them to be adjustable. Adjustable shelves make it possible to customize your space to allow for very tall items or very small items. It also makes it possible to quickly add additional shelves. If you have ever wondered how to make shelves adjustable, the good news is that it is not hard at all!
(This post may contain affiliate links (*). That means that I make a small commission from sales that result through these links, at no additional cost to you. You can read my full disclosure here.)
How To Make Shelves Adjustable – Tools…
 |
 |
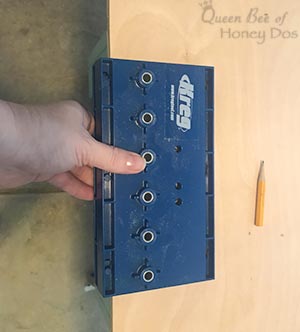
In order to make shelves adjustable, you must create shelf pin holes. Doing that without a jig is a PITA. ;-) But, using a quality shelf pin jig can make the job a breeze.
The same way that I could not live without my Kreg Pocket Hole Jig, I also could not live without the Kreg Shelf Pin Jig.* The one shown above is the 1/4″ jig. They also have a 5mm shelf pin jig*, but I prefer the 1/4″ because the 1/4″ pins* are the most common pins sold at the big box stores.
Speaking of which, you will need to buy shelf pins to go with your jig. Make sure that you get the correct size for whichever jig that you choose to buy.
How To Make Shelves Adjustable – New Build…

When I am in the process of building a cabinet, as I am doing in the image above, I start by marking my guide for the jig. Here, I am using a combination square* to mark a straight line to use as a guide to rest the edge of the jig against.
Some people prefer to use a piece of wood as a guide, which is perfectly acceptable. Just make sure that you are working on a perfectly square area and that the wood guide is also perfectly square. Otherwise, you may end up with unaligned holes.
Next, I align the top edge of the jig up to my mark. (You can clamp the jig in place if you want, and if you feel safer. But, I usually just hold it in place by hand. It has a nice overhang that rides along the edge of the surface. So, keeping it in place is easy.) Then, I drill my first holes at the top hole of the jig.
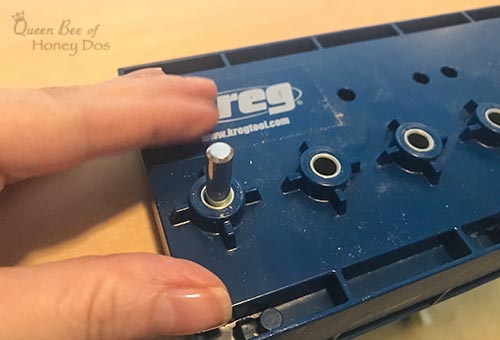
Once that first hole is drilled, the kit has a nifty little pin that can be used to hold the jig in place. I insert it at this point and continue with making the other holes.

To continue down the entire length of the cabinet, just place the pin in the last hole that you made. Then, place the jig over the pin so that the pin is once again in the 1st hole location. This is the genius of this device. It keeps each and every hole spaced exactly the same distance apart.

Now, to move to the back side of the cabinet, I like to use the guide mark that I made in the first step. (You can see the marks just above the blue t-square.) I then drill my first top hole on the opposite side, and just for my own peace of mind, I like to once again lay the t-square across the wood to make sure that the holes are lining up.
In the image above, you can see that both of the top holes are resting just on the edge of the t-square. So, I am pleased with these results and will keep going using the previous steps.

To make the pin holes on the opposite side of the cabinet, I lay the t square out and transfer my guide marks to the other section of wood, and start all over with the same process.
How To Make Shelves Adjustable – Previous Build…

If you want to make adjustable shelves in an existing cabinet, you can do that, too. You just clamp the jig in place along a level line and start the process. Tip – here is where I would definitely use a piece of wood as a guide.
It is much easier to get an exact starting point if you rest the jig on top of a piece of scrap wood, as I wouldn’t recommend marking up your finished cabinets. Plus, it is pretty much impossible to clamp the jig in place at the rear of the cabinet.
So for ease, I would use a 4″ or 6″ high piece of scrap wood as a guide, clamped in place at the bottom of the cabinet. Make sure it is level. Then, rest the jig against that scrap.
Final Comments…


As I mentioned before, the Kreg Shelf Pin Jig* can be used any place where you have shelves. Besides kitchen cabinets, I have used it for my recessed medicine cabinet. I used it for the media equipment box in my home theater. And, I have used it for closets, bookshelves, built-ins, and probably some other places that I just can’t recall.

– PIN IT –

– PIN IT –


Please keep it clean. Comments that do not follow the Comment's Policy may be removed.