Crates are a lot like wicker baskets. You can never have too many, and they are perfect for providing quick and easy storage. They also can serve as an addition to your home decor. You can find them in just about any home goods store. But, if you choose to make your own, you can dictate the strength and the design of the crate. And as luck would have it, crates are quite easy to make. To demonstrate how to build simple crates, I will use a few of my images to break the process down for you.

How to Build Simple Crates…
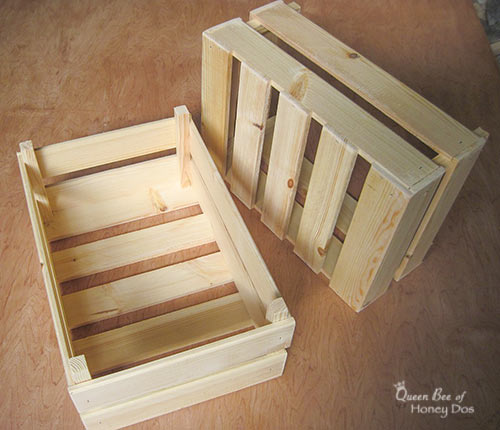
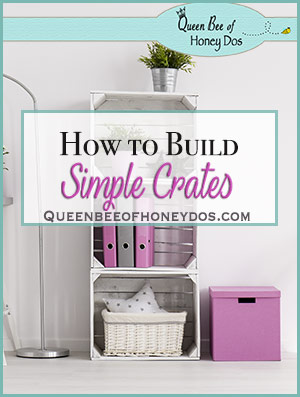
To begin with, let’s look at these two basic crates and assess how they were constructed.
Materials Needed:
- 4) 1/4″ x 2″ x 15″
- 9) 1/4″ x 2″ x 12″
- 4) 1/2″ square dowel rod cut to 5″
- wood glue
- nail gun or nails/wood screws
Note – The thickness and size of the wood effects the strength of the crate. So, for a heavy duty crate, switch to 1×4 lumber and 1″ dowels. You can even use old pallet lumber to make crates. FYI – Pallets also make great coffee tables.
How to Build Simple Crates – Instructions…
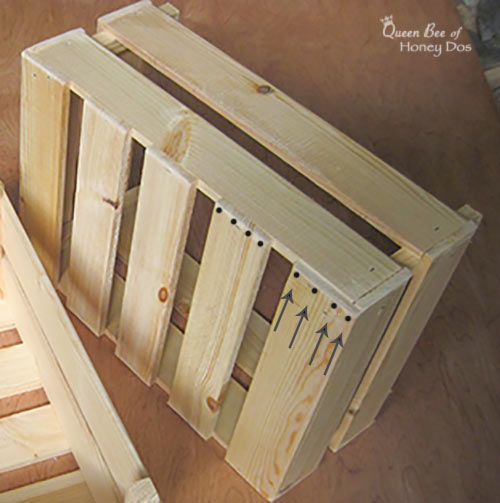
To begin making your crate, you should use glue and a nail gun to attach 2 of the 12″ sections to two of the dowel rods. Align the 12″ sections up along the bottom and the sides of the dowels, as shown in the image above. If you do not have a nail gun, the glue will hold just fine as long as you clamp it in place and allow it to dry before moving forward. With thicker wood, you may use wood screws. Repeat the process to make the opposing end for the crate.

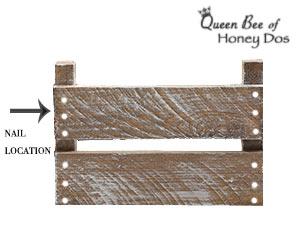
Next, Attach two of the 15″ sections to sides of the dowel rods using glue and nails, aligning the sections and nailing as indicated above.
Finally, turn the crate over to expose the bottom. Space the remain 5 boards so that they are equally spaced. Then, glue and nail them into place. Finish with your desired paint or stain.
Final Thoughts…
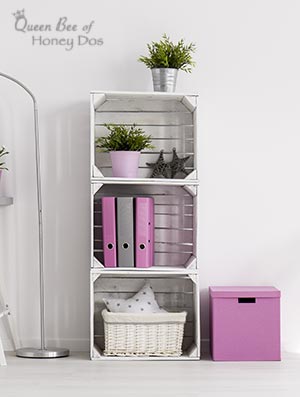
Crates are one of the easiest woodworking projects that you can do. What’s more, they can provide an incredible amount of return for the effort. So, the next time you finish up on a project, and you have a little bit of scrap wood left over, don’t throw it away. It only takes a small amount of scrap wood to make a crate.

– PIN IT –
– PIN IT –
This post was shared with Remodelaholic.


Samantha Fisher says
Dear Rachel, I’m 59 yr old woman and am Autistic too, I also have Aspergers, I hated getting my photo taken too, the camera flash & sunlight always hurt my eyes & it still does, I remember getting my photo taken outside on the 1st day of kindergarten & my mother scolding me & getting angry w. me because I could not lift me head up & I complained the sun hurt my eyes, she argued that it didn’t & was quite angry & disbelieving. She commanded me to look up, I rolled my eyes way up & she snapped the picture of me w. the whites of my eyes showing! She took my older brother 7 me to a photographer, he understood me & adjusted all the lights, somehow he softened the light & had us in a brown painted room, it worked & we had very nice black & white photos, common in the early 1960s. Yrs. later I was taught a couple of tricks to help me get thru photo taking times: sitting near an open door with light coming in & lighting me softly from my left side (for me I like it from my left) & if it is night & there must be a flash the individual taking my photo would tell me to turn my head towards a person next to me & look between them & the photo taker or towards a pet sitting near me to keep the flash from out of my eyes or to look at a stuffed animal or favorite toy in my arms. One of the best photos of me was when I was scarcely 13 & had gotten a new large stuffed toy Lassie that I was gazing at in front of the Christmas tree on Christmas night, it was a flash photo in the early 1970s. Outside photos are more easily taken of me if the sunlight is early morning an hour before sunrise or within the hour just after sunrise, or within the last hour near sunset. I hope this helps. God bless You & Your Family, Samantha Fisher P.S. I love your website & hope to make some of your lovely crafts soon. I stumbled onto your blog while looking for DIY wooden boats, like the kind we all played with many years ago. I signed up for your email too.
Rachel Lynn says
Samantha, Thank you for providing your perspective. It always helps to hear from someone that is able to express themselves, as my son is not. I feel that it helps. Like you, I have also discovered that natural lighting is best with my son. I just keep snapping away and eventually, I end up with a few good ones. Glad to have you as part of my email family. :-)