Toys are some of the easiest things that you can make with wood. In fact, you rarely need to go out and buy wood to make a toy. Usually, you can accomplish several wooden toys just using the scrap wood left over from a previous project.
The following is a list of some of the easiest DIY wooden toys that I have made from scraps. Anyone can make these!
Note – I am not including process shots for these toys. I feel that all of these are so simple that a detailed post is not necessary. However, I will include links for the few toys where I do have a more detailed post available.
(This post may contain affiliate links (*). That means that I make a small commission from sales that result through these links, at no additional cost to you. You can read my full disclosure here.)
Simple Blocks
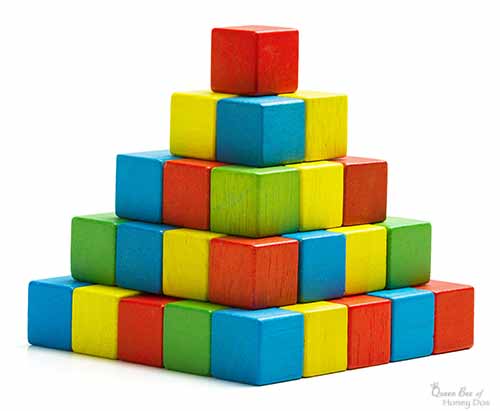
How incredibly easy are these wooden blocks? Well, I make them out of 1” square dowels cut into 1″ cubes. A single 36” long dowel will make more than enough to create the entire alphabet.
If you don’t want to add letters, you can leave them plain or finish them with vibrant colors.
Building Blocks
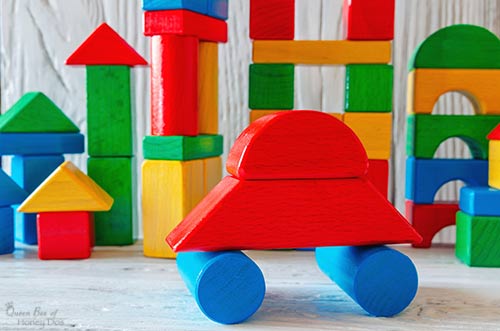
If you want to make a more complete set of wooden blocks, add in some circular dowels and throw in some 45-degree angles. All the above can be made using 1” square and round dowels.
To get the set above, make your cuts to include 10 of each:
- 1×2 rectangles
- 1×1 cubes
- 2” long rounds
- 1/2 x 2 rectangles (can rip square dowels in half)
- small triangles with 2” base and 45-degree angles
and make 5 of each:
- large angled rectangles with 4” base and 45-degree ends
- 1 x 2 rectangle with 1” half circle cut out (hint – use 1” round dowel to trace half circle)
- 2” half circle (hint cut a 1 x 2 rectangle and round off the top)
Stacking Rings
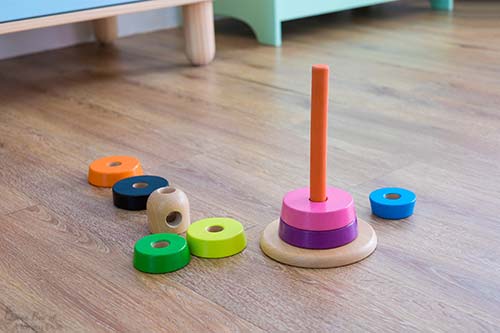
These look much more difficult than they actually are. The trickiest part of this toy is to get the holes perfectly centered.
You can make them in several different ways, but the easiest is to slice an 8″ tapered chair leg into equal sections. Yes, I said this is was a chair leg. Who knew, right!
Make a base approximately 1” wider than the largest slice. Drill a hole through the center of all pieces. Then, glue a dowel rod into the center of the base.
You can make a square wooden stacker and triangular stackers. For the tops, I have used large wood balls/beads, custom-cut shapes, and even finials.
Sorting Stacker
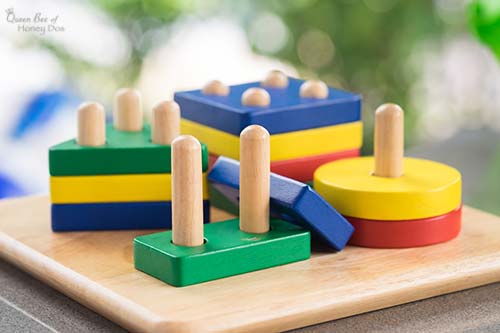
A sorting stacker is a bit more difficult than the stacking rings but is still quite easy. You will need a piece of 1/2” plywood for the base, 1/2” wood for the shapes, and dowels. To make the circular pieces, slice up a 2” round dowel.
Lacing Plates
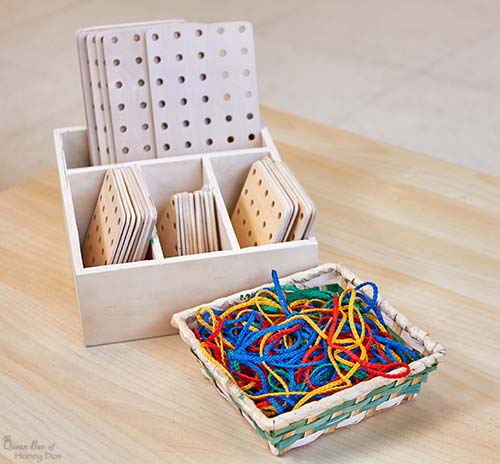
Lacing plates were some of the best wooden toys that I have ever made. They promote fine motor skills and the kids seem to really enjoy working these.
You can make them in any shape or size. You can even design them to look like animals (tracing the edge) or shoes (learn to tie). All you need is 1/4” (minimum) plywood, some colorful laces, and an imagination.
Hint – use a piece of pegboard as a guide for the holes if doing flat plates like those above. For more variety, make additional smaller shapes (triangles, circles, etc) that can be stacked and laced into layered designs. Be sure to use the template for all pieces so that the holes line up.
Jenga

Jenga games are super easy to make and can be customized with colors and finishes. I have done these in pretty pastels colors, vibrant bold colors, and even in premium woods for the serious adult players.
To make a Jenga game, you will need to cut 54 pieces with lengths that are 3 times the width. The most work you will put into making a Jenga game is sanding the pieces smooth. To work properly they need to be ultra-smooth.
I make my pieces out of 1/2” that is stock cut to 1” wide by 3” long. Sand all the sides and edges smooth will give the pieces that polished finish that is needed and will also provide the slight variances seen in the real game’s pieces.
Ring Toss

To make the ring toss shown above, you will need to first make a base. The one above is made from 1″ x 2” wood that is cut to 16 1/2″ long. They are joined with a center half lap.
The pins are made from 3/4” dowels cut to 8” in length. They are attached 1” from the ends. I recommend using hanging bolts and t-nuts to attach the dowels. This makes it easier to repair or replace a dowel when needed. It also makes it easier to store the game away.
The ropes can be made from 1/4″ – 1/2” rope cut to allow for a 5” circumference. Slip and glue a large macrame bead over the end to join.
If you need to see how to attach hanging bolts and t-nuts for dowel rods, check out my post on building a dish drawer insert. I use the exact same process with this game.
You may be interested in more posts like these:
More amazing projects made from dowel rods!
Check out these woodworking gifts that are perfect for mom!
This easy dowel rod trivet makes the perfect gift!
See how to make nested trays. They make great gifts!
Build some simple crates and use them for packaging!
Tetris Blocks

These look like complicated cuts but they are actually all made from 1/2” square dowels. I cut the dowels into pieces that measure 1” (makes up most of the pieces), 1/2” cubes, and a few 2” pieces. All of the geometric shapes were made by gluing together 1” length pieces to 1/2” cubes. Sand, finish, enjoy!
Camera
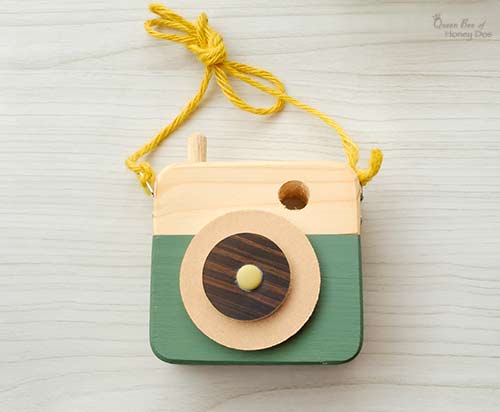
This is oh so adorable and a favorite for most young children. Plus it is super easy to make and can be customized to fit individual personalities.
You will need a 1/2”- 3/4” thick pieces of wood cut to either a 4” square or a 4”x 5” rectangle. Drill a 1/4” hole through the top front to make the viewer. Drill and glue a 1/4 piece of dowel into the top to make the button. Paint the body as desired.
For the front lens, you can do these as elaborate as you like. The simplest way is to cut a slice from round dowels (I like to use 2” rounds and 1” rounds for a staggered look).
Another great and favorite lens option is to glue a large flat glass bead to the front. This adds the bling factor and is by far more popular with the kids.
Dominoes and Dice
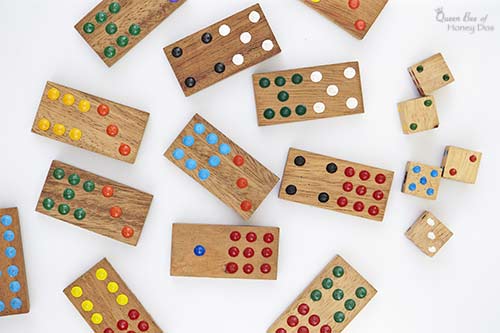
You can make dominoes of any size (and there are several), but I prefer the jumbo size for kids. Jumbos measure 1/2” thick, 1” wide, and 2” long. You can leave these plain or solid-colored for kids who just like to build with them.
For the actual game, you will need to add the dots. If your skills are good, you can drill dimples like mine above. But if you don’t feel comfortable with drilling dimples, you can color them on with a sharpie marker.
For each set, begin with the six-ended pieces. Start with six dimples in each end and count downward adding a domino with 6/5, then 6/4, and so on until you finish the six and blank combo.
Continue working down the number combos – 5/5, 5/4, 5/3, etc. You will need to make two pieces with 1/1 ends and don’t forget the double blank piece.
Wooden Boat
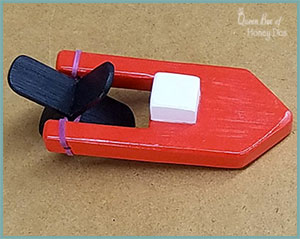
This one is really easy, and I like it as a do-together kid project. You may be able to assemble this one with nothing but the image to inspire you. But because it has multiple dimensions, I feel that you may need to take a look at the post on how to build this toy boat.
Old Fashioned Tree Swing

A tree swing is one of the easiest and most impressive gifts that you can give. I had one growing up and even as an adult I loved swinging on it.
You will need a solid wood plank. A 2×8 pieces of oak cut to 24” is a great size. Be sure to use hardwoods for this because softwoods can crack or splinter. Smooth the corners and/or customize as desired.
You will also need enough rope to go 4xs the height from the ground to the branch. I recommend 5/8” polyester or sisal rope. In addition, you may need 5/8 “ washers and these tree protective straps.*
Drill a 5/8″ hole at each corner of the boards. Make sure the holes are a minimum of 1” away from the edges.
From this point on, you can package the kit up and give it as a gift or you proceed to hang it yourself.
I recommend that you check out the details provided at Cottage Life on how to hang a tree swing safely. They include instructions on knots and safety measures.
Please keep it clean. Comments that do not follow the Comment's Policy may be removed.