This year, I have been making a lot of my own Christmas decorations. I wanted to have a good mix of neutral farmhouse decorations to go with my champaign gold theme. In particular, I wanted to find some wooden stars in a neutral finish. Well naturally, I am not likely to purchase something that I can make with things from my scrap wood bin. As a result, I am able to share with you how to make farmhouse style wooden stars!
You should always practice safety when using electric saws. Because this project places your hands close to the blade, I must request that you read my disclaimer. :-)
Lately, I have been on this streak of making shapes that require angles beyond the standard 45 degree norm. It is nice to be able to get out of those everyday squares.
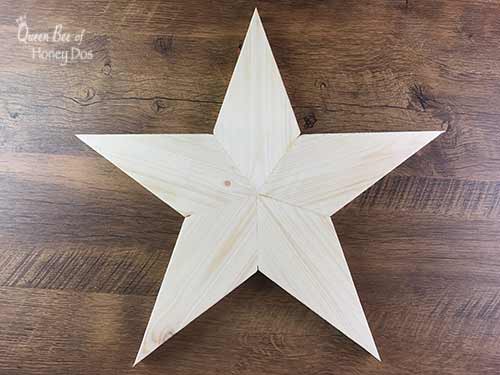
Besides these wonderful star frames, I also have details on making flat wooden stars. Those are also great for Christmas decorating.
And one of my favorite shapes is the honeycomb (or hexagon). The honeycomb shelves are one of my most popular posts. So, if you like to build these shape type decor, be sure to check that out.
But, for now, let’s move on to these farmhouse stars.
How To Make Angles for Wooden Stars…
One thing that I should mention is that this project requires some angles that your miter saw probably doesn’t go to, but I have a solution for that.
Yep, I am going to now tell you that before you can complete this project, you may need to read my post on how to make any angle with your miter saw. But I promise it is a good informative post that will serve you well.
So, after you finish reading this post, jump on over to my post on making angled cuts. I’ll leave a link at the end, so you don’t have to go there just now.
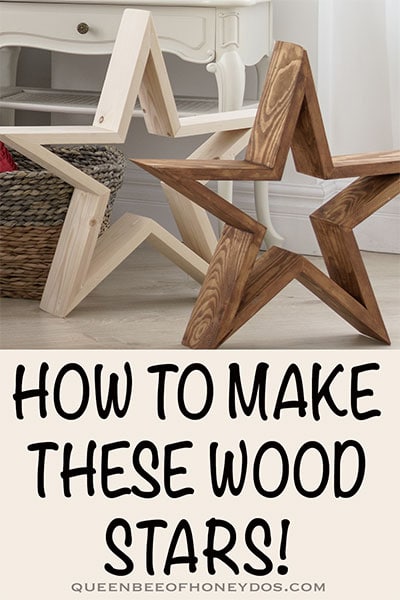
The star above is the small version. It is still quite large but is better for fitting on bookshelves. I am demonstrating this tutorial (and video) using the dimensions for this size.
But if you want to make both sizes shown in this post (shelf size and floor size), I am providing the details for the larger one after the instructions below.
See It in Action…

To make life even easier, you can watch the video on making these stars. It may give you everything that you need to get started, or it may just clarify the instructions written below.
Either way, I think that it helps most people to be able to watch the project as it happens. You can find more DIY videos on my Youtube channel. (psst… while your there, be sure to subscribe and give me a thumbs up).
Materials and Cuts:
To make this project, I recommend purchasing one 3″ x 8′ board in your choice of material. I am using oak, but any type of wood will be fine. You can also use scrap wood if you have enough pieces for this project.
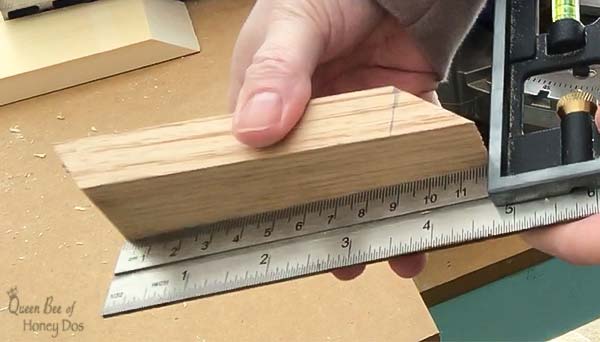
Take a look at the angle measurements above. You will notice that five of the pieces will have the long side with a final measurement of 6″, and the other five pieces will have the long side with a final measurement of 4 3/4″.
To make the cuts, I recommend starting with (10) pieces that are at least 8″ in length. This will allow a bit of extra room for your hands.
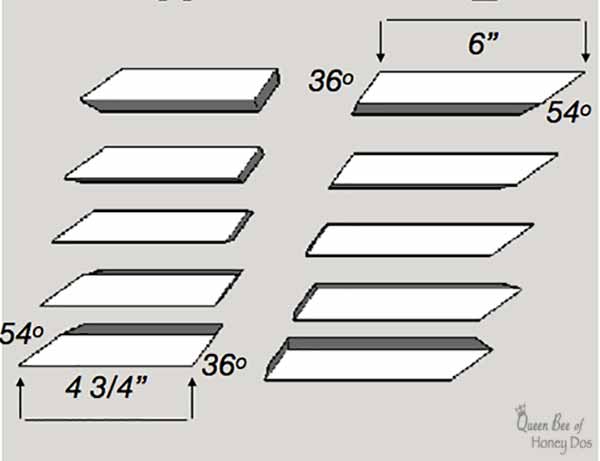
- Cut 5 sections with a 54º angle on one end. Measure from the angled tip and place a mark at 6″. Then, cut 36º on this end. (see image above)
- Cut 5 sections with a 54º angle on one end. Measure from the angled tip and place a mark at 4 3/4″. Then, cut 36º on this end.
Instructions:

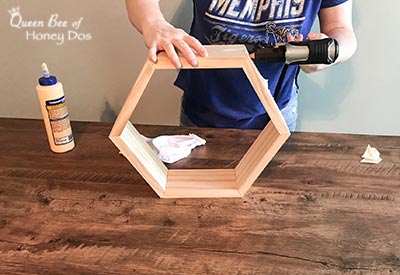
- To assemble the star, first, attach one of the long pieces to one of the short pieces at the 36º angle. Repeat for all pieces. A brad nailer with nails that are 1″ or less is recommended.
- Next, attach the sections from the previous step by placing the 54º angle of the short side along the inside of the 54º angle of the long side.
- Repeat for the remaining sections, connecting short sides to long sides.
Making Different Sized Wooden Stars
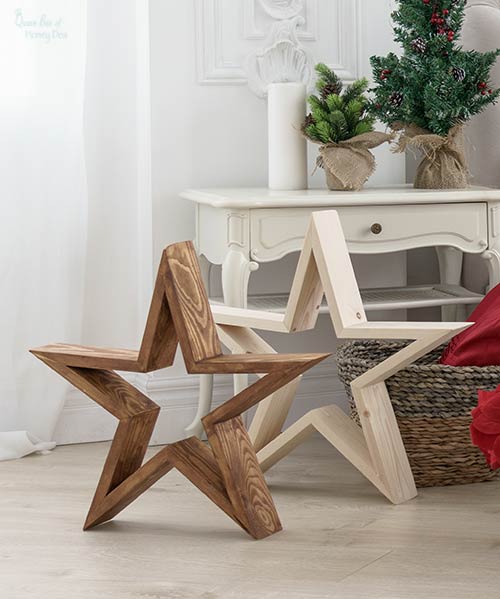
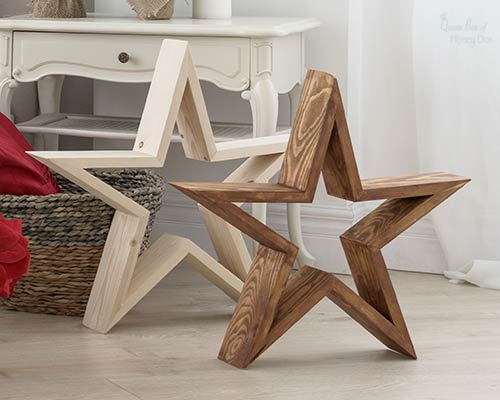
One thing that I am asked a lot is about making these in different sizes. The plan listed above is for the smaller star. It seems to be the one that most people want. It fits nicely on a book shelf or on a mantle.
But, you may prefer to make something more like the larger stars which you see sitting on the floor.
To get the larger version, you will use the same angles. However, you will be using 1x4s the 6″ piece will need to be changed to 11″and the 4 3/4″ should go up to 9 3/4″. Preform all the other steps the same way.
Finish:
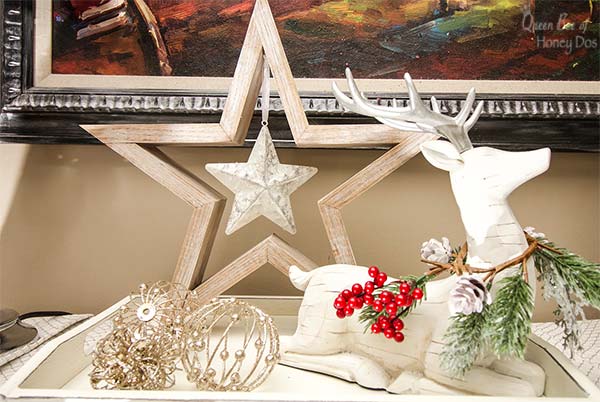
If you want to use your wooden stars for decor all year long, you can give them a nice rustic finish, and of course, forget the ornament. Just use a stain of your choice, or paint and then distress it, like the one above.
For the star in the video, I used oak wood and applied a coat of weathered gray Minwax followed by some accenting of white paint. Then, to top it off I added an ornament to the center.
Getting that ornament to hang just right in the center was probably the hardest part of the project. Okay, maybe that is an exaggeration. But, I tried getting a hook in the center before giving up and using hot glue.
Those points are just too tight of a space to be able to do get anything in there besides glue. So keep that in mind if you decide to go there!
The large stars are made from Pine. One is raw and the other has a provincial stain.
Final Comments…
And, now you know how to make farmhouse style wooden stars! As I said at the beginning of this post, you are going to need to see how I make those weird angled cuts.
And now that you have finished reading through this post, you should head on over to my post on how to get any angle from your miter saw.


Anonymous says
Thank you for explain every step.
Rachel Lynn says
Your welcome!
C says
Fabulous post! Thank you ?
Rachel Lynn says
welcome!?
Alicia Hursley says
We recently bought a small beach house that needed a few updates including a hardwood floor resurfacing. The results came out great and now we need to decorate it. Your stars are going to be the perfect addition and I can’t wait to get to work on them. Thanks for sharing.
Kevin says
Just a hint for easier assembly, I glue n Brad nail the “inside” corners first, let the set up a little then assemble it gluing and nailing the “outside “ corners. I found it difficult to get the Brad nailer on the inside corners if it’s was already partly assembled
Rachel Lynn says
Good idea Kevin. I imagine some of the guns may be bulkier than others.
Gertrud says
Sorry, my English is very bad!
Do you have the instructions for Farmhouse Style Wooden Stars in german? The stars are very nice.
Please, can you help me?
Rachel Lynn says
Gertrud, You can use Google translate.
David L. Smith says
I teach woodworking in a senior community and this project dramatically appeals to those who take my classes. I use the project as a “hook” that provides interest in using the miter saw and allows me to show proper and safe use of that tool. Also, this star allows me to teach methods to extend the miter saw beyond normal limits. That you.
David
Mario says
Hi Rachel, how do you make a 54 jig for miter saw?
David L. Smith says
I am an experienced woodworker and teacher. I love you complete projects and tips while constructing them. I use projects as an tool for instruction on equipment to further the adults enjoyment of creating. YOU ARE THE QUEEN!
Phil says
I agree using a Brad nailer comes in handy . For center star a few options like gluing a hook or fishing line between the above boards ? Or incorporate a triangle into the smallest angle above and then use a hook .