• Skip to secondary menu
  • Skip to main content
  • Skip to primary sidebar
  • Skip to footer

Queen Bee of Honey Dos

Build - Fix - Do

  • Build It
    • Cabinets
    • Decor
    • Furniture
    • Workshop Talk
  • Renovate & Repair
    • Ceilings & Walls
    • Closets/Shelves
    • Decorating/Design
    • Doors/Windows
    • Electrical/Lighting
    • Exteriors
    • Flooring
    • Paints/Finishes
    • Plumbing
    • Tile
    • Upholstery/Fabrics
    • Weatherproofing
  • Housekeeping
    • Cleaning
    • Storage & Organization
  • Lawn & Garden
  • Seasonal
  • About Me
  • Resources
    • Contact
    • Free Printable Gallery
    • Shop My Amazon
    • Visit my “Start a Blog” site
    • Visit My Crafting/Recipe Site
Home » Build It » Furniture » DIY Weathered Gray Console

DIY Weathered Gray Console

52 shares
  • Share
  • Tweet

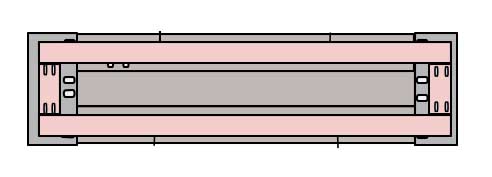
Seems like the in thing right now is weathered gray furniture, and I have to admit that I am developing a fondness for it as well. I recently found a console  at Restoration Hardware that I have been coveting, but it wasn’t exactly the gray color that I was hoping to find. I was looking for more of a dark driftwood tone. Plus, with a price of around $1700, I thought that this would be a good DIY project. I am sorry that I did not take photos of the whole process. However, I have created a sketch up to compensate.

DIY Weathered Gray Console

Console Table Inspirations…

Here are a few images of the style I was going for, minus the gray finish. I’ll let you all be the judge on whether or not I achieved the look!

by Palm Beach Gardens General Contractors

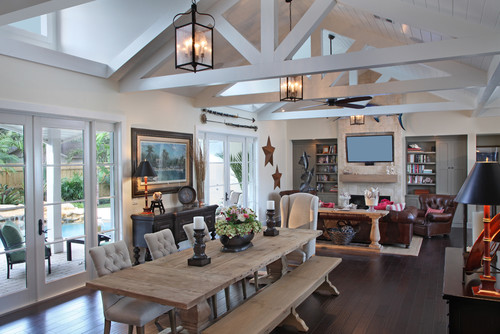
(Console table in the background – FYI that also looks like a RH dining table)


 by Westport Home Builders 

(A nice side view of Restoration Hardware’s console table)


Just an FYI:

I posted this project to help those who want to build something but do not have the equipment or skill required to create high end quality. The professional woodworker in me forces me to let you know that this is totally not the correct way to build a dining table or anything that you want to have and maintain a solid surface.

This particular plan is being done to demonstrate a quick and easy assembly of a rustic/farmhouse style. I am not concerned with this piece showing spaces between the seams. So, I am using pocket holes screws for the build.

If you want to create a piece that does not show the effects of wood movement overtime, you should use my professional method for table top construction. This project will eventually show seperation of the planks. I know and accept this upfront. But, you should also know this as well, and proceed with these instuctions only if you are wanting this type of look.

That being said, there is nothing wrong with building a console in this fashion. This table will hold up quite well for many years, and the structure is sound.


Tools and Supplies For This Project:

  • Drill
  • Pocket Hole Jig (I use Kreg Pocket Hole Jigs)
  • Clamps
  • Pocket Hole screws
  • Wood screws
  • Wood Glue
  • Orbital Sander
  • Chisel
  • Hammer
  • Utility Knife
  • Paint Brush
  • Rags
  • Tack cloth
  • Stain of choice (I used Minwax Dark Walnut, just because I had some left over)
  • 2 shades of gray paint (one dark and one light)
  • Wipe on Poly (I used the satin finish)
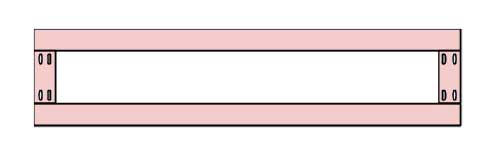
  • (6) 2×6 pine boards cut to 5′
  • (4) 2×6 pine boards cut to approximately 16″ (These are the end sections. Do not precut these. They should be cut to fit after assembling the 5′ sections).
  • (2) 1×4 cut to 68″
  • (2) 1×4 cut to 7″
  • (2) wooden balusters – they come at around 20″ in height. I added wood blocks to raise mine to the height that I wanted, which was 23″. (I found these balusters on ebay, but Osborn’s carries a lot of table legs similar to this).
  • (4) 8″ steel braces (available at Lowes and Home Depot)

Assembly Instruction…

tabllesketch(1)Lay out the boards to determine which sides that you want to be visible for the top and bottom sections. (2)Then beginning with the top section,  use the glue and the pocket hole jig to attach the 5′ boards from the underside, as shown in the graphic. (use clamps to hold everything in place while attaching) (3) Measure and cut the end boards to the proper length. (4) Check to see if the 5′ section has nice flush ends. If needed, sand the ends of the 5′ section to get a level surface before attaching the end boards. (5) Attach the end boards to the ends of the 5′ section using the pocket hole jig and the wood glue. (I did not use clamps for the end board. I just made sure that I was working on a flat surface). (6) Sand the entire section to remove any rough areas, to round off the corners and edges, and to make sure that everything is flush from the top, bottom  and sides. (7) Remove all dust with a tack cloth. (8) Repeat the entire process for the bottom section.


Attach the Balusters…

baluster1The balusters need to be attached so that the screws are not visible. To do this, all screws will go from the bottom side of both the table top section and the bottom section. (1) Determine where the balusters will be placed. (2) Attach the balusters to the table top from beneath. The image to the left is the underside of my table top, as seen with the table upside down. I added a 1x5x5 block of wood to the balusters to give a good place to attach the screws. FYI – this is what dark walnut stain looks like before the paint is added. It is the same stain that is on my wood floors in the top image (3) With the table still upside down, place the table bottom on the balusters, and attach from the underside. Be sure to check for level.

Attach the Bottom and Top Foot/Braces…

console feet2 console feetFor the bottom section the wooden support frame doubles as the feet. (1) Using wood glue and pocket hole screws, assemble the 1×4 boards as shown in the graphic.

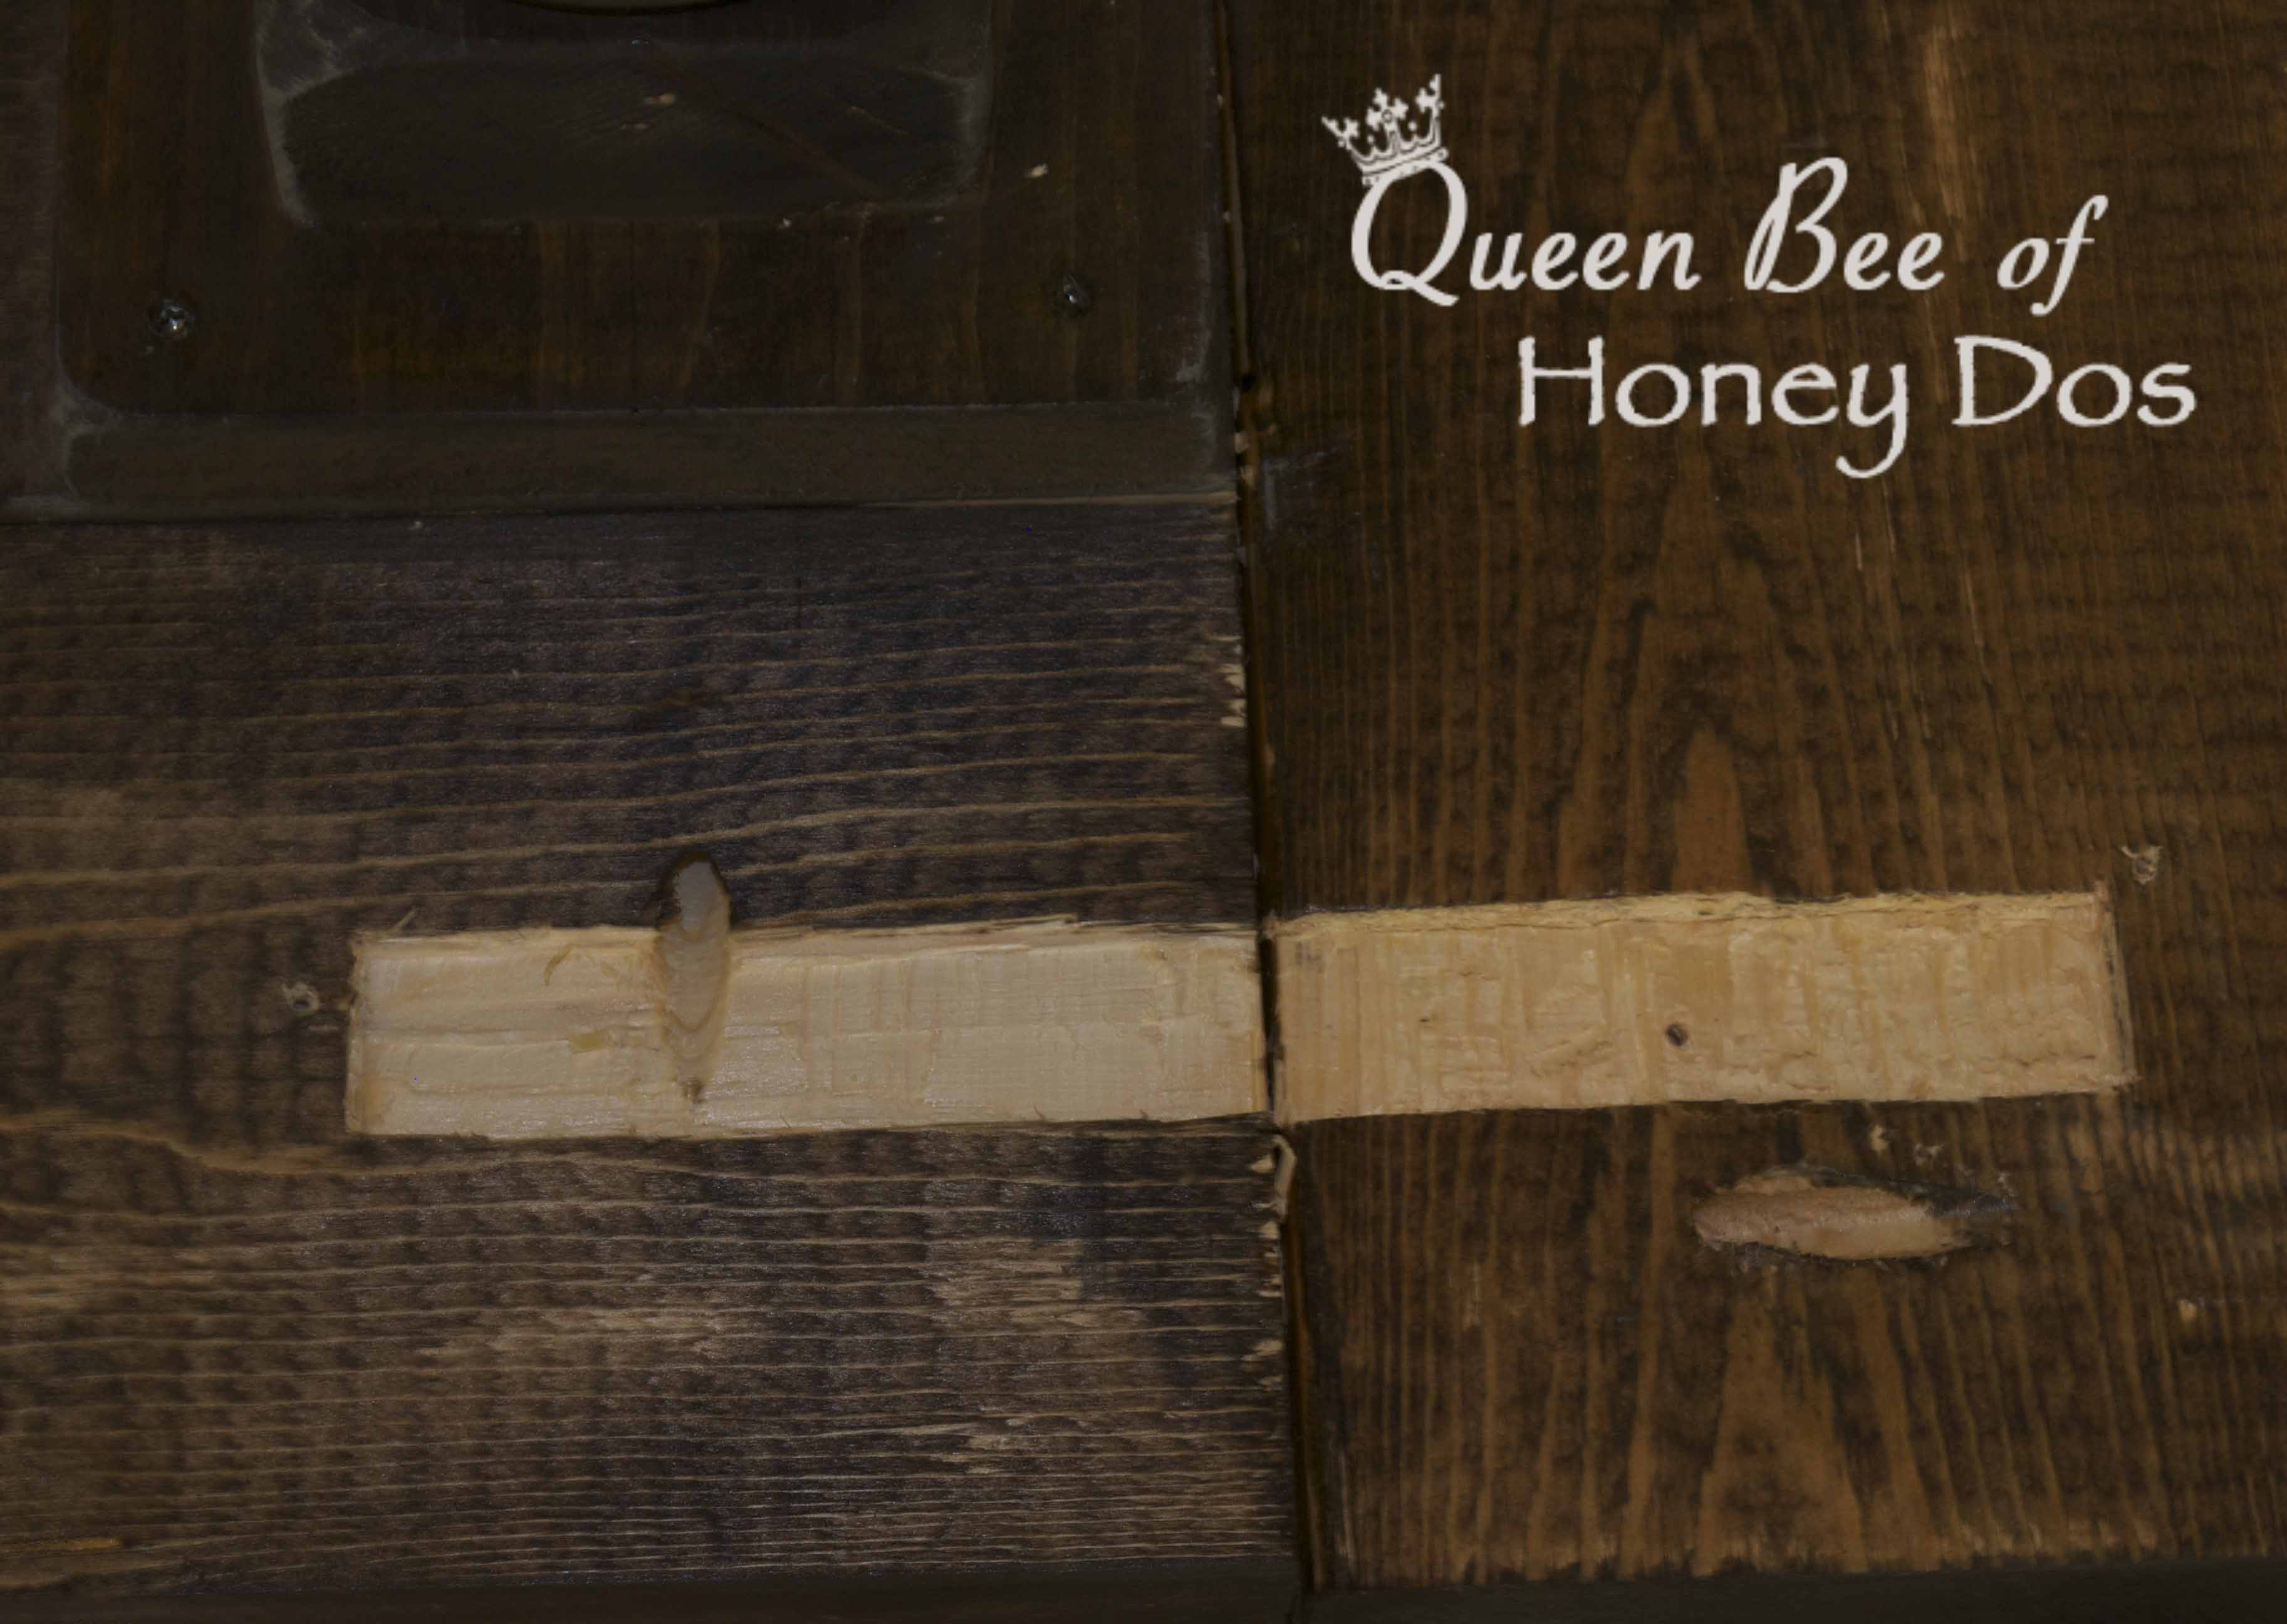
(2) Attach the wooded support frame to the underside of the table’s bottom section using wood screws. (Sketch up shows the bottom view of the lower shelf).

chisel1Because I chose to place the balusters 6″ in from the end edges, none of the end boards are being supported by the balusters. If left as is, their sole support would come from the pocket hole screws, which under normal circumstances I would be satisfied with. However, this table is the perfect height for little children to grab and swing or press their weight on. Therefore, it is necessary to add support to both the bottom and top outer edges. We have accomplished that for the bottom shelf, now we need something for the top shelf. So, this is were the 8″ braces come in. (1) flip the table upside down. (2) lay a brace so that it is centered along the seam between the end board and the long 5′ section. (3) Trace the brace.

chisel2(4) Use the chisel and hammer to score along this line.

chisel3

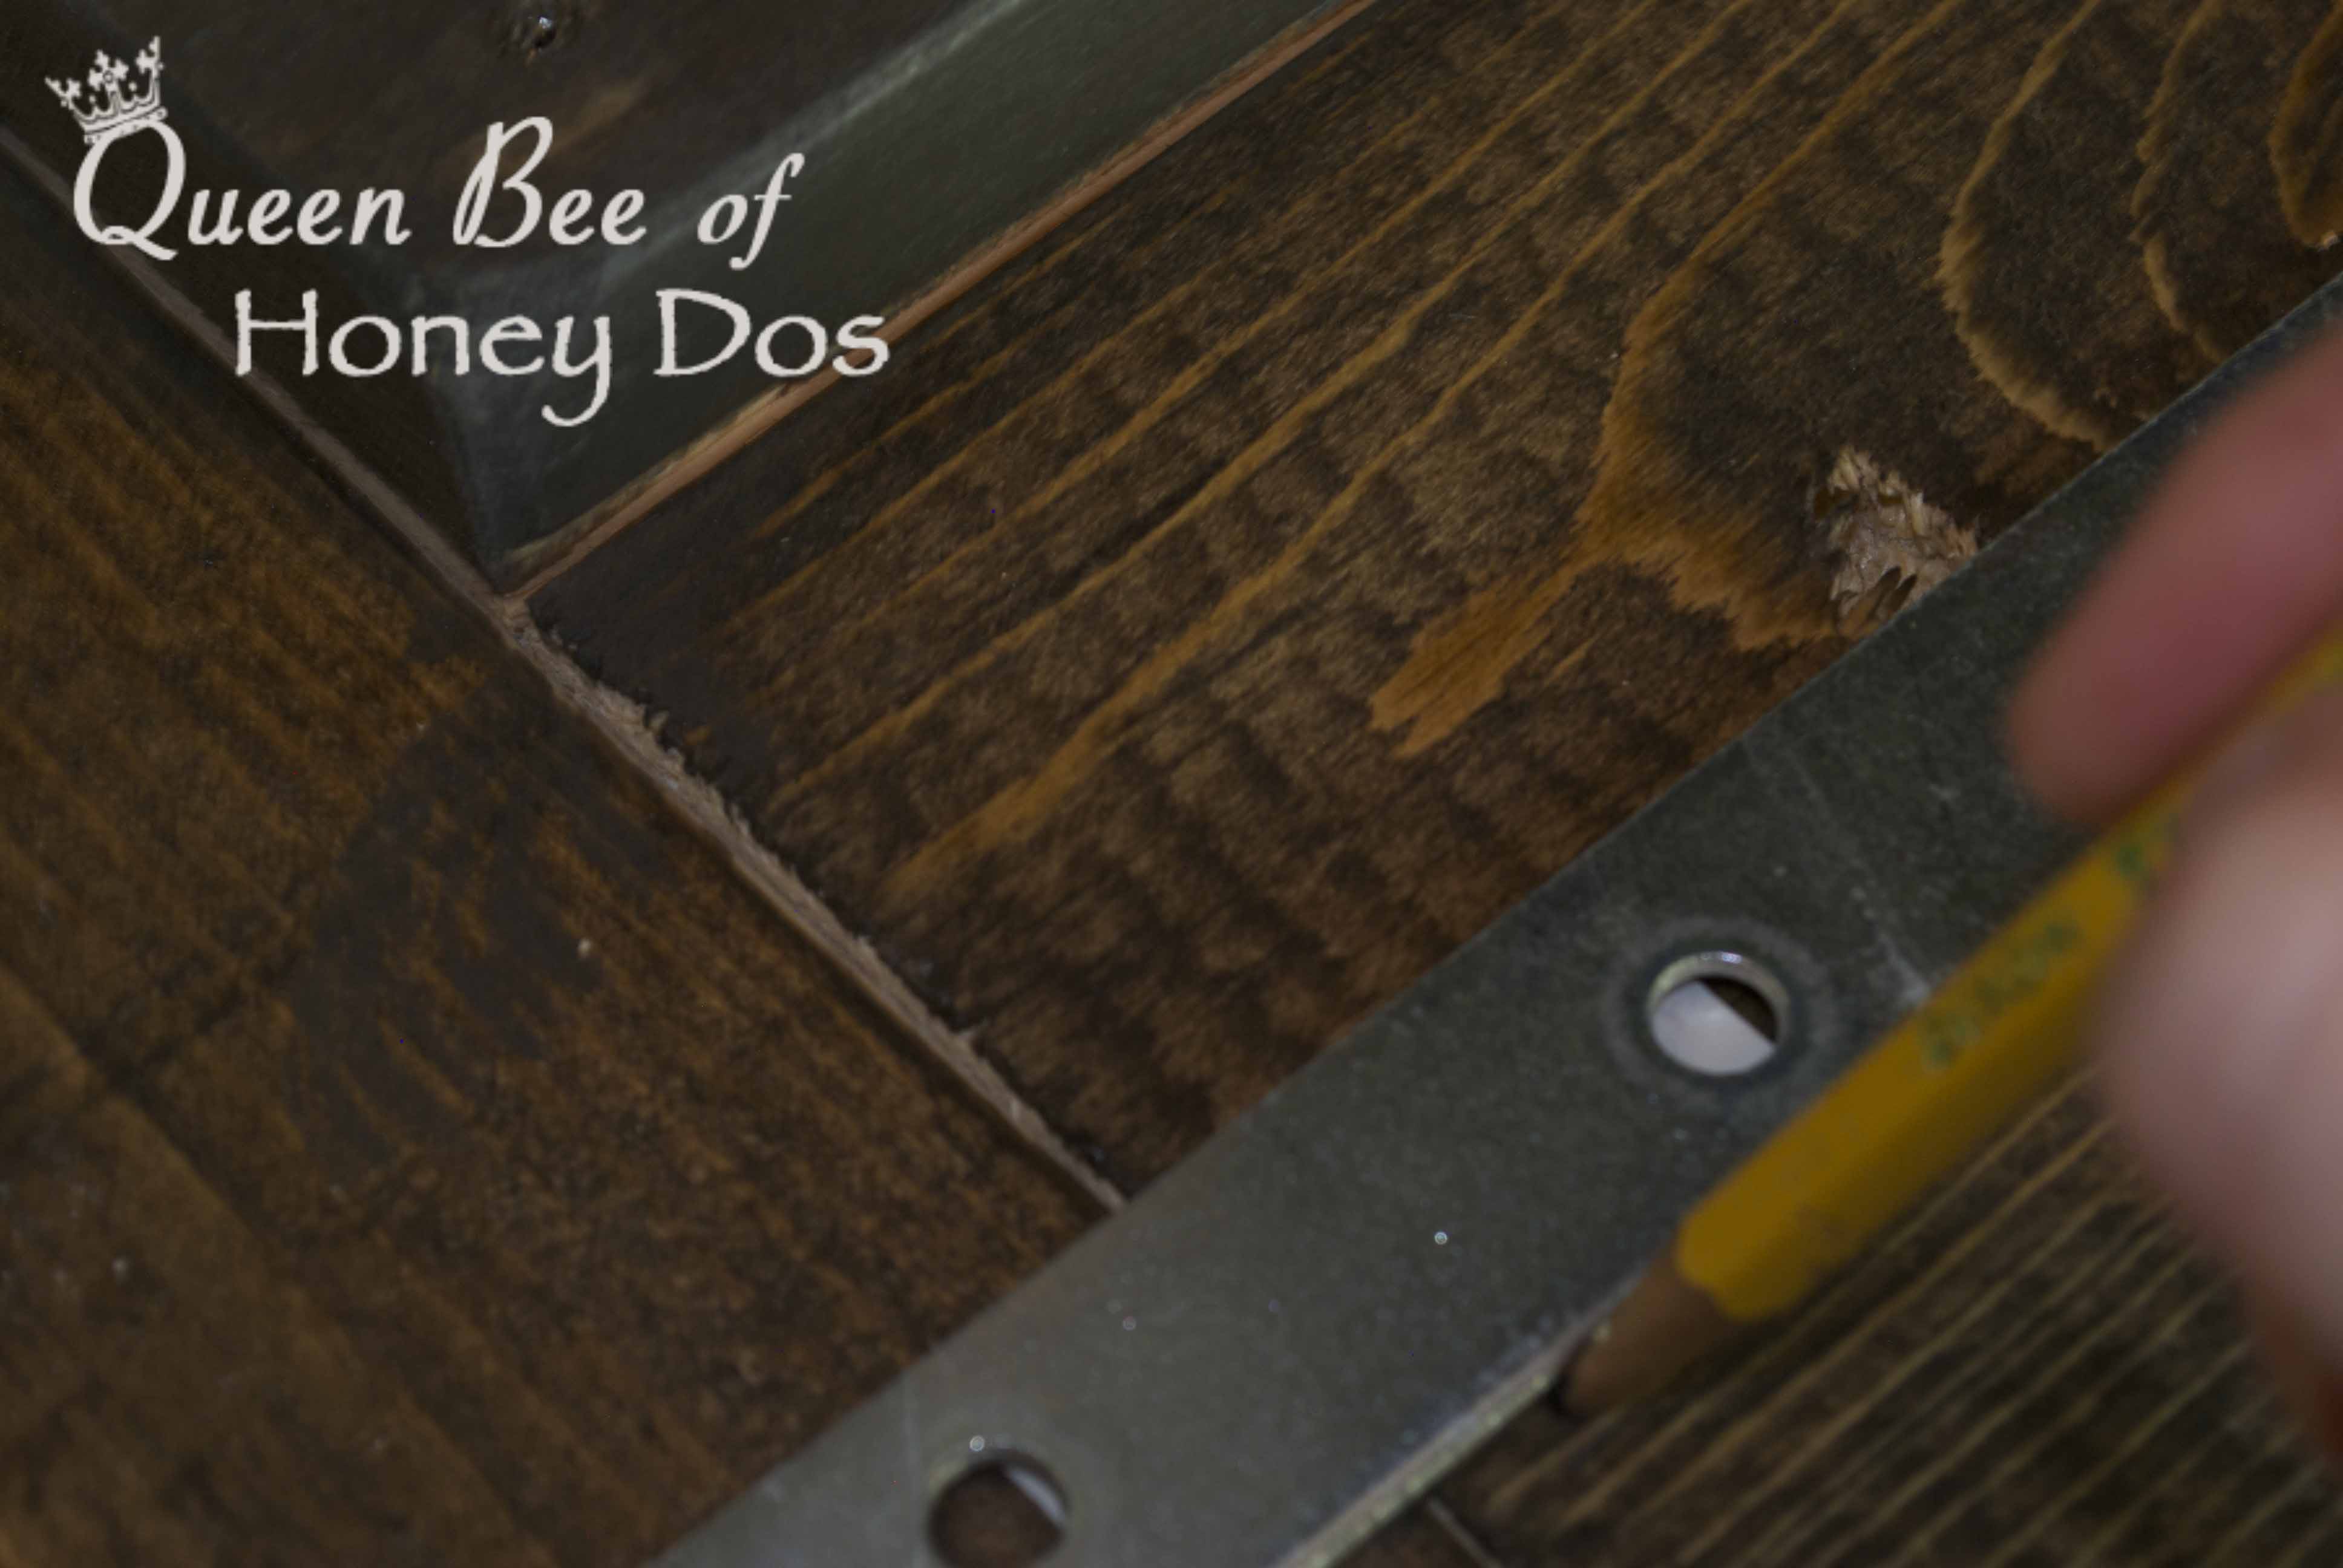
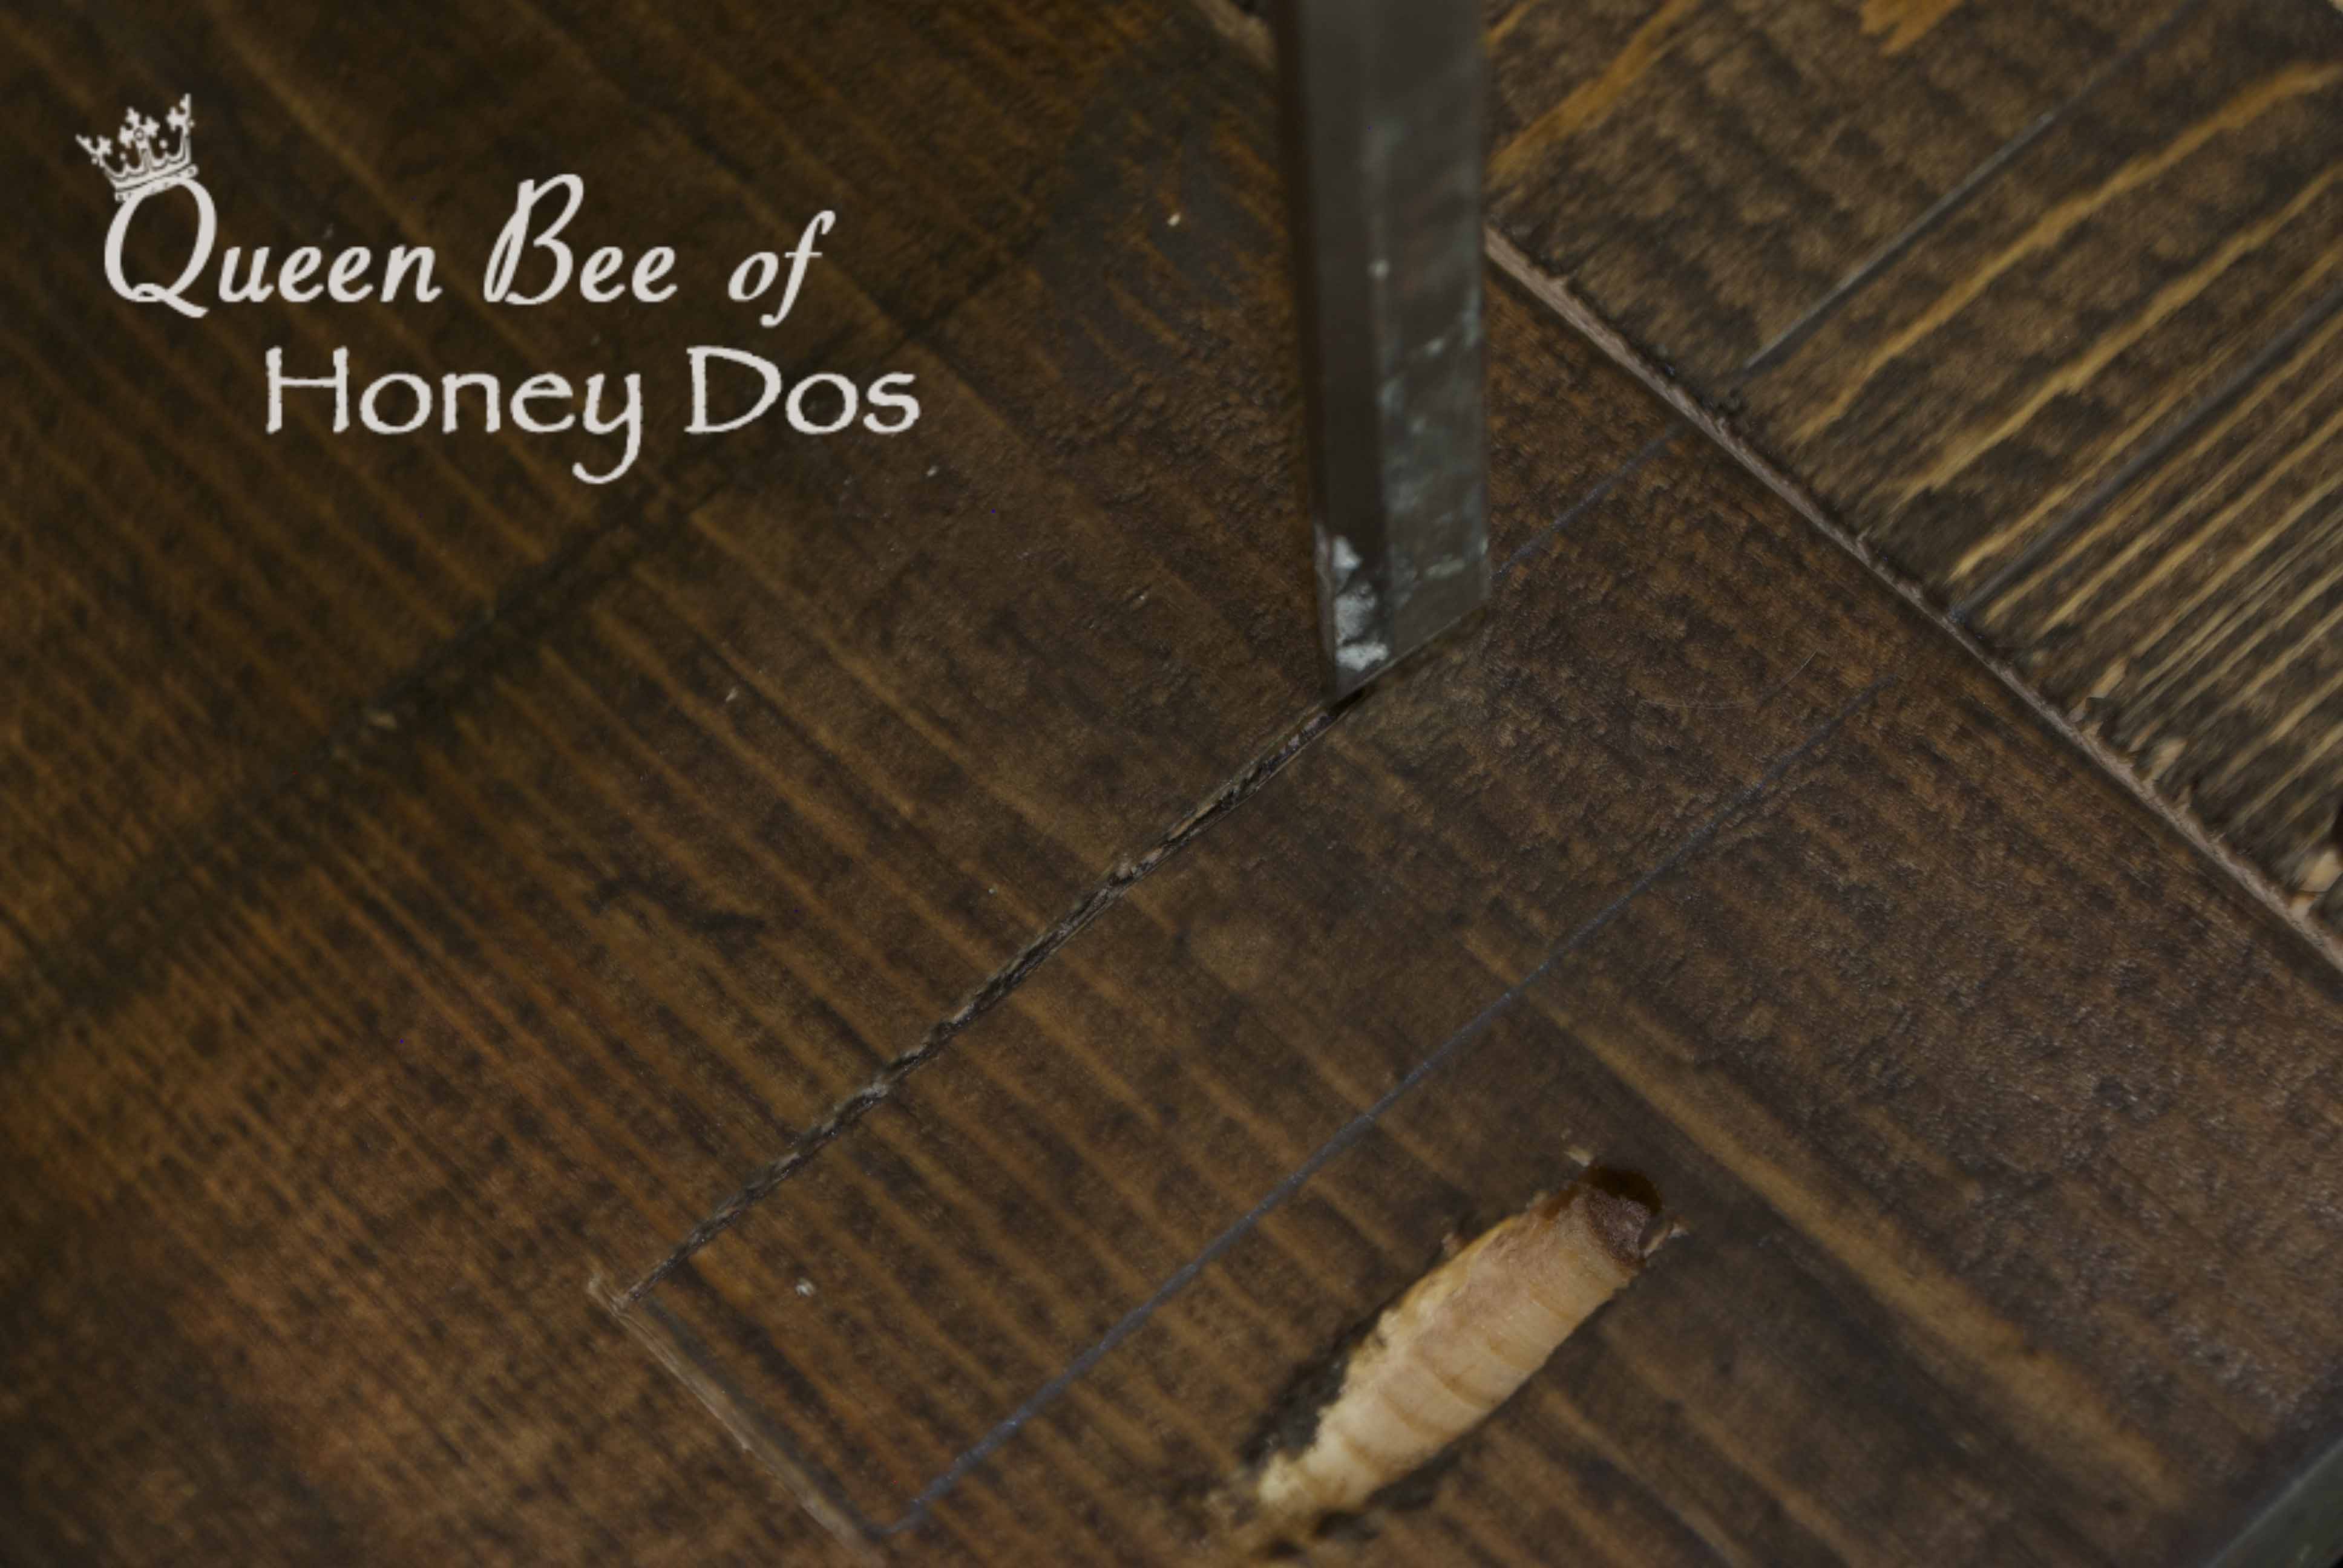
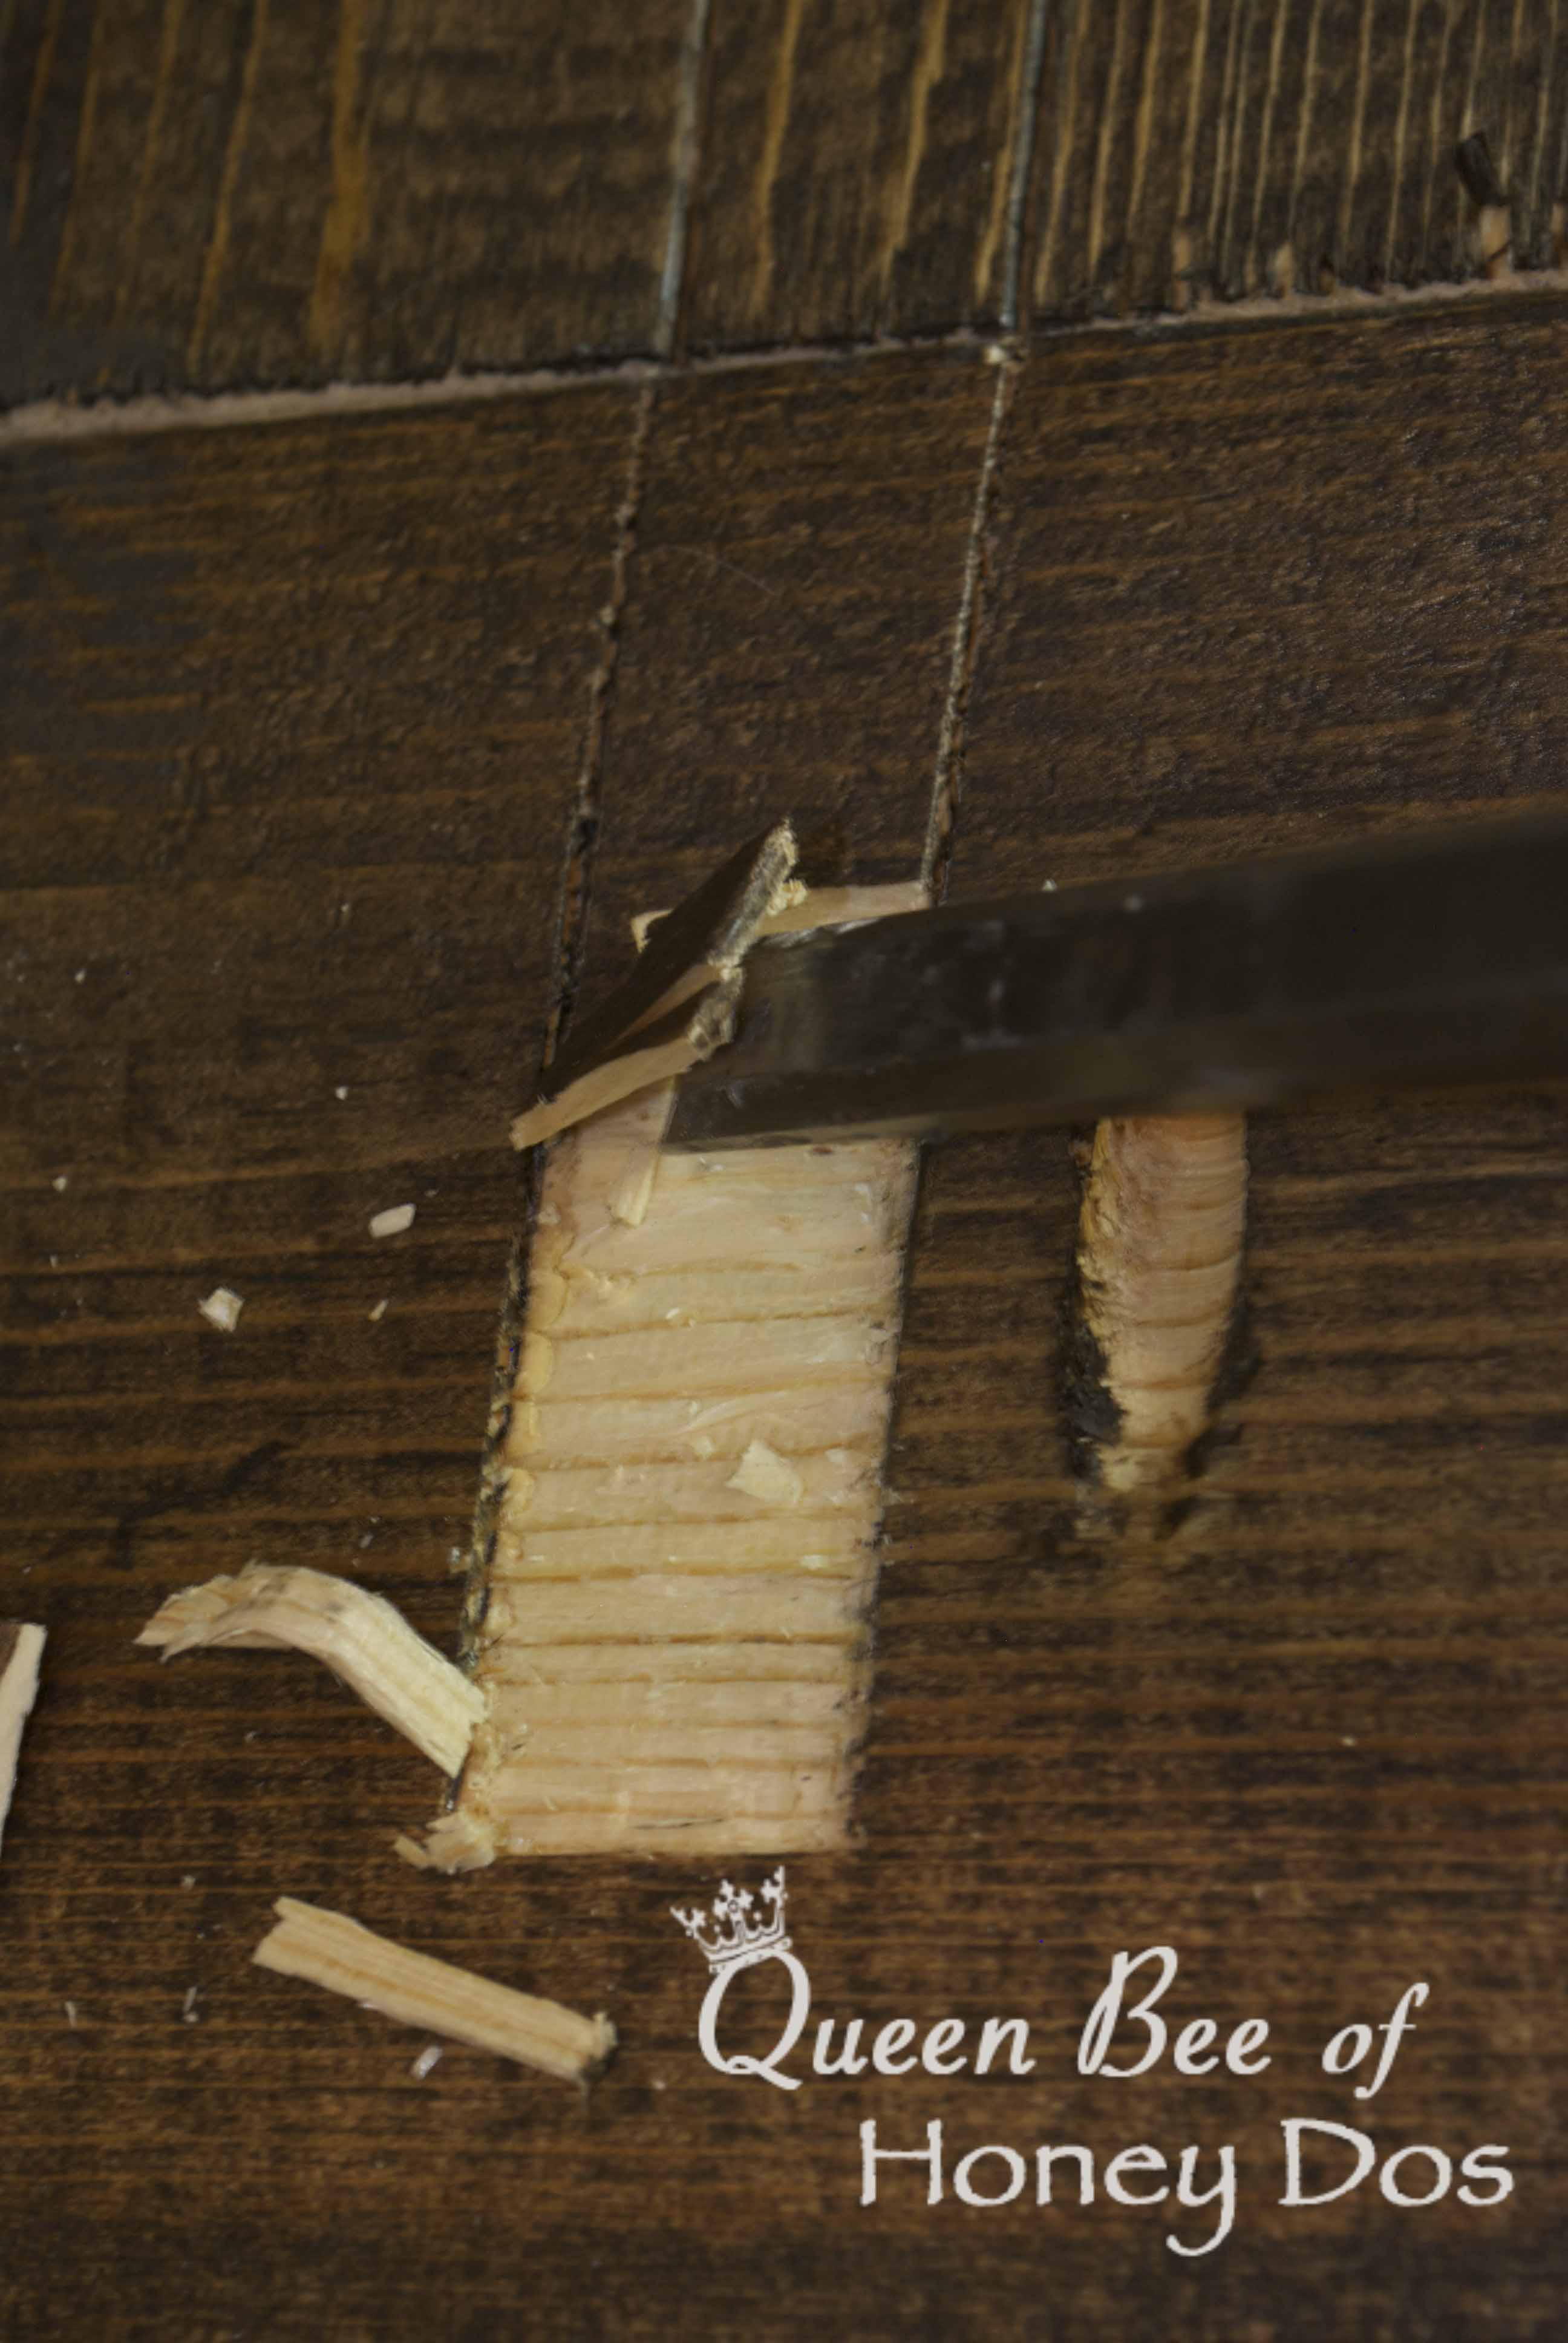
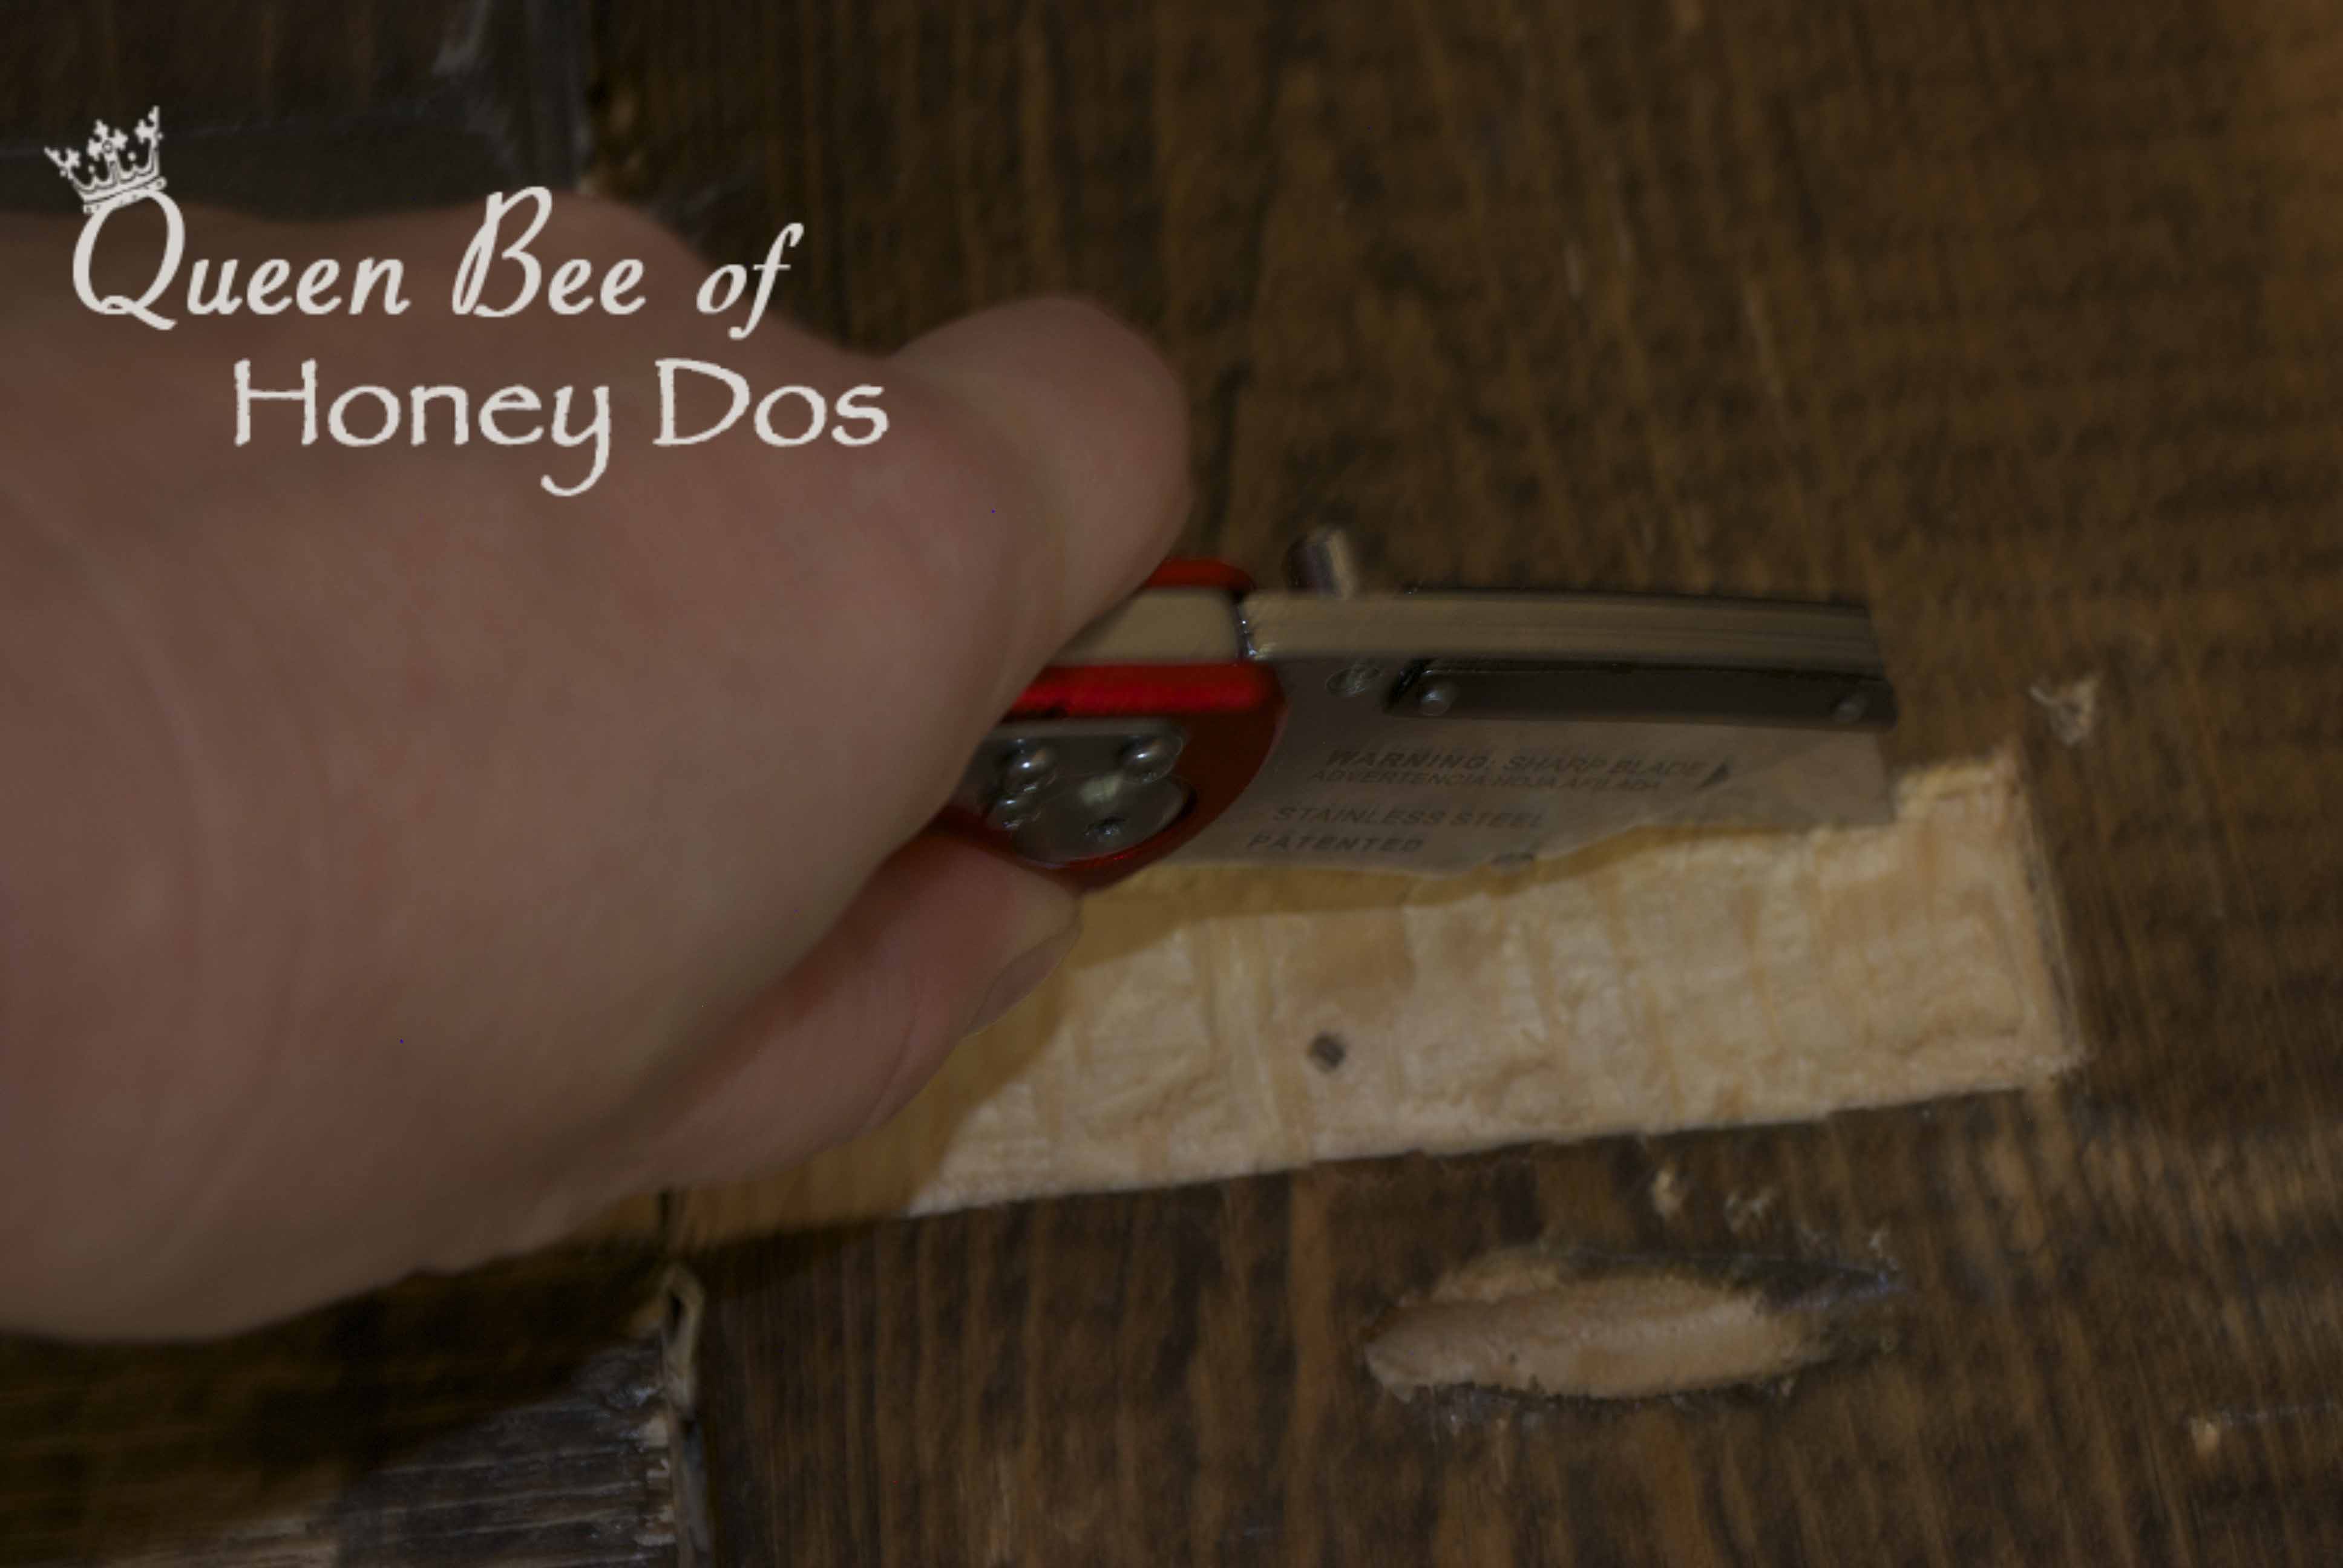
(5) Angle the chisel on one side of the scored line and chisel the wood out towards the opposite line, working in the direction of the grain line


chisel4(6) After the area has been chiseled out, clean up the edges with a utility knife. Test to see if the brace fits flush within the chiseled area. If not, repeat the steps above.


chisel5Continue until you have  nice level spaces to insert the braces. Attach the braces with wood screws. (You have probably noticed that my table is already stained. I ran out of screws and needed to make a run to the hardware store. So, I decided to go ahead with the stain in the mean time).
 

Stain and Paint:

Unknown

Unknown-1

For those of you who are curious about which colors I used for my paints, I used Sherwin William’s Urban Bronze (dark gray color) and Sherwin William’s Pavestone (Lighter gray). These are just some left over paints that I had on hand from painting the home theater room. So, feel free to go with something more to your taste.

darkwash(1) Using a lint free rag, apply the stain to the table. (2) After allowing the stain to set for 24 hrs., the paint can be applied. Start with the darker paint. To add darker paint, you will need to create a wash of 1 part paint to 4 parts water. It needs to be a watery consistency or it will look painted instead of aged. Brush the wash onto the table following the direction of the grain. You can see how it will settle into the grain lines of the wood. Allow this to dry completely. (The photo shows the paint/wash still slightly wet. Because it dries so dark that the camera doesn’t pick it up well, I had to photograph it wet). If the base color is not yet to the depth that you want, apply a second wash. I ended up doing three passes with the wash.
grayfinishAfter the base color has been achieved, the accent color can be added. (1) dip the tips of the brush into water, then lightly dip the brush into the lighter paint. It should not be dripping, but just have a small amount of paint. Remove excess paint from the brush by dabbing it on a paper towel (2) begin lightly brushing the edges and corners to add highlights. This is really going to be a judgment call on where and how much accenting that the piece needs.  You can see in the image how I started by brushing along some of the edges. If you make a mistake, use a clean damp cloth to lift and blend. Continue adding accenting until you get the final look that you want. I brushed over knots, along the sharp edges of the balusters and any imperfection that I could find in the wood. I also added some here and there along the grain lines of the wood.
Seal It

Finally, after it has been allowed to dry for 24 hours, you can add the sealer. (1) Using a lint free rag, work the Wipe on Poly in the direction of the wood grain. (2) Apply at least 2 coats, (I used 3 coats) allowing it to dry between each coat. Add some furniture felt pads to the bottom, if you have wood floors, and it is good to go!


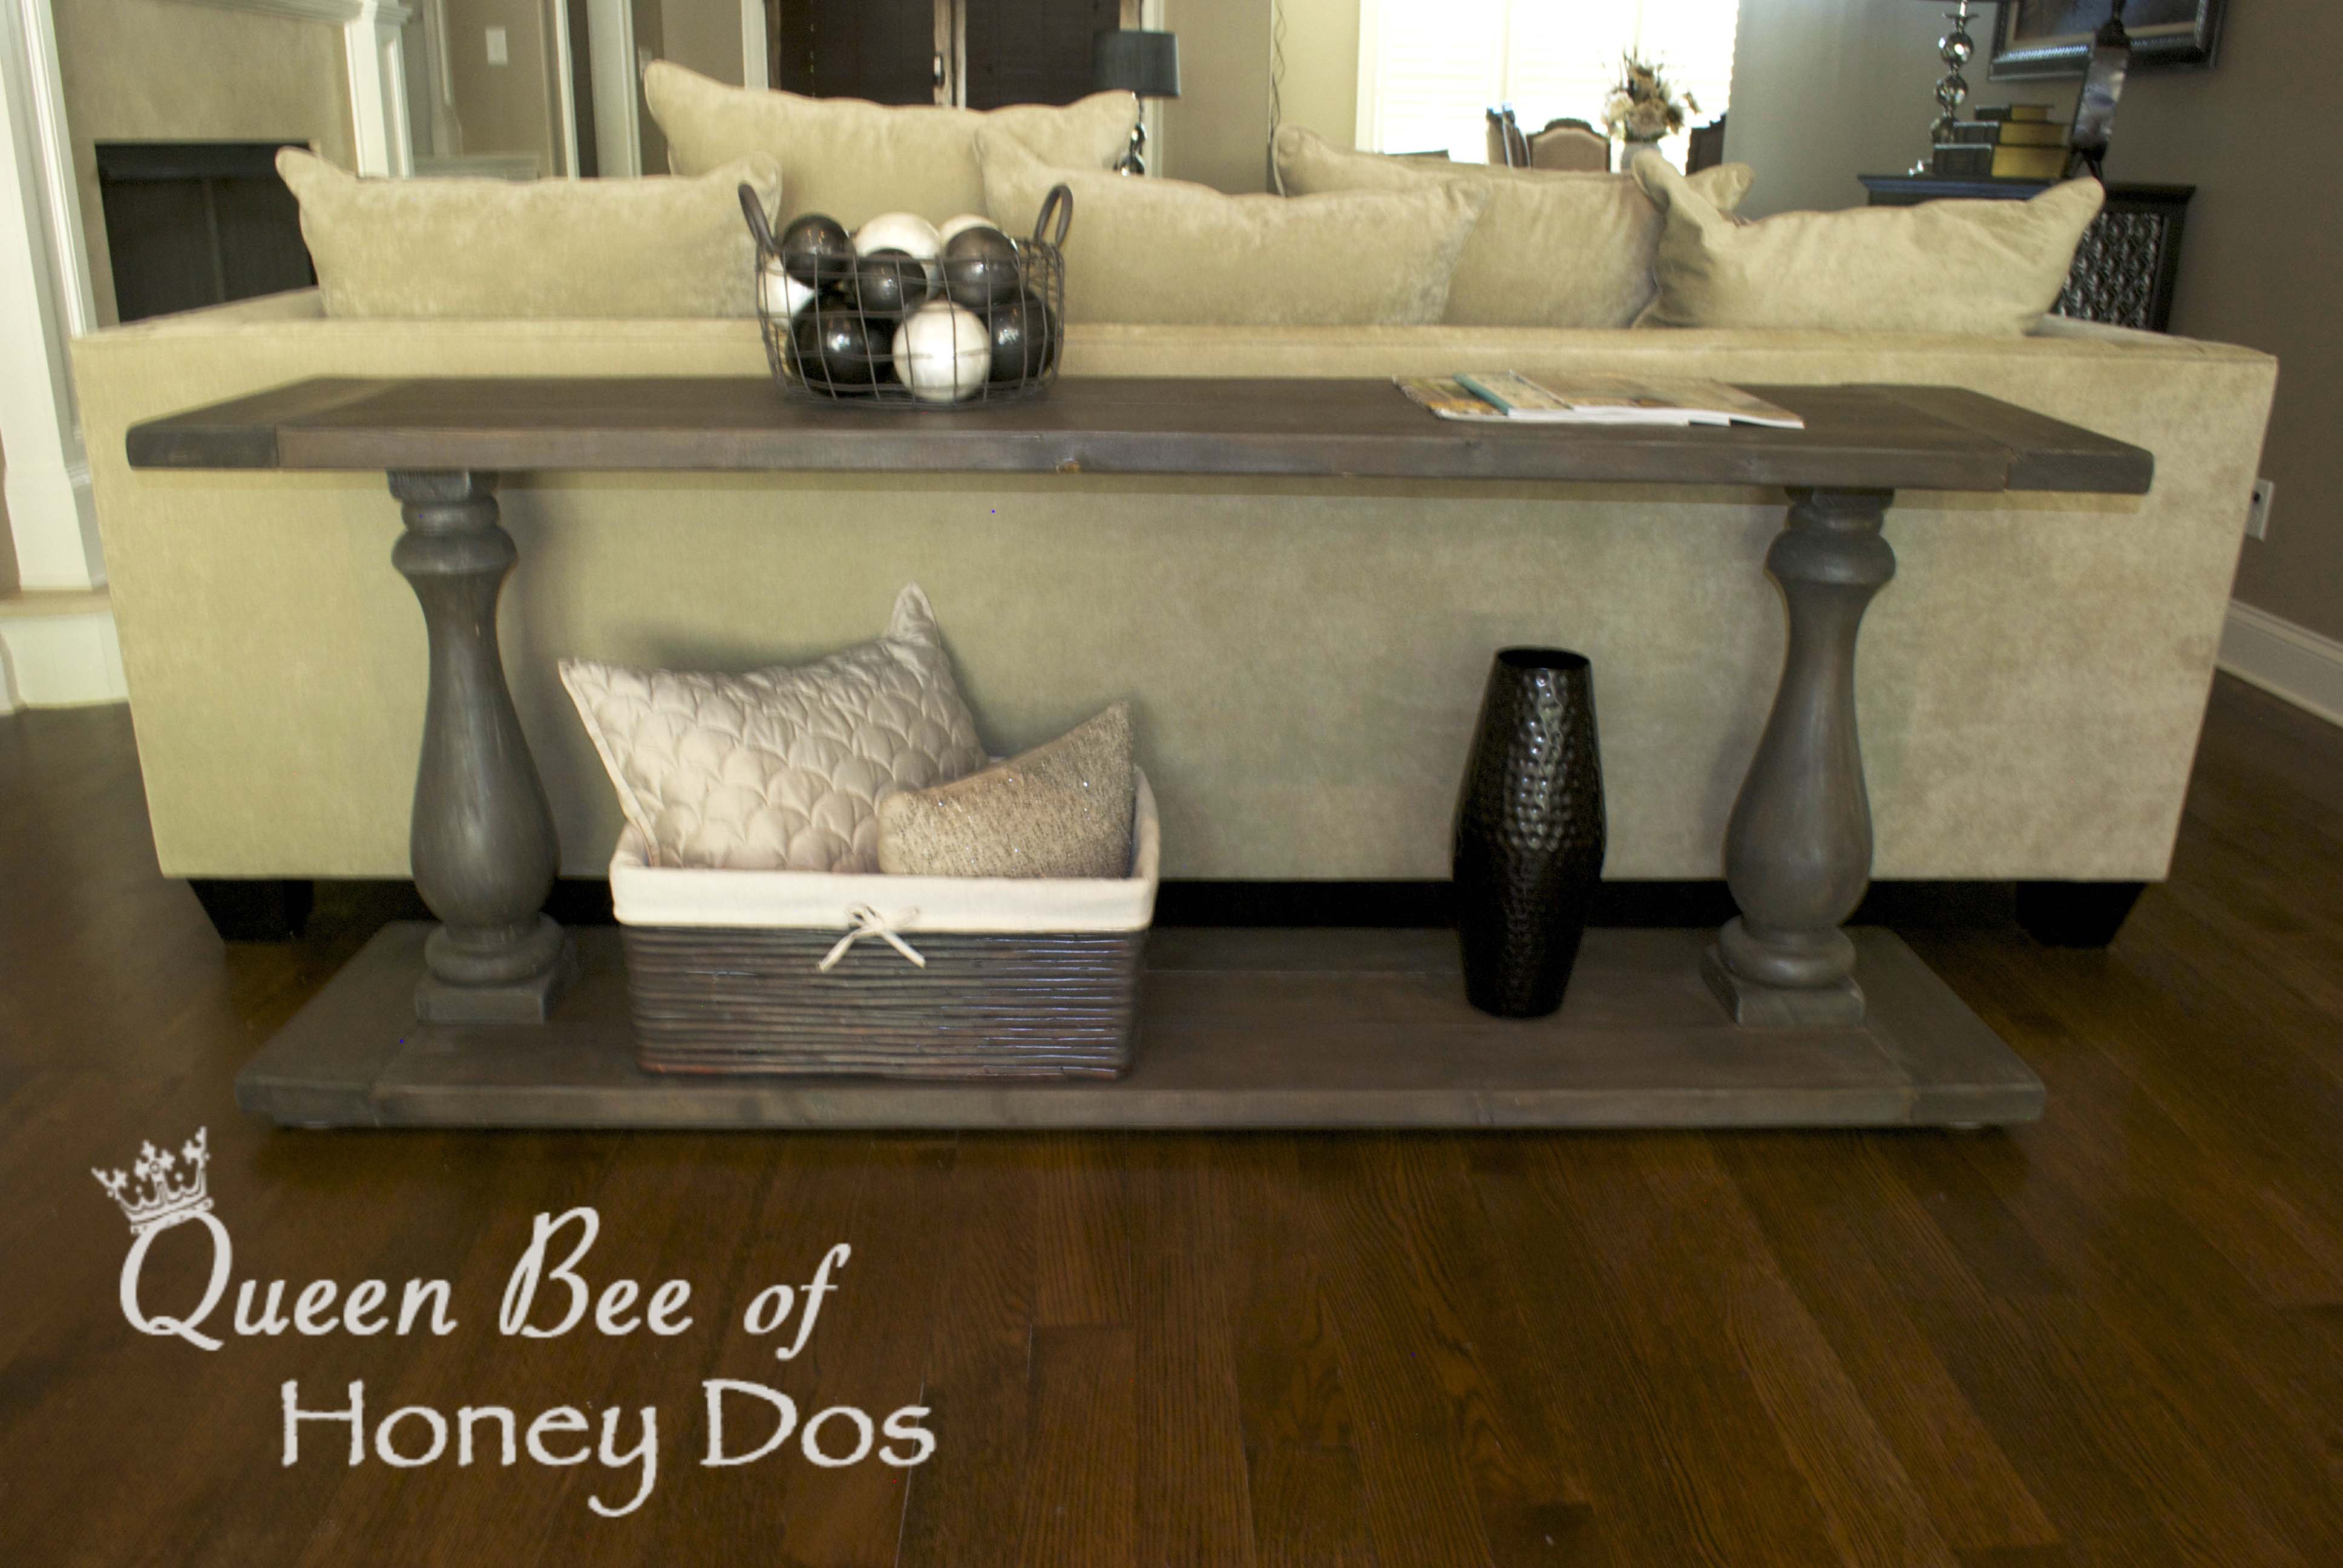
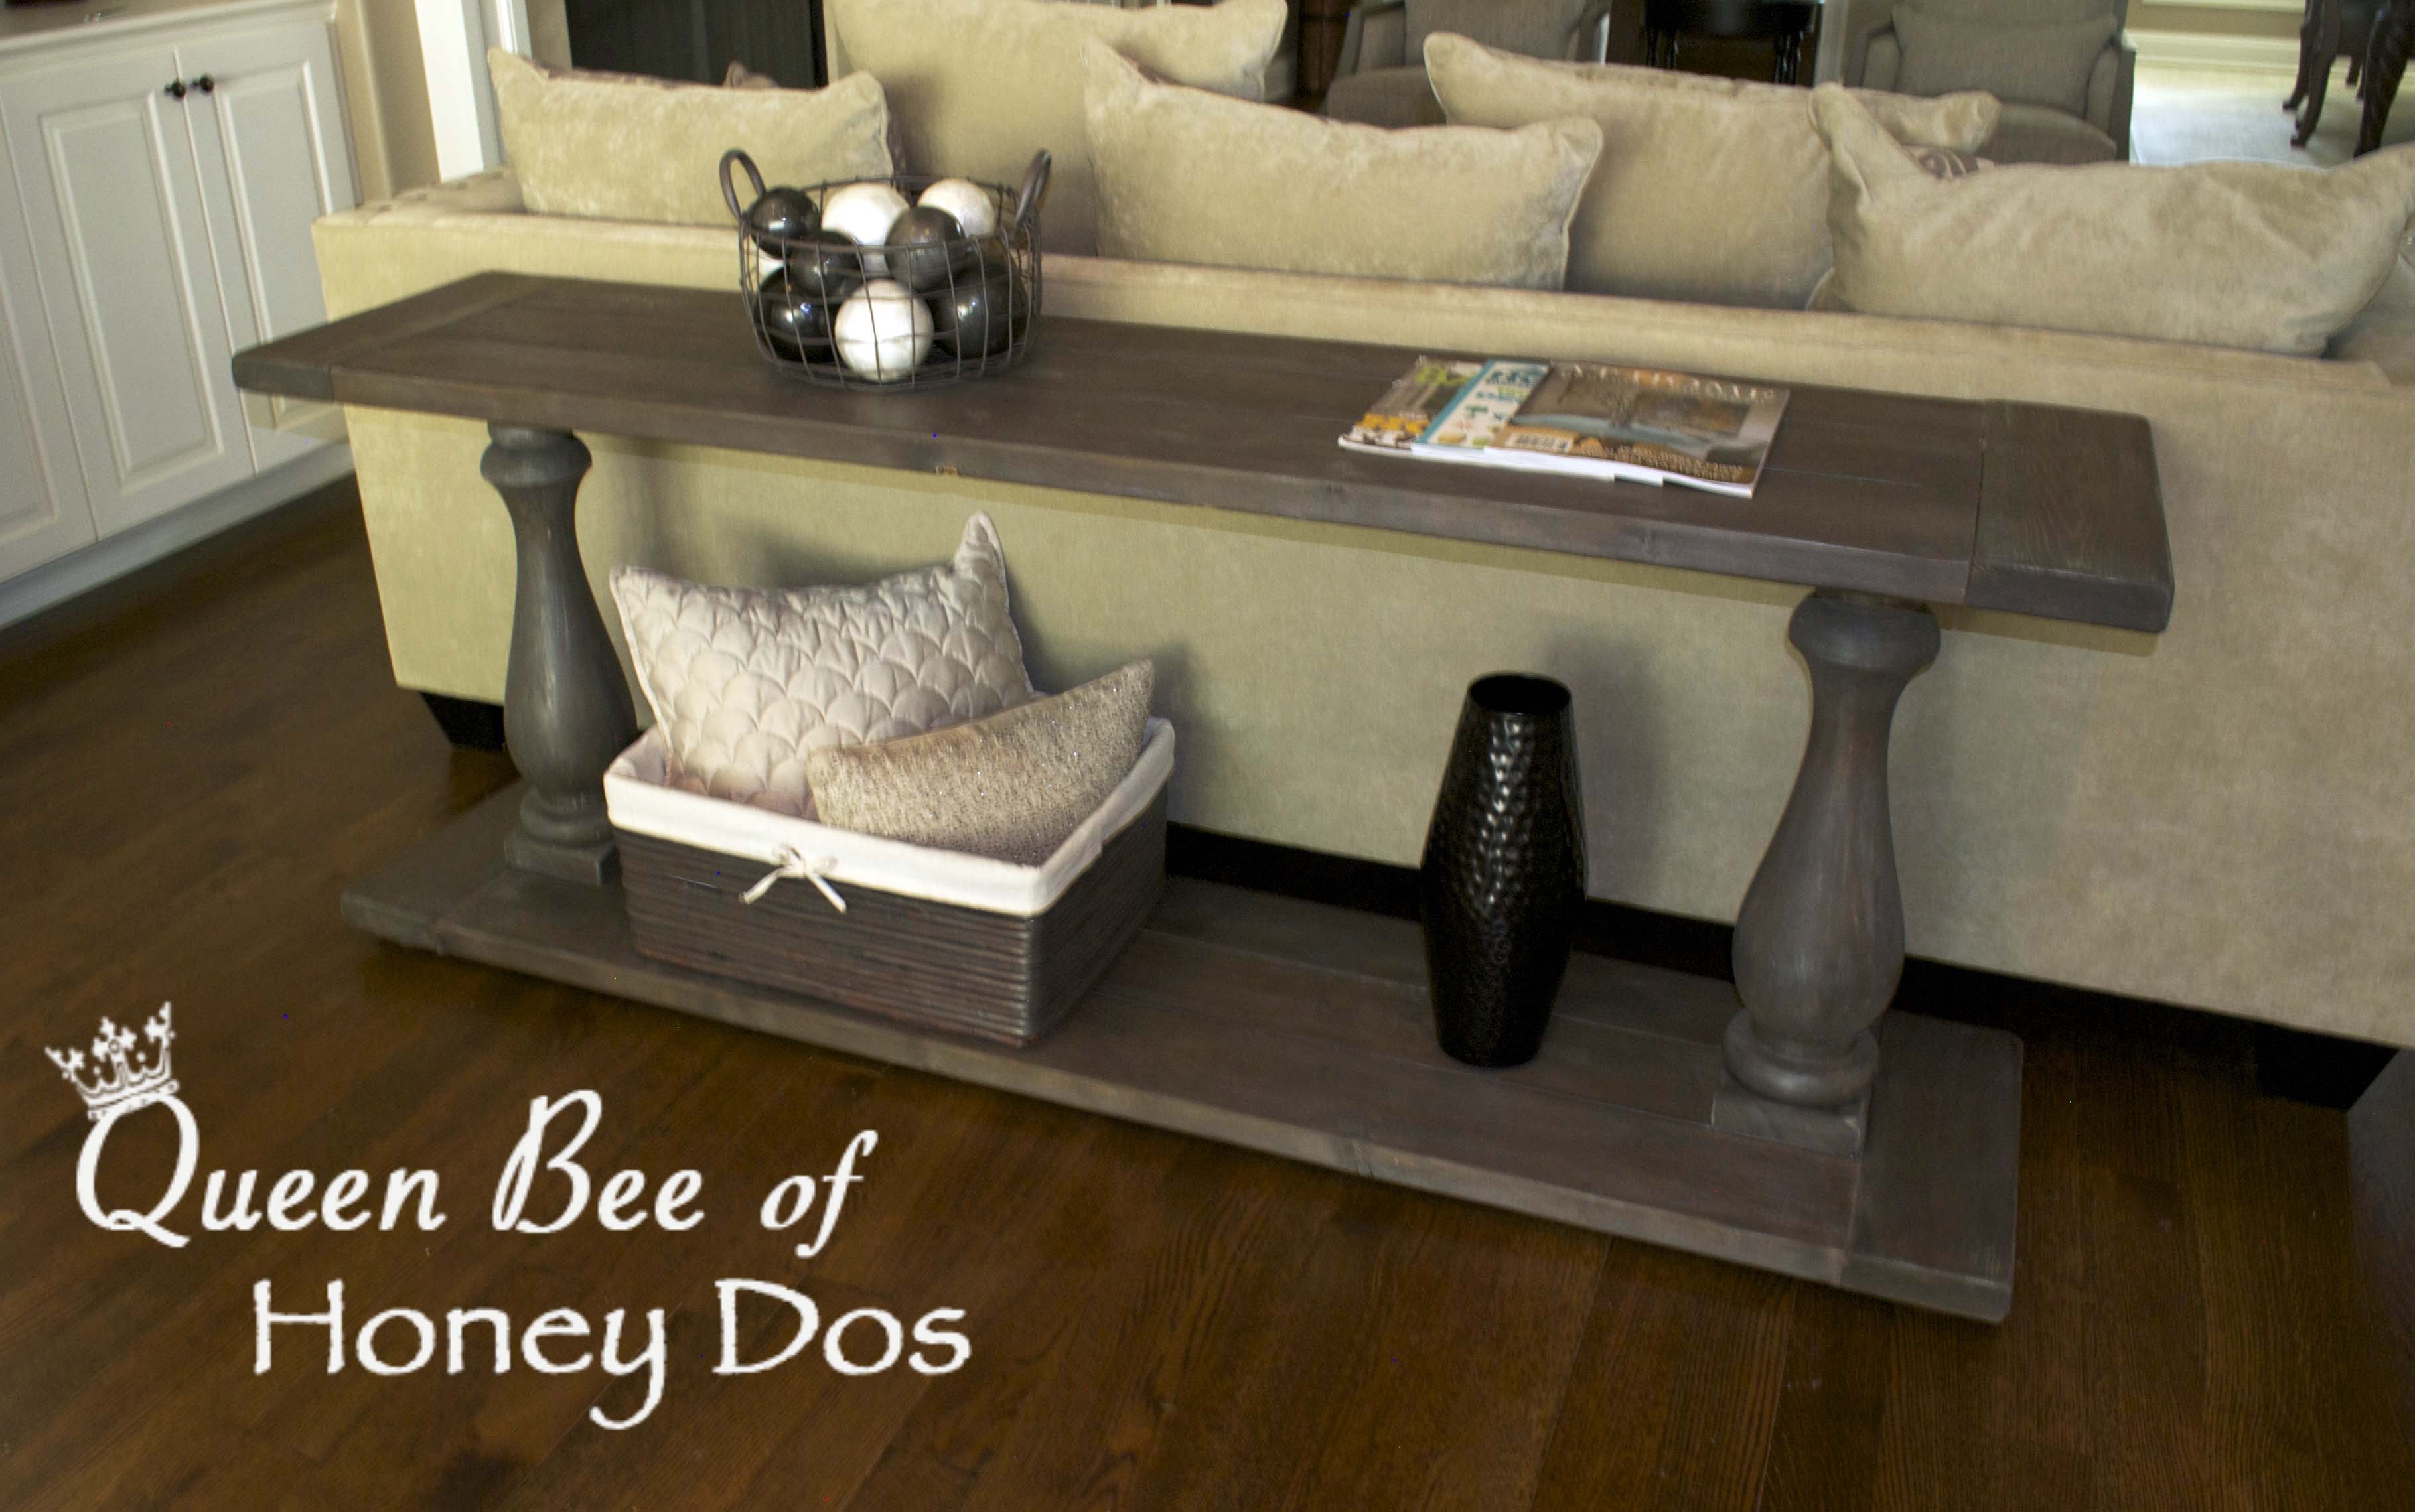
Finished Product – My weathered Gray Console…

DIY Weathered Gray Console


DIY Weathered Gray Console


Feel free to share your own your own outcomes with this project!


(This post has been linked up with Remodelaholic and Savvy Southern Style). 


52 shares
  • Share
  • Tweet

August 31, 2015, by Rachel Lynn Leave a Comment

About Rachel Lynn

Rachel is a home improvement expert with more than 20 years of experience in renovations, carpentry, and interior design and has more than 10 years experience in graphic and web design. She used the combination of her experience and knowledge to start her own digital media publishing company where she shares her knowledge across three different websites.

You may also like the following posts:


Kreg Pocket Hole Jig

Guide to Cutting Boards and Butcher Block Tops

Easy Woodworking Projects for Mother’s Day
assembling project made from dowel rods
DIY Dowel Rods Project Ideas

Reader Interactions

Please keep it clean. Comments that do not follow the Comment's Policy may be removed.

Leave a Reply Cancel reply

Your email address will not be published. Required fields are marked *

Primary Sidebar

author's imageHi & welcome to my blog. I’m Rachel – Southern gal, DIY addict & Organizing fanatic; Woodworking enthusiast, Mom of two, Wife of one. (Read more about me!)

  • Bloglovin
  • Facebook
  • Instagram
  • Pinterest
  • Twitter
  • YouTube

Footer Widget Header

AS SEEN ON:

media features

Footer

Permission

Terms of Use

Privacy Policy

Copyright © 2015–2025 · Queen Bee Of Honey Dos · Built on the Genesis Framework


Queen Bee of Honey Dos® is a participant in the Amazon Services LLC Associates Program, an affiliate advertising program designed to provide a means for us to earn fees by linking to Amazon.com and other affiliated sites.