“What can I do to upgrade my kitchen on a budget?” I get this question a lot. Everyone wants to have their dream kitchen. But, not everyone can afford the cost and/or the time that it takes for a remodel. Typically, getting a new look is as simple as a new backsplash and some fresh paint. But, if you are looking for more of a customized look, you may want to consider adding stacked cabinets. So, let’s go over how to install stacked cabinets and when it is a good solution.
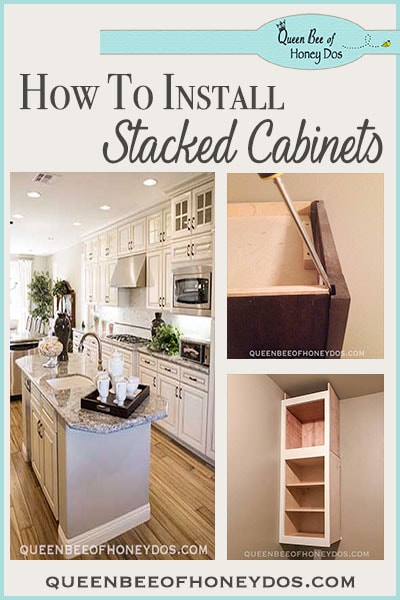
How to Install Stacked Cabinets Over Builder’s Grade…
One of the first things that I like to do for a remodel is to add stacks. With stacked cabinets, you can take an ordinary kitchen and turn it into something fabulous! In fact, other than completely replacing kitchen cabinets, adding stacks is the best way to achieve dramatic results.
When I designed my current home, I was faced with a sub-par job from our first cabinet contractor and had to refuse a set of kitchen cabinets. It is a long story which I will not bore you with. Suffice it to say, the whole experience was a disaster and really put a crunch on our time frame.
Lucky for me that I know how to build cabinets. Because I ended up taking on temporary cabinets and have been slowly replacing and upgrading them ever since. One of the things that I did for my laundry room was to add stacks to the “so-not-what-I-ordered” cabinets.
FYI – you can follow the progress on my home and all my other projects over on my Instagram. My Instagram account will allow you access to images that are not available on my blog.
When Should I Add Stacked Cabinets…
But if you are wondering whether or not adding stacked cabinets is a good decision for your kitchen, we should take a look at when they are appropriate and when they just won’t do.
Standard Builder’s Grade Cabinets:
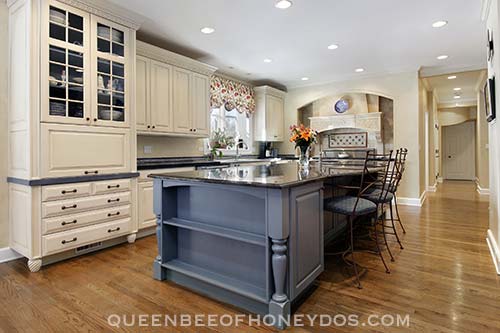
Builder’s grade cabinets are easy to spot because the wall cabinets are generally 36″ high. Sometimes, they can even be as short as 30″. These type of cabinets will benefit the most from having a stack added.
12 – 24 Inches of Space:
When you have between 12-24″ of space between the top of your cabinets and your ceiling, a stack can take your cabinet all the way to the ceiling. This is when stacked cabinets look the best. Remember, if you are adding crown molding, you need to leave room for that, or use wider width rails when building the face frames.
When I Shouldn’t Add Stacked Cabinets…
Not Enough Space:
If you don’t have at least 12″ of space above your cabinets, you probably shouldn’t bother with stacks. You won’t get much storage from such a small cabinet, and it is likely to look strange.
Instead, you can box out the area and add molding. This will create the illusion that your cabinets extend higher than they do and will look like you have expensive crown molding.

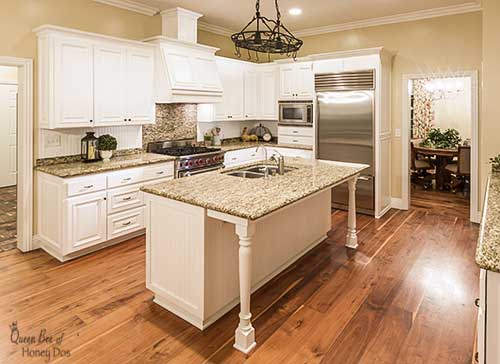
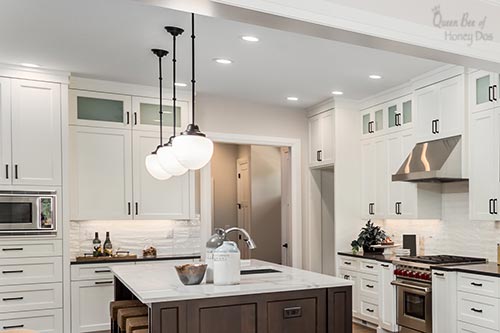
Extra High Ceiling:
If you already have tall cabinets and your ceilings are super high, there is not much benefit from adding stacks. For instance, my kitchen (above) ceiling is 13 feet high. I have 48″ cabinets and my vent hood is a massive 60″.
I could never reach the ceiling (or at least it would require an enormous effort), and my cabinets already provide plenty of space for my needs. So, I would not get enough benefit from stacks to make it worth my while.
Benefits of Installing Stacked Cabinets…
Extra Storage:
The biggest functional benefit you will get from stacked cabinets is all that extra storage space. However, you should keep in mind that a ladder will be needed to use this space. So, it is best for items that are used seasonally or for special occasion items.
Customized High-End Look:
Aesthetically, stacked cabinets will give you an instant customized kitchen. It is that dreamy kitchen result that many of us desire. Having such a high-end look will also help you increase your sale’s price should you decide to sell your home.
Raise the Ceiling Height:
Stacked cabinets also go a long way towards increasing your ceiling height. Any cabinet that ends below the ceiling will visually cut the wall into sections. This causes low ceilings to appear even lower than they actually are.
Stacked cabinets, on the other hand, give the eyes a continuous surface. This makes the ceiling appear higher and the walls appear longer.
How to Install Stacked Cabinets Over Builder’s Grade…
So, what do you need to do to add those stacked cabinets? Well, you could just buy short wall cabinets in the size that you need. If you don’t have the ability to construct your own, this is obviously your best choice.
But, if you want to take a stab a building your own stacks, you can get started by reading my post on building cabinet boxes. Then, take a look below to see how I transformed my laundry room cabinets.
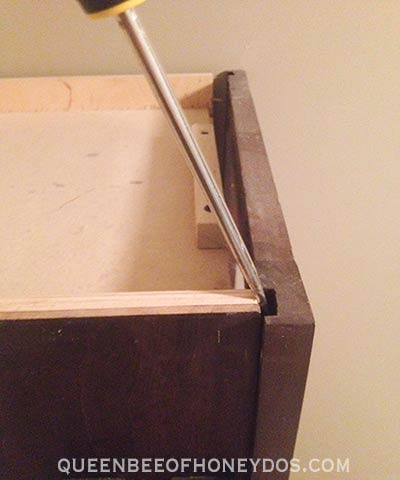
Step 1:
To get started, I first removed the face frames from my old cabinets. This may not be necessary for your particular situation. I just did this because I was planning to build all new face frames as part of my cabinet remodel.
However, if you plan to keep your face frames the way that they are, you can just leave them intact. This will help to cut down on labor and materials.
Step 2:
Next, take measurements of the cabinet space. Measure from the back wall to the front edge of your face frame. Or, in my case, measure from the back wall to the front edge of the box. Then, measure the width from edge to edge.
The height should be measured from the front of the face frame to the approximately 2-4″ from the ceiling, depending on the height of the crown molding that will be used. NOTE – It is very important to design your cabinet (face frame included) to allow for your crown molding to fit.
Step 3:
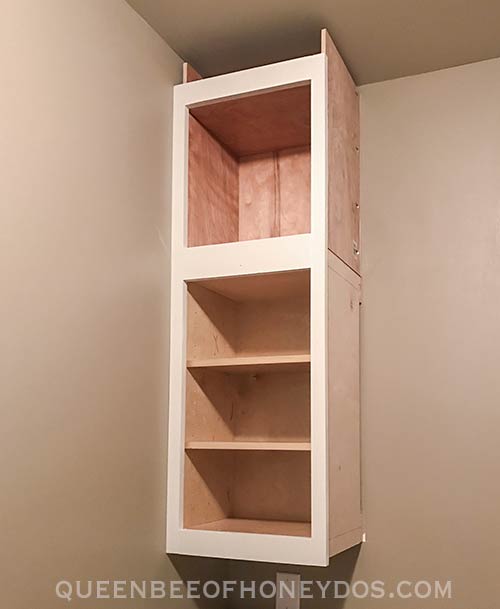
Using the instructions from my post on building cabinet boxes, construct your boxes to your dimensions. Then, build the face frames so that they have the same amount of overhang as the old cabinet.
I have a few other things going on here, so it may look a little strange at the moment. For instance, I have stripped away all of the old facing and panels. You’ll be able to catch the entire remodel when I post my laundry room reveal. But, for now, let’s just focus on the stacks.
Step 4:
Paint or stain your new stack to match the original cabinets. Allow a few weeks for the finish to cure before installing.
Step 5:
For your new doors, you can either order doors from a carpenter. There are actually several good places available online for bespoke doors and drawers. However, you will most likely need to do the finishing yourself to get it to an exact match, unless you have access to a local carpenter who can match it for you.
If you have reasonable woodworking skills, you could build your own. There are several options that are available, depending on your skill level.
If you have shaker doors, you can just follow my instructions for making shaker doors. If you have a door that you know you can’t replicate, consider glass panel doors. They are very easy to build and match well with any door style.
Final Comments…
Stacked cabinets are just one of the many DIYs available to create a designer kitchen, but it is my favorite. If you want to create an entire kitchen remodel using stacks, you can check out my instructions for designing your kitchen like a pro.
– PIN IT –


Erin says
What do you do with the “seam” if you keep the face frame from the existing cabinet….we have cabinets that look very much like the “When Should I Add Stacked Cabinets…” picture. We can take the crown molding down to reuse along the ceiling when we install the upper cabinets, but there will be a line between the old and new and I’m not sure how that will look or how to cover or hide that seam so it doesn’t show.
Rachel Lynn says
You can add a decorative molding. I sometimes use a narrow bead molding along those lines. A trim with no ornamentation will look the most natural. I’d recommend doing a search on Google, Pinterest, or Houzz to see how some of the stacks are trimmed out and to get an idea on what you want to do.
Carmen says
Hi, Would you recommend glass doors or just plain doors for 12-inch high stacked kitchen cabinets? Are 12-inch doors too small for glass panels, esthetically speaking? Thank you.
Carmen says
Hi, Would you recommend glass doors or just plain doors for 12-inch high stacked kitchen cabinets? Are 12-inch doors too small for glass panels, esthetically speking ? Thank you.
Rachel Lynn says
The smallest standard height for upper stacks is 15″. That being said, I have done 14″ before but never as small as 12″. For 8′ ceilings, I would recommend either going with as much as the full 42″ in upper cabinets. For 9′ ceilings, you can do 36″ cabinets with up to 18″ stacks. Normally, I would go with between 14″-15″ stacks with 3″-4″ crown. If you absolutely have only 12″ of space to utilize, you still have a few options. I would either fill the entire space with crown and molding or do an open (finished interior) stack for display purposes only. If doors are a must, use double-width doors (no glass) with flip-up hinges. Adding standard width glass doors would, in my opinion, look wonky for such a short cabinet.