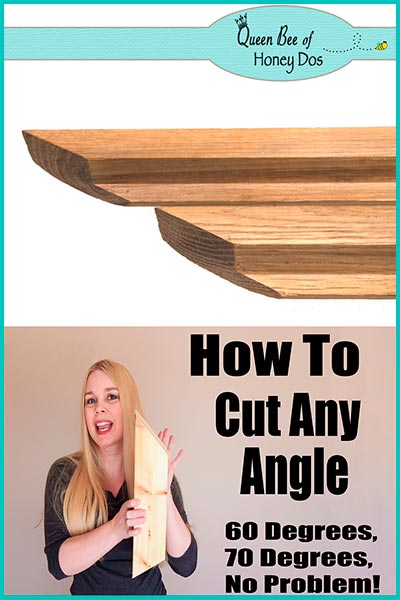
Have you ever wondered how people get all those elaborate angles in their woodwork? I use to only use them when I was doing an inlay in wood flooring. Then, I started building decor pieces for my home, and I ventured fully into the territory of mitered angles that go beyond the standard 45º cut. With furniture and cabinetry, it is all about creating curves and box shapes. But when you want to get creative with something, you may find that you need some weird angle – like a 50º, 60º, or 70º miter. It can present a conundrum. So, I thought that I would show you how to cut any angle with a miter saw.
(This post may contain affiliate links (*). That means that I make a small commission from sales that result through these links, at no additional cost to you. You can read my full disclosure here.)
How To Cut Any Angle With a Miter Saw…
To make thing easier to understand, I am including my Youtube channel video on this topic. However, I will explain the reasoning behind the math below. But before you get started, I do want to remind you that I am only offering this for information purposes only, and I can’t account for one’s level of skill, knowledge, or common sense. ?
But seriously, you should be aware that any type of saw presents the potential for injuries. So, make sure that you understand the dangers, and I recommend that you read my disclaimer statement below. I also recommend that you make sure that your miter saw is calibrated to give you accurate cuts. You can read how to do that here.

So, here is the video. If you like it, be sure to jump over to my Youtube channel and subscribe. I am posting new videos about once per week – sometimes more, sometimes less, depending on my workload. (Video Corrections: I am using a 6x6 post, not a 4x4 as I stated in the video. However, either will work.)
How To Cut Any Angle With a Miter Saw – Q & A

To better explain the math that I use (and to answer the biggest question that I have been getting emails about on this), I thought that we should use a visual. As you can see, the fence is exactly 90º away from zero, or at least it should be. If it is not calibrated properly, it may not be precise. So, just make sure that it is calibrated before you start your cuts.
Now, if it were possible to set the angle to 70º on my miter saw, then it would cut somewhere around that yellow line. This location would also place the cut just 20º away from the fence. This is the first part of the math (90 – 70 = 20). We need to know how far away from the fence that we would be for the next step.
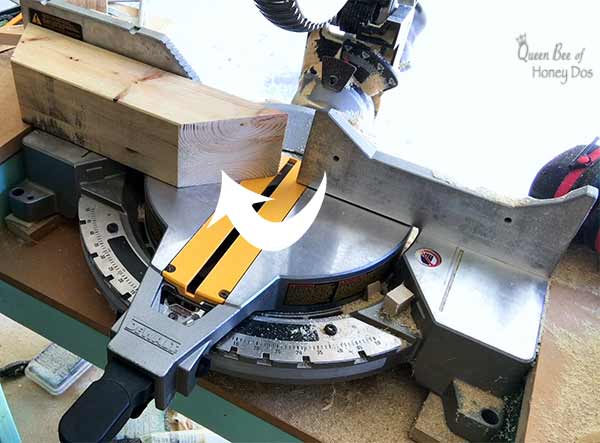
The next step would be to figure out where to set the miter saw based on the jig. The jig will basically become your new fence. So, since we needed to be 20º from the fence before, we will subtract that amount from our current jig angle. (45 – 20 = 25). So, we set the miter saw to 25º in order to get that 70º cut.
So why can’t you just add to 45 to get 70? (45 + ? = 70) It comes out to the same, right? Well, let’s say that you use the 30º jig to make your cuts. And, you will sometimes need to do that because some cuts are just easier and safer to do with the 30º jig. Now, you can’t just add to 30 to get the results that you want.
Let’s say for example that you want a 60º cut (as noted in the video). Well, 30 + 30 = 60, right? But, that would be wrong. The math would be 90 – 30 = 30, and 30 – 30 = 0. So, to get that 60º cut, you would set your miter saw to 0.
Of course, with the 45º jig, you would come out to 15. But, I didn’t want to complicate things by giving you two different formulas. This way, you can just use the two-step method for any jig and it will work.
Also, note that you have to clamp the jig in place. This is vitally important! I just used a basic clamp in this video, because I know everyone doesn’t have vertical clamps* to accessorize their miter saws. However, if you can afford to purchase one, I would recommend doing so.
Final Comments…
Anyway, I just thought that you might find this information useful in your workshop. Since Christmas is just right around the corner, I will be doing several projects that require cuts that are greater than 45º. So if you are looking for some examples of how this can come in handy, I will be providing some within the coming weeks!

– Pin It –
– Pin It –


Scott Freeman says
Thank you so much! Simple yet effective
Rachel Lynn says
Glad to help.
Jack Logan says
Hey Rachel,
I enjoyed this helpful article. Honestly I wrote a similar article on my site but I must say this one was even more helpful than may own.
I am going to put a link back to it. Thank you and keep posting such helpful content.
Anonymous says
fOR A 70 DEG CUT LONG POINT , i’VE BEEN CUTTING A 20 DEG ,THEN TURN THE SAW TO ZERO WHILE HOLDING THE 20 DEG. TO THE FENCE .CUT OFF THE SHORT POINT OF THE 20 DEG. TO END UP WITH A 70 DEG. CUT . ITS A BIT RISKY. I NEVER THOUGHT OF TURNING THE SAW AT A 45. MUCH SAFER THANK YOU
Rachel Lynn says
Glad to help!
Glenda Prieve says
I am an amateur wood worker at 65. I have an order to make a shelf that looks like a christmas tree. It uses 1 x 4s. In the instructions it says ” cut 1 x 4 @ 18 3/4 longest point to longest both ends cut at 25 degree bevel.” I understand how to cut angels on my miter saw but how to you cut it to the specific size making the angels are right.
Rachel Lynn says
Hi Glenda! First, do you mean that you need to cut a 25 degree “bevel”at each end or at 25 degree “miter”. I know we often use those terms interchangeably but they mean different things. Without seeing the tree, in my mind I picture miter cuts resulting in a 2 dimensional tree and a bevel being used to create a 3 dimensional tree. That being said, the Pythagorean theorem is the technique that is used to determine angles and lengths. If geometry is not your thing, you can always use a carpenters protractor to mark the lines. As you described it, the 18 3/4″ will be the long side of the wood and the angles will move in toward the short side of the wood. i.e your angles should look something like this \ / Cut just outside the lines for a tight fit.
kws says
very informative article about angles cutting,
All the points have been covered in this content and everyone can easily understand it and improves their cutting experience. Really I have learned something new from this valuable post.
i will appreciate it and highly recommended it. Thanks for sharing your experience with us. keep up the good work