Sometimes we just need a little inspiration to get our juices flowing for that next home improvement project. Because everyone wants to have that key feature element in a room, I thought that a beautiful fireplace is a good place to start. So, today I have decided to offer you some of my favorite remodeled fireplaces. If you have a fireplace that needs some love, your gonna want to see these!
Remodeled Fireplaces – Before & After…
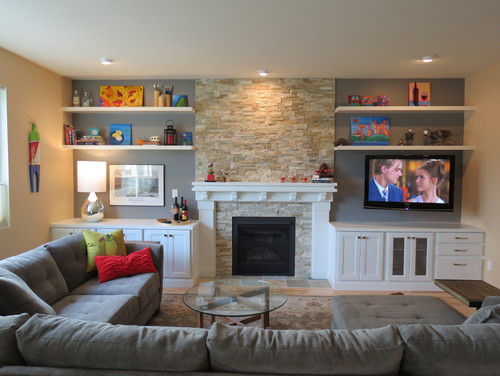
This living room looks very cozy and has a nice feature fireplace. However, it wasn’t always so. Take a look below at the before images and see what went into this remodel.
(By LanaCar)
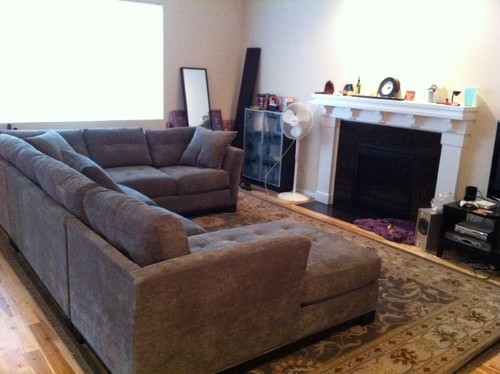
Before anything was done, you can see (if you focus on the specifics) that the floor is a nice hickory wood with a natural finish, and the sofa is actually in very good condition. However, all of the positives in this room are severely outweighed by the drab wall color and the understated feature (i.e the fireplace).
The room also looks cluttered because there just isn’t a place to store this homeowners necessities. The stereo system has a home on the floor to the right of the fireplace, and other items have been place in a small cabinet to the right.
(By LanaCar)
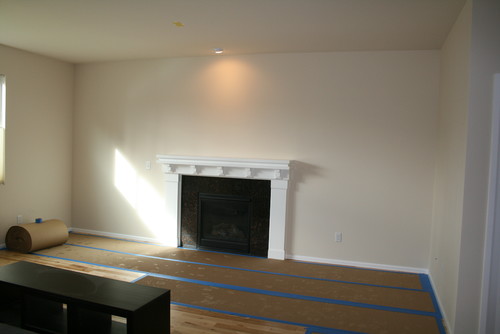
So, where to begin? Well, naturally you would begin with removing all the furniture and clutter. Then, prep those floors to protect them from construction damage.
(By LanaCar)
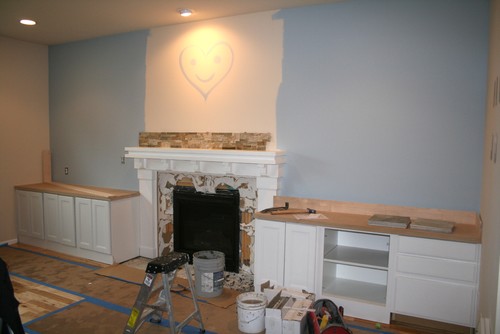
Now, this homeowner was happy with the mantle that they had. So, that gave them a good starting point. Built in on either side of the fireplace will solve the issue with storage. So, a nice set have been installed. (notice, the open shelves in the center right cabinet. A perfect place for cable boxes with an unobstructed signal for the remotes).
Next, the old granite tiles were removed from the fireplace surround. In their place, a more modern, but rustic, faux ledge stone is being installed. In addition, the walls will now have a beautiful blue paint color to accent the shelving.
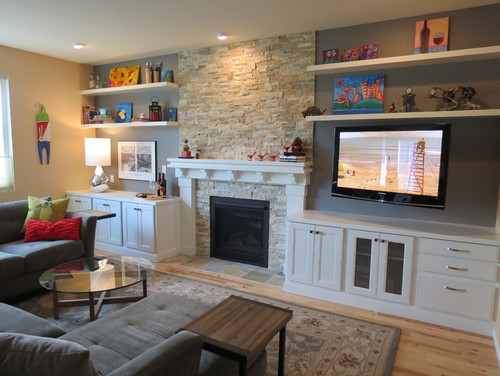
A few floating shelves later and some finishing touch ups and the room now looks bright and refined. Notice how the furniture and throw rug no longer have that drab appearance, but seem to fit perfectly in the space.
Remodeled Fireplaces – Number 2

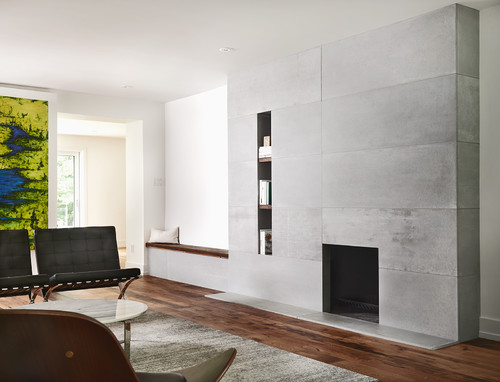
Here, we have a complete gut job with the fireplace being the central feature of the room. The old fireplace has been boxed in to extended all the way to the ceiling, and to cover the duct work that runs along the wall to the left.
(Photo by Anthony Concrete Design)
After covering the newly constructed box with concrete slabs (and of course, installing floors and finishing walls) the new room is quite striking. A small nice of shelves was placed in the space between the fireplace and the duct work to create some interest, and the concrete was extended to cover the bench to the left.
Remodeled Fireplaces – Number 3…
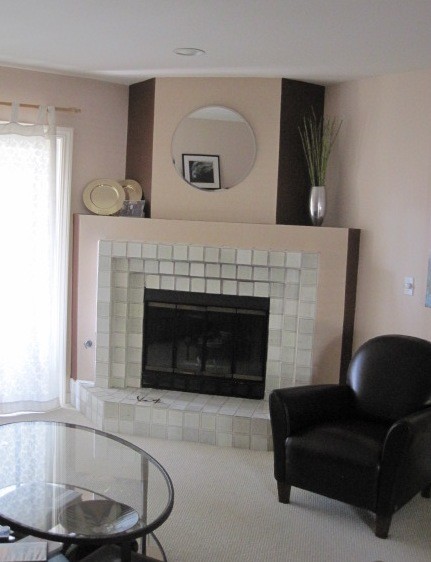
This fireplace looks dated and too taste specific to be found pleasing by the vast majority. Luckily, this overhaul will be an easy one. Just remove the small tiles from the surround and hearth, and then it is just a matter of choosing a material.
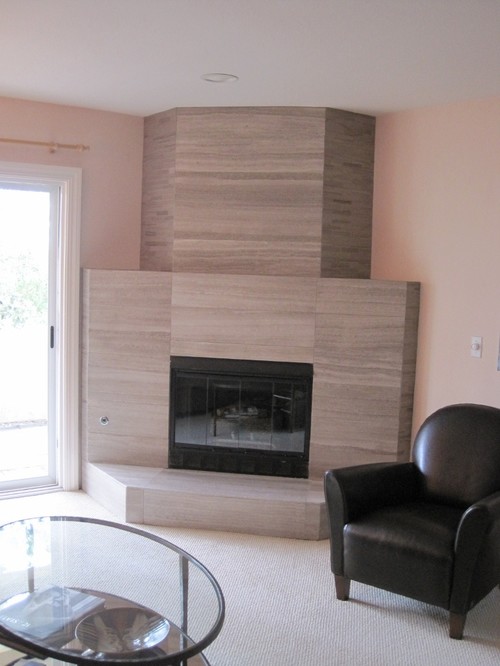
The homeowner chose a neutral tile that was installed to completely cover the area. With this new makeover, the fireplace becomes a blank slate for any person to apply their personal flair to. While, still maintaining its place as the rooms feature.
More Options for Remodeled Fireplaces…
(Photo by Houzz)
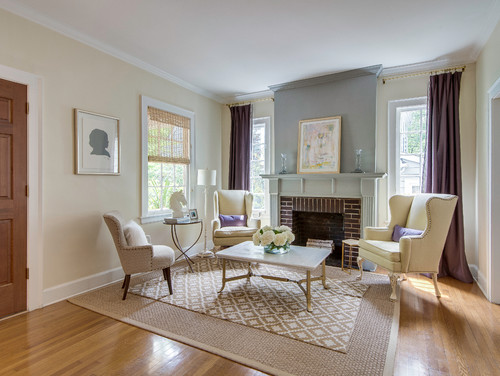
So, I have given you several before and afters, with a peek inside the construction process, just to get the juices flowing. Now I want to show you some of my favorite fireplaces, beginning with this tranquil sitting room.
If you have an old brick fireplace that protrudes into a room, consider boxing it in all the way to the ceiling. Allow some of the bricks to serve as the surround. Add a Traditional mantle, fluted sides, and wrap the crown molding at the top. Then, paint the new boxed out fireplace in a contrasting color. Tip: Make sure to paint the crown molding over the boxed area with the new color. This will really make a feature wall that is fresh and elegant.
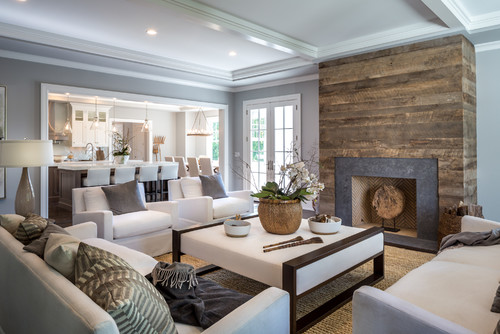
Another great option for an old and tired fireplace is to cover it with reclaimed wood. The blending of old and new in a room can create balance. (Tip: a sleek, modern tile choice for the fireplace surround will add more contrast to the rustic planks, and give it a rustic industrial look).
(Photo by Houzz)
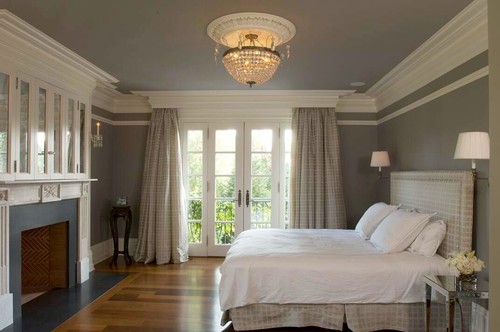
If you have a bedroom with an old fireplace, consider creating a mill work masterpiece. A boxed out fireplace with glass door is a great way to have a TV without sacrificing the beauty to electronics. If you add some dramatic crown all the way around the room, you can marry the fireplace to the mill work and create a stunning bedroom. (Tip: Keep the surround tile in a dark, understated color so that it doesn’t fight with the mill work for attention).
Final Thoughts…
Well, that’s all for today. I believe that I have gotten my own created juices flowing while writing this article. Now, I believe I will be off to plan an overhaul on one of my fireplaces. ;-)


Please keep it clean. Comments that do not follow the Comment's Policy may be removed.