How To – Winterize Outdoor Kitchen Sink…
Well, the weather has really begun to get cold here in the South. So, I know that it is time to close down the outdoor kitchen and get it ready to survive the winter. If you have an outdoor sink, you may want to read this article to make sure that you have your sink ready to go, as well.

So this is my outdoor sink. As you can see, it has just the basic, everyday, outdoor faucet. This is the type of faucet that most people have for their outdoor sinks. (If you have something different, you will need to check with your installation manual for specifics.) As you can see, it is a dreary and wet day here. The leaves have been falling and everything is covered with a light film of grime from the trees. What you can’t see is that it is also uncomfortably cold outside. So, a perfect day to have to mess with plumbing. ;-)
How To – Winterize Outdoor Kitchen Sink (Step 1)
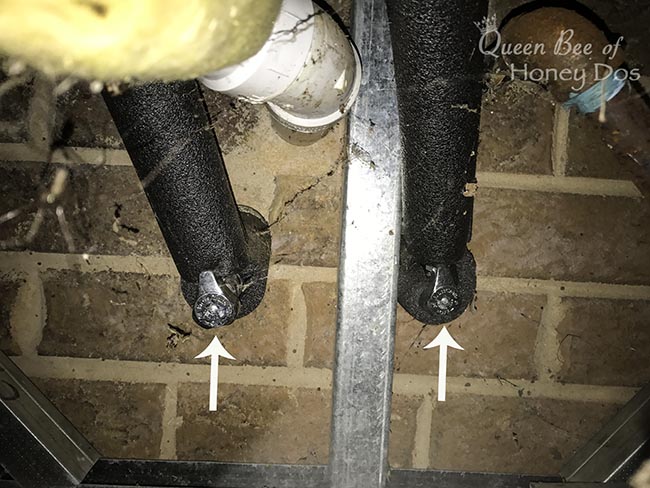
So, of course I have to crawl under the sink structure to turn off the water valves. (Did I mention that I hate the spider webs that accumulate during the year?) These valves are still in the on position. To get them off, turn them so that they are not pointing in the same direction as the water lines.
How To – Winterize Outdoor Kitchen Sink (Step 2)
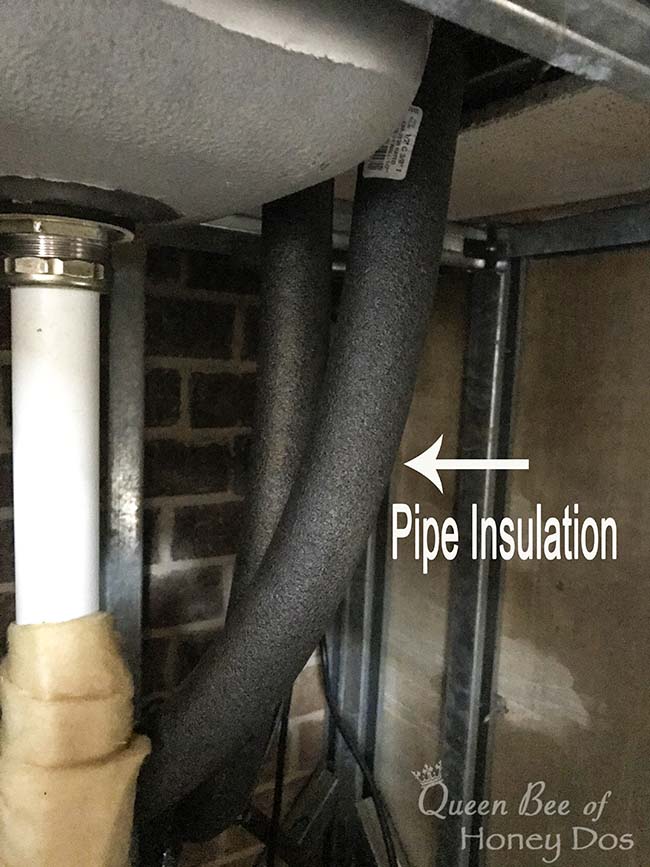
Now, hopefully your lines are already wrapped in insulation. But if not, you need to get that taken care of now. My water lines have foam insulation on them. This can be purchased at any hardware store. It looks like black pool noodles and slips right around the pipes. I also wrapped some left over insulation around the p-trap in the drain line. Since the p-trap always holds water, it is a good idea to insulate here, as well.
How To – Winterize Outdoor Kitchen Sink (Step 3)
Now, this next part is overlooked a lot of the time. Then, come spring when you turn the water back on, you end up with water leaking all around the faucet, and you are left wondering “what did I do wrong?”
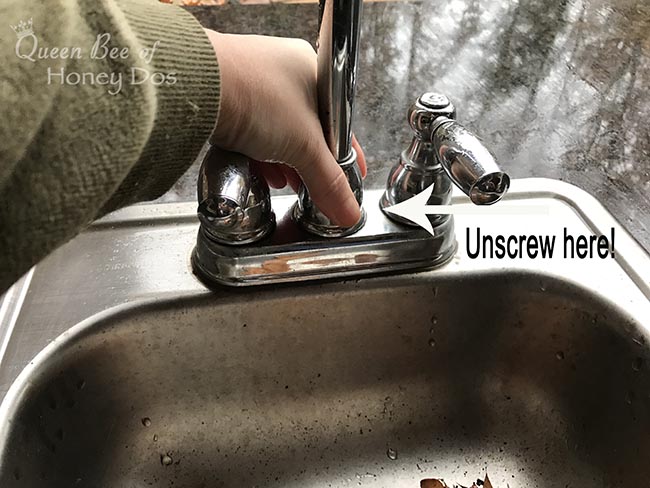
After turning off the water, turn the faucet handles to the on position to allow any excess water to drain. Then, unscrew the faucet from the base by turning the base counterclockwise. (This is where you will need to check out your manual, if you have a different faucet type than this. You want to know if the structure has any PVC within the faucet. If so, you will need to know how to properly winterize it).
How To – Winterize Outdoor Kitchen Sink (step 4)
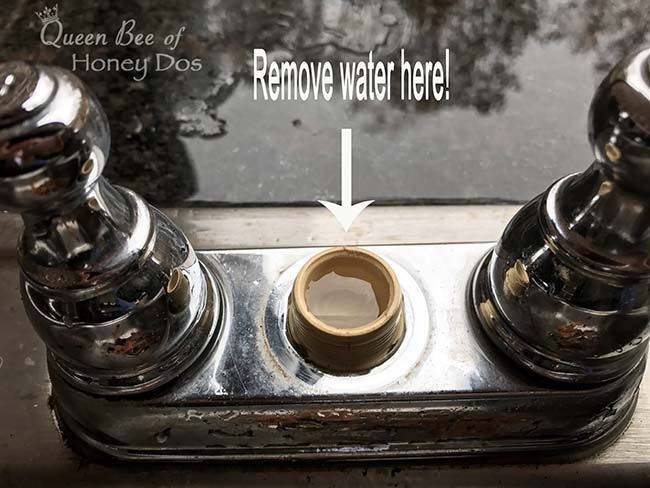
Once you have loosened the faucet, pull up and remove it. Now, you will see that there is water beneath where the faucet was screwed in place. You need to remove all of that water. A paper towel will soak it up just fine. But, if this step is skipped, the water will freeze and crack this piece. The result will be that you have to buy a new faucet and have it installed.
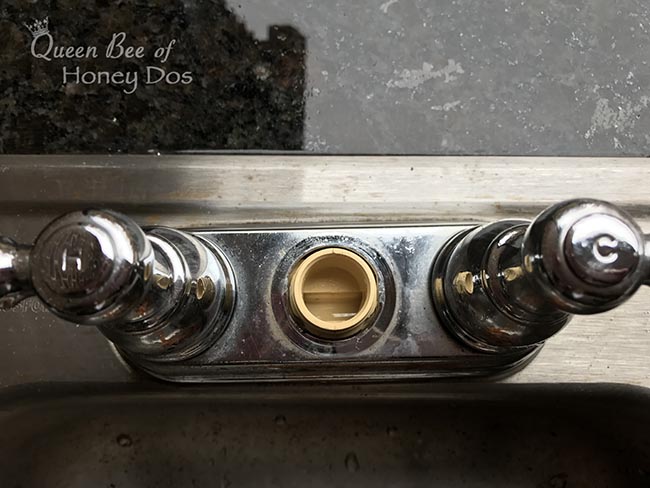
Here is mine after I dried it out.
How To – Winterize Outdoor Kitchen Sink (Step 5)
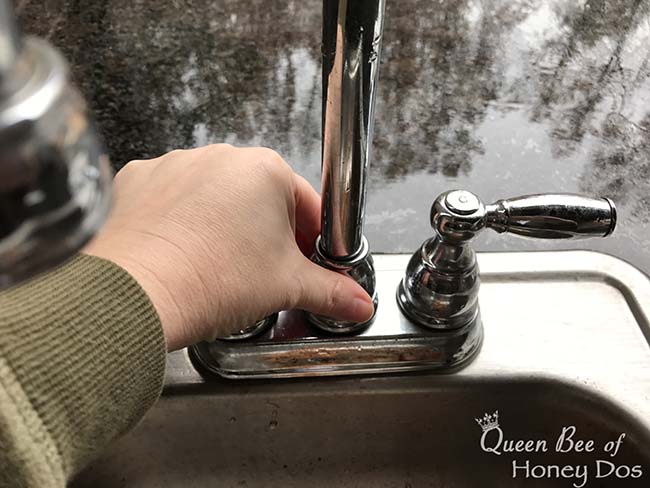
Then, I replace the faucet and turn the handles back to the off position. Now, I just need to clean everything and finish with the rest of my outdoor winterizing.


Please keep it clean. Comments that do not follow the Comment's Policy may be removed.