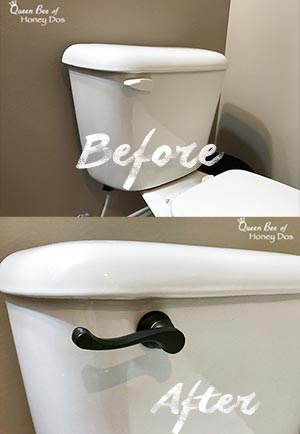
Sometimes, it’s the really small touches that make the difference in a home’s decor. This is very apparent to me when I walk into a bathroom and admire the lovely toilet flush levers that some bathrooms have. Yes, you may think it is a sad day when someone is admiring toilet levers, but then again, I am a stickler for the details. Of course, I never notice the plain levers. For some reason, my eyes just never settle on them unless they are nice. However, when I do notice them, it really solidifies that impression of quality and high-end finishes. So, if you have ever wondered how to upgrade toilet flush levers, this is for you.
(This post may contain affiliate links (*). That means that I make a small commission from sales that result through these links, at no additional cost to you. You can read my full disclosure here.)
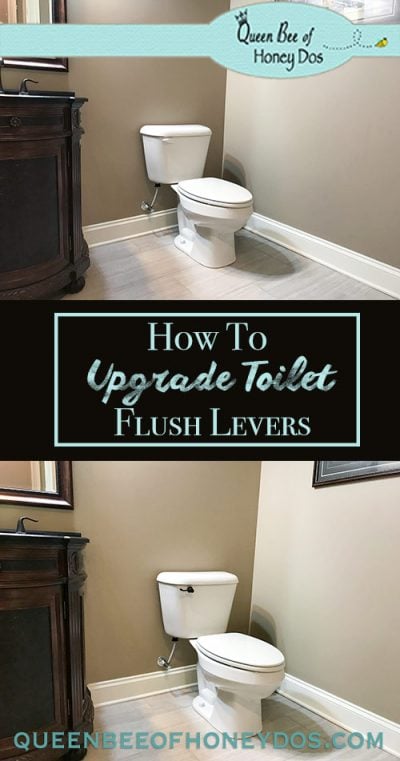
How to Upgrade Toilet Flush Levers…
For some reason, when I was placing the orders for all of my fixtures and trim kits, back when my home was still under construction, I failed to include nice flush levers for my bathrooms. So, when the plumbers were installing all of my stress inducing toilets (yes, I struggled mightily with the decision on which type/brand of toilets that I wanted), they installed their standard, white, universal levers.
Fast forward to a few years later, and I am finally getting around to upgrading the levers to match the rest of my trim. Luckily, this is a very simple DIY which anyone can do in 5 minutes or less. The most challenging part is finding a lever that works. I went through a few different brands before I found a good universal brand that fits correctly. I have six bathrooms in my house, and did not want to go all out on the name brand versions.
Delta is the brand used for the rest of my hardware, but they do not have toilet levers in the same style as the rest of my hardware. (Which may be why I ended up with builder’s basic, in the first place). Moen has a lever that would look right, but the cost was almost $50 each. That is a lot to spend for one toilet. Considering I needed six, I thought I would keep looking.

![]()
I tried a few universal brands from the big box stores, but they both had issues with either fit or function. Finally, I found this lever* at Amazon. It looks very nice with my Delta hardware, and the fit and function was perfect. Also, the price was quite low. So, after trying out the first one, I placed an order for the other five.
How to Upgrade Toilet Flush Levers – Instructions…
Step 1:
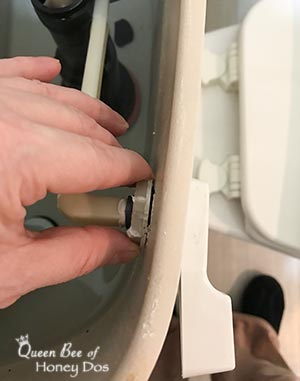
First you will need to remove the tank lid and loosen the plastic nut that holds the lever in place. You may need a wrench to initially loosen the nut. But once loosened, you can remove it by hand.
Next, you will need to remove the old lever. If you look down into the tank, you should see the lever arm extending from the handle to the flapper. It may be connected by a chain to the flapper, or the arm may be inserted through a lever that lifts the flapper. Either way, you will need to disconnect the arm from the flapper mechanism. (If the arm is inserted through a lift lever, you can twist the lift to the side to allow the arm to be removed). Remove the old lever mechanism, by slipping it out through the hole in the tank.
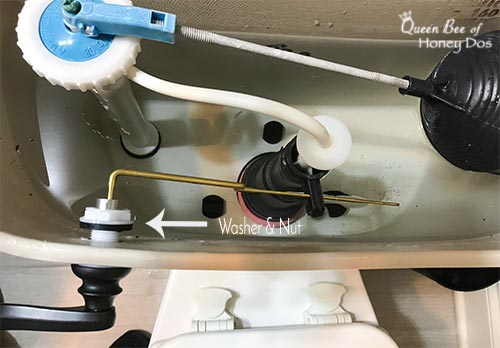
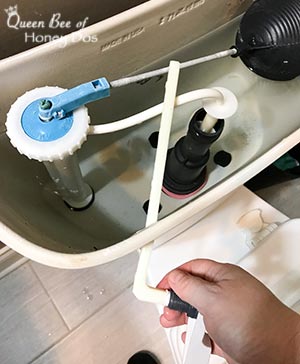
Now, slip the new lever through the hole and reconnect everything in reverse order. Note – sometimes the universal levers do not fit against the tank as snug as they should. This can sometimes be resolved by adding a rubber washer to the inside of the tank, between the handle and the nut. This was one of the biggest issues that I found with the other levers that I bought. But, this one that I found on Amazon* did not have that problem. Plus, it came with a good quality washer which helped quite a bit in that area.
![]()
So, if you are looking for a new lever, but don’t want to spend a lot of money for one of the more expensive brands, you may want to check out the lever that I used.* It comes in several different finishes, even brass. Which is good since brass hardware is making such a strong comeback. (Although, as of this writing, I noticed that a few finishes were on back order. I guess everyone else has discovered that it works great, too).
Final Comments…
So, I guess the moral of this story (post) is that you can make simple changes to your decor that will effect the ambiance in a big way. The devil is in the details.

– PIN IT –
– PIN IT –


Please keep it clean. Comments that do not follow the Comment's Policy may be removed.