An improperly aligned door can cause drafts and unnecessary heating expenses. Not to mention, it can cause damage from the wear and tear from the wood rubbing or pulling in areas were it otherwise wouldn’t. This is definitely one of those projects that I categorize as “Not Fun But Must Be Done.” But, it is also a relatively easy fix that will save a lot of repairs in the future. You can quickly get rid of gaps with these easy door alignment steps. So, on with it….
(This post may contain affiliate links (*). That means that I make a small commission from sales that result through these links, at no additional cost to you. You can read my full disclosure here.)

Common issues with older doors…
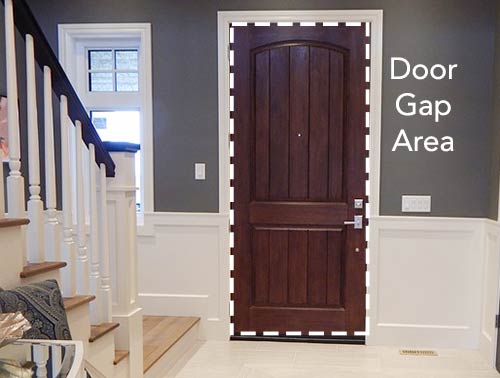
The gap around all sides of a door should be even, and typically should have about a 1/8″ space. If they are not properly aligned, this could lead to undue strain on the hinges, bugs gaining entry, and drafts. One common reason for misaligned doors is that old doors begin to pull against their hinges, causing sagging. A common symptom of this problem is that the door will rub and/or bind against the frame. This type of problem can usually be fixed by simply tightening the screws. If the screw holes are stripped and can’t be tightened, there are a couple of quick fixes.
Easy Door Alignment Options:

1) Use a longer screw which will reach past the stripped section of wood and bite into the fresh wood beneath.
2) Glue in a wood plug and reset the old screws. (If you don’t have a wood plug, a quick fix is to use a couple of wooden matches or a wooden golf tee. Glue in place and, after it dries cut off the excess with a utility knife. Then, reinsert the screw).
Common Issues with new doors…
The second most common issue is with newer doors that just were not properly aligned in the beginning. With these, the space around the door will be wide at one spot and tight at another. There are two ways to fix this, depending on which side the gap is located – hinge side or swing side.
To begin, determine which side has too much gap. If the gap is located at the hinge side, then that hinge most likely needs to be further recessed. Look at the hinge. Does it sit completely flush within it’s mortise or does it sit above it. The hinge should be completely recessed within it’s mortise, so that it is flush with both the door and the frame. If it is not flush within the door and/or with the frame, then this is the culprit. To repair a proud hinge, you will need to chisel out the hinge mortise. I demonstrated how to work a chisel on my sofa console table.
If the wide gap is on the swing side (side with the door knob), the hinges are recessed too much and need to be shimmed, or raised up within their mortise. This is the problem presented in my door.
Easy Door Alignment – How To:

The door that I am working on has a wider gap on the bottom of the swing side. As you can see from the photos, I have a full 1/4″ gap on this side. To make the adjustment, I will shim the hinge on the opposite side of the gap.

There are a few different types of shims that can be used for this project. Most people tend to use cardboard or some form of card stock to shim. Other people prefer to cut out a wooden shim. As I stated before, I like to use plastic shims because 1) they are pre made, so I don’t have to bother shaping them. 2) Cardboard, and wood to some extent, will deteriorate over time. 3) The plastic shims are inexpensive, so I get the best of both 1 and 2 without a downside. (FYI – these EZ Shims * are available on Amazon)*.
As you can see, the holes in the shim align perfectly with the screws of my hinge. The two middle slots in the shim are to allow the shim to be slid in behind the hinge plate. This allows adjustment to be made without having to remove the hinge completely from the jamb. (another benefit of the plastic shims).

To insert the shim, remove the top and bottom screws, but only loosen the two middle screws. Then, slip the shim in behind the hinge. (A hammer may be needed to tap it all the way in place). Next, tighten the middle screws and check the gap. If the gap is still a bit too wide, insert a second shim and recheck. (I used two shims for this door) After everything looks right, replace the top and bottom screws.

Final Comments…
This is the after photo. Now, the door has approximately 1/8″ gap. I can no longer see any light coming through on this side. I expect that there will not be a draft here this winter either. :-)

– PIN IT –
– PIN IT –
Pattianne says
Thanks for the info…but our hinges are the Really old fashioned ones with the exterior ‘rod” that has a ‘pin’ inside that is removed to remove the door. The only doors in this old house that Don’t have a problem are the two exterior doors. All the others (all 100+ yrs old) are wood & 6 panel doors that either ‘gap’ or won’t stay closed or ‘stick’.
Pattianne.
Rachel says
Sorry that this article didn’t help with your situation. Obviously, this is intended for modern door hinges. 100+ door hinges are sure to give you problems. But thank you for visiting my blog anyway. I hope that I will be able to help you in the future. :-)
Sherry Liptan says
Thank you for your tutorials. I used the how to remove the door hardware and this one. My front door was out of alignment and the door would not latch.The EZ shim worked great to solve the problem. I found them at a local hardware store. I really like to spend my dollars supporting local businesses when I can and they were 2/3 the cost of what amazon is charging.
Rachel Lynn says
Glad to help. I always appreciate the support, but yes, occasionally Amazon pricing is off.