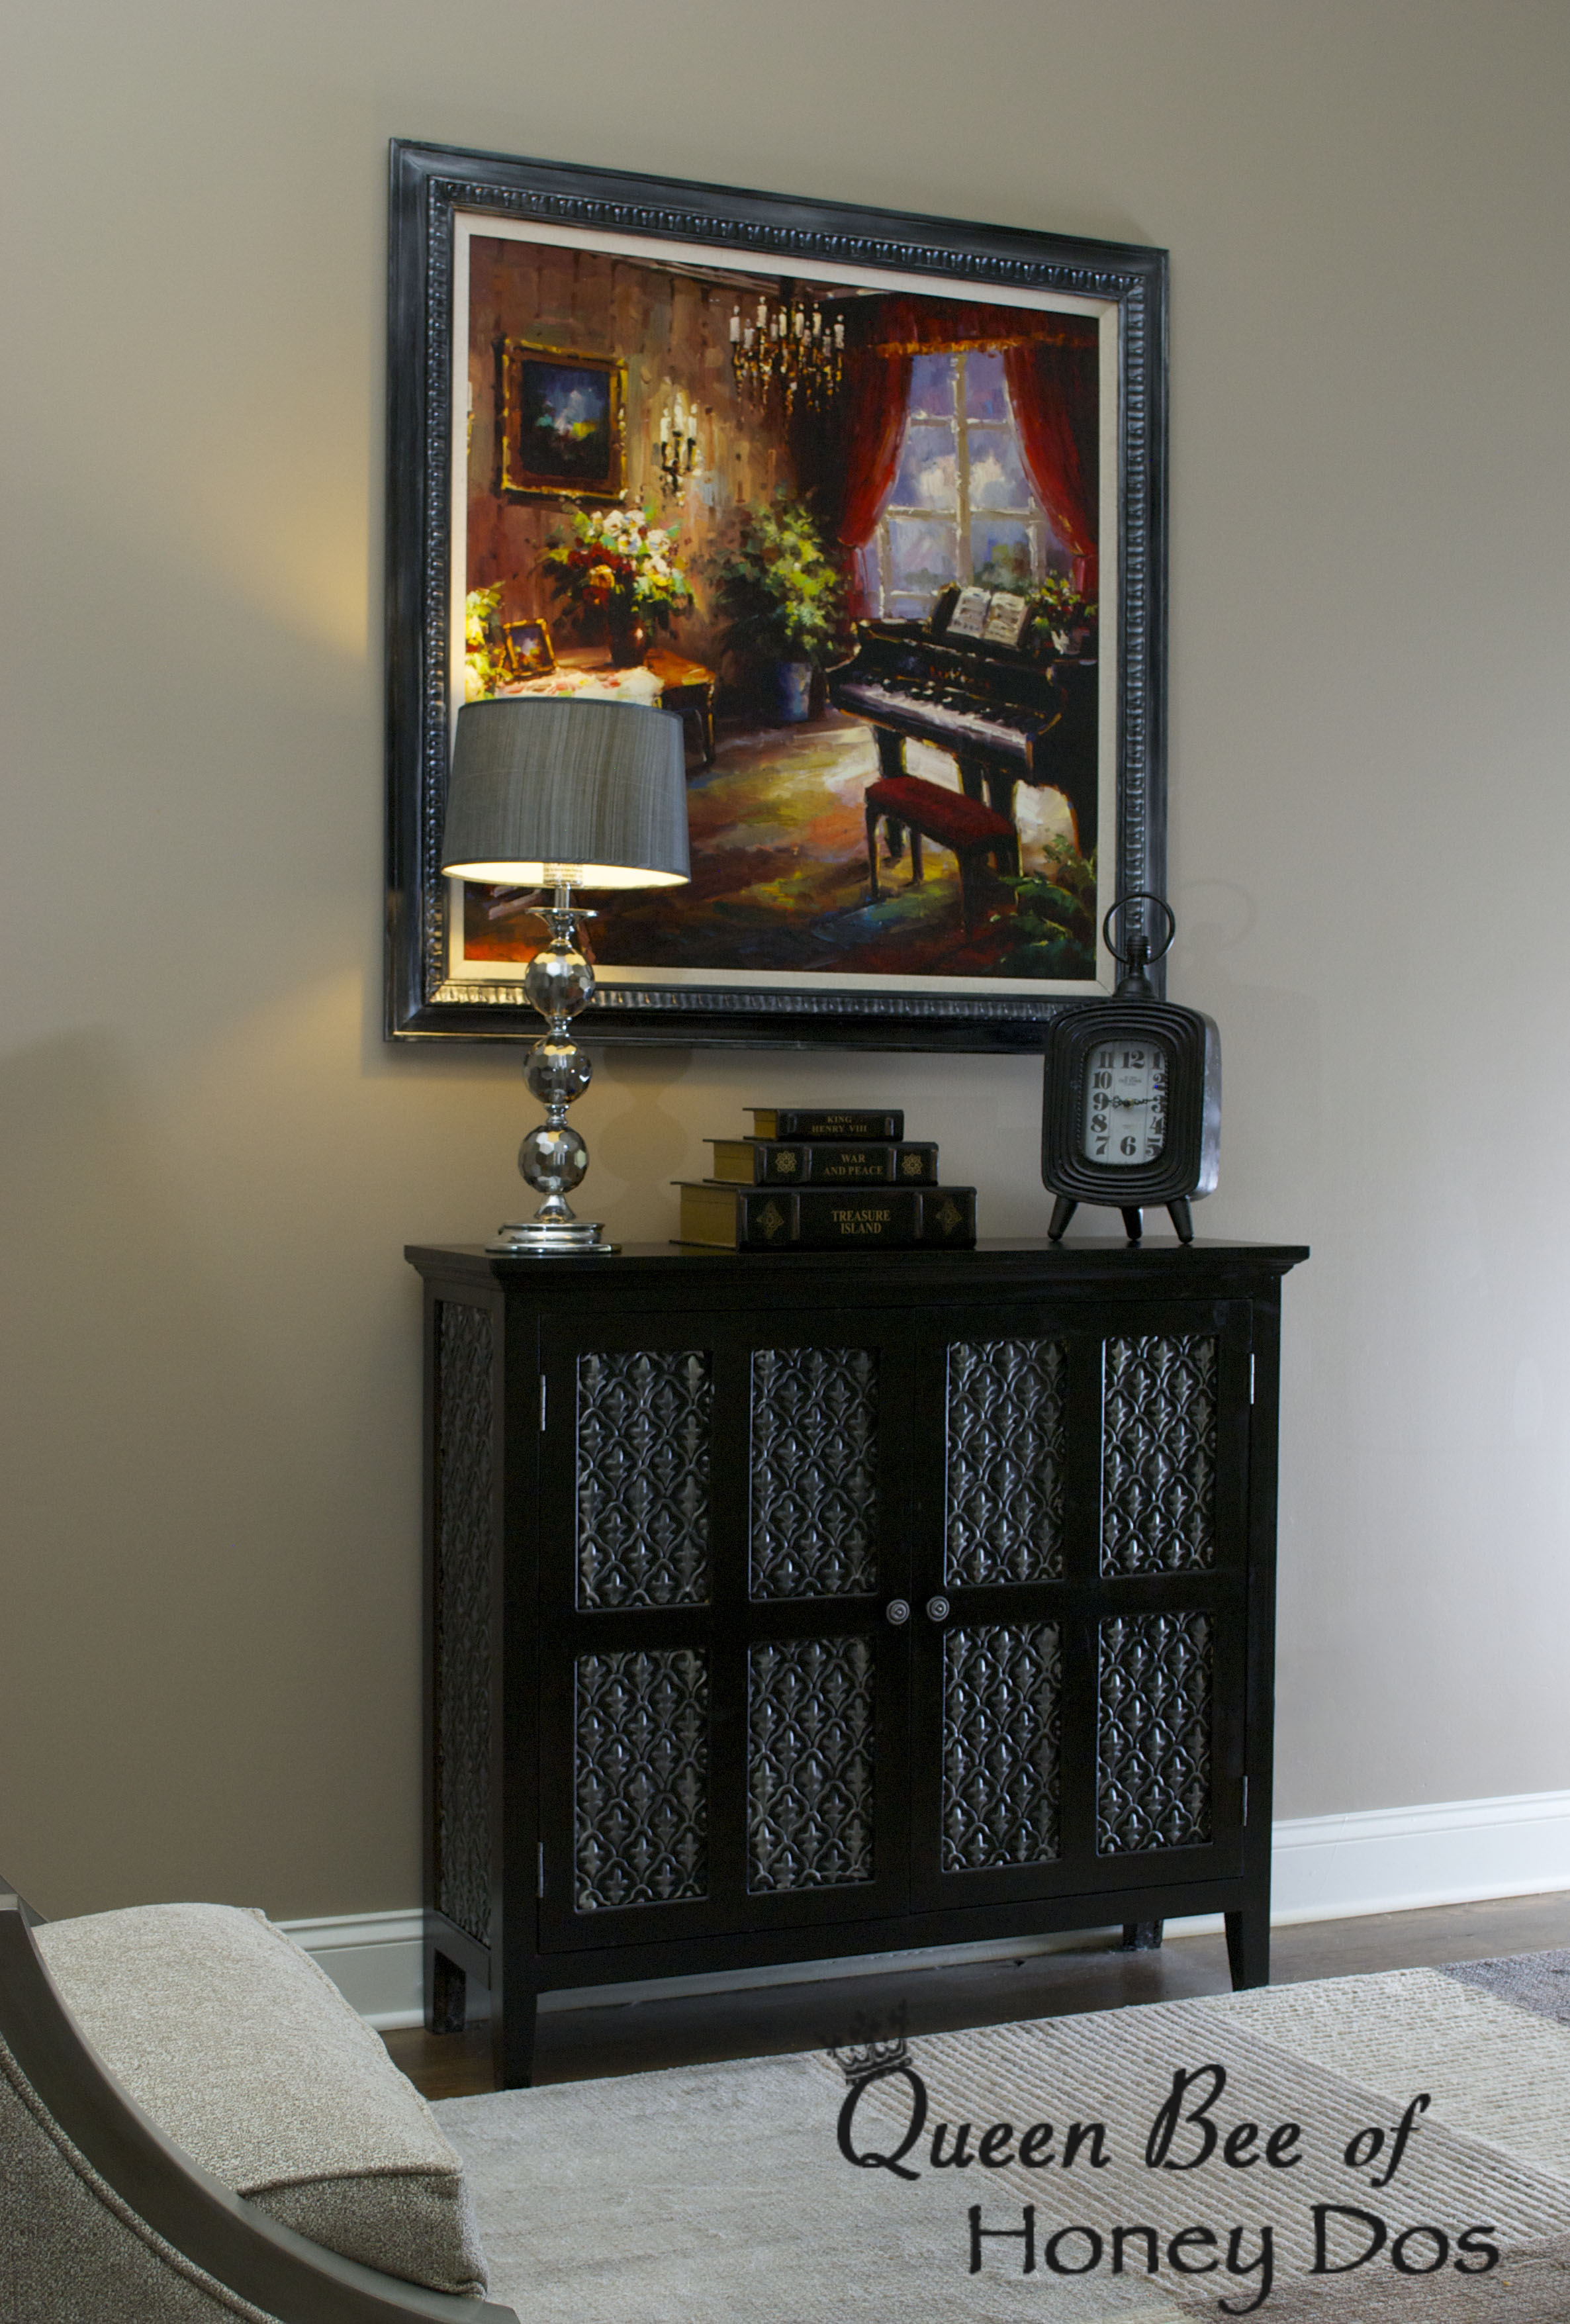
Old pieces can look fresh and new again with just a little paint and effort, and can even create a set from previously unrelated pieces. Just take a look at this cabinet and oil painting that was headed for the attic. The painting was one of my favorites, but although the previous gold, accented, frame worked nicely with my old paint scheme, it was really clashing with my current gray tones.
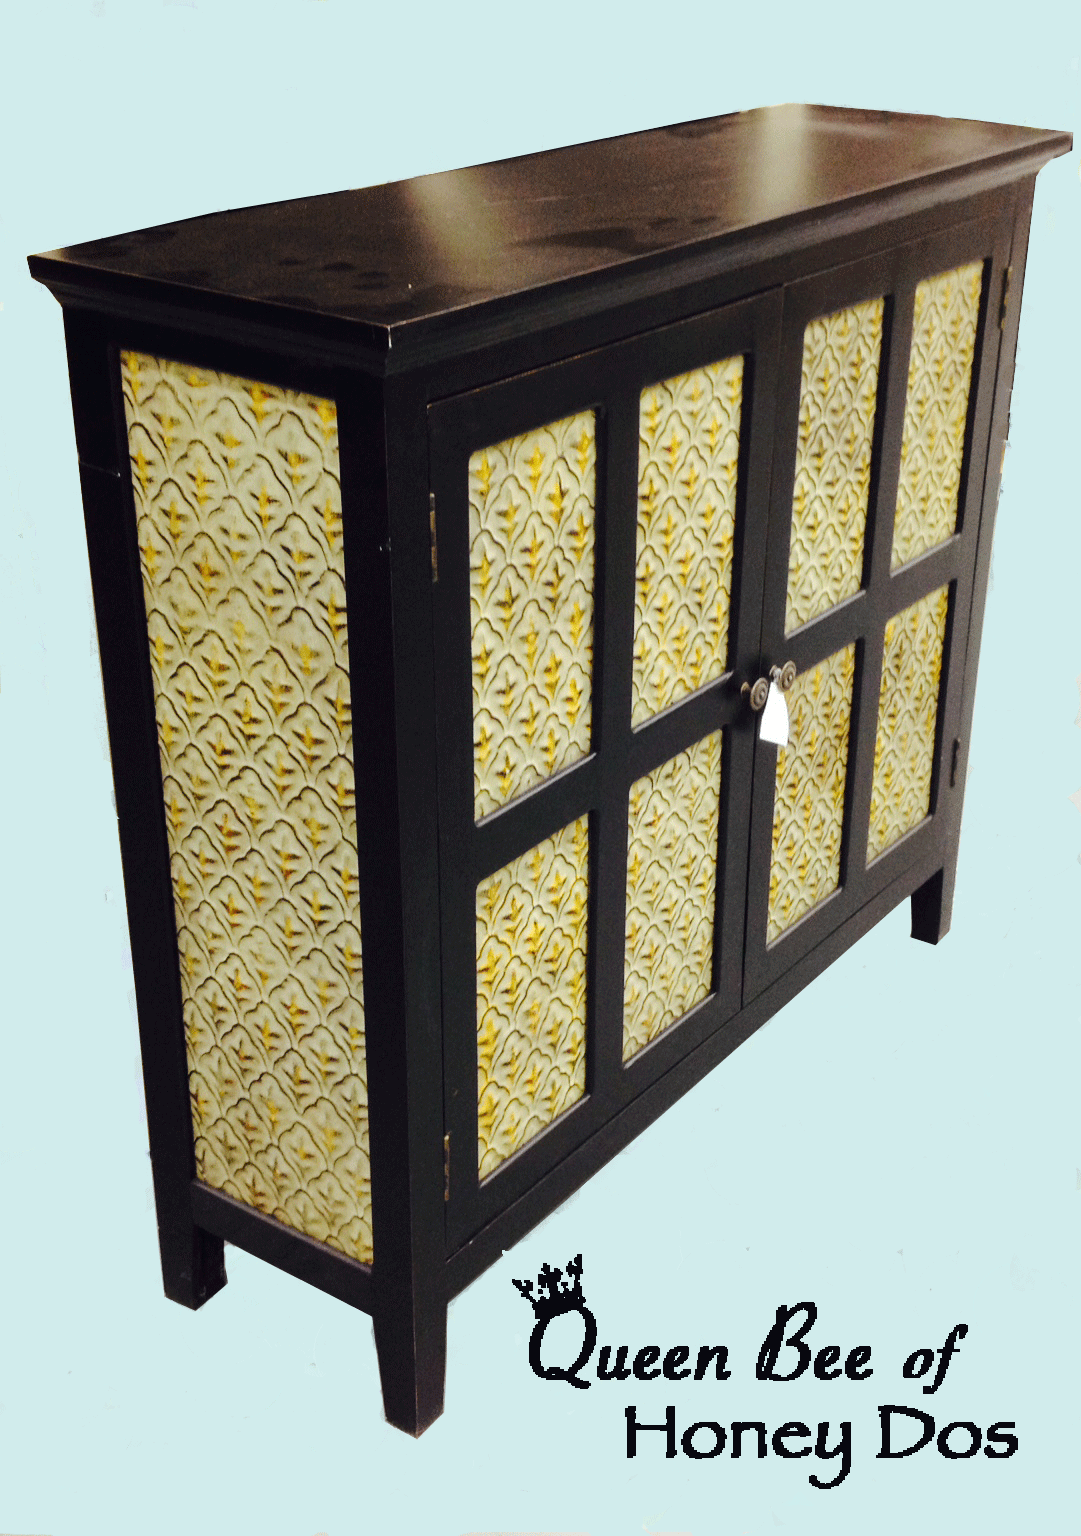
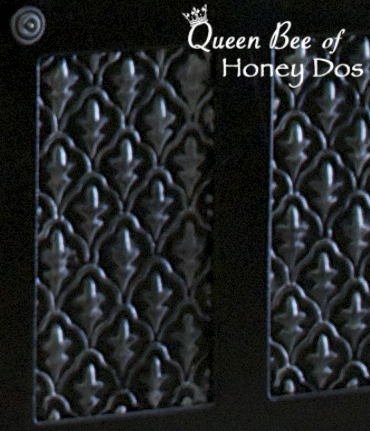
The cabinet, before this makeover, had a disjointed look to it. It looked as if it couldn’t make up its mind on which style it wanted to be – farmhouse or modern. The cabinet itself was a simple wooden frame with tin inserts in the door and sides. The frame was black (good for me) and the tin inserts were painted yellow with rust-red accenting.
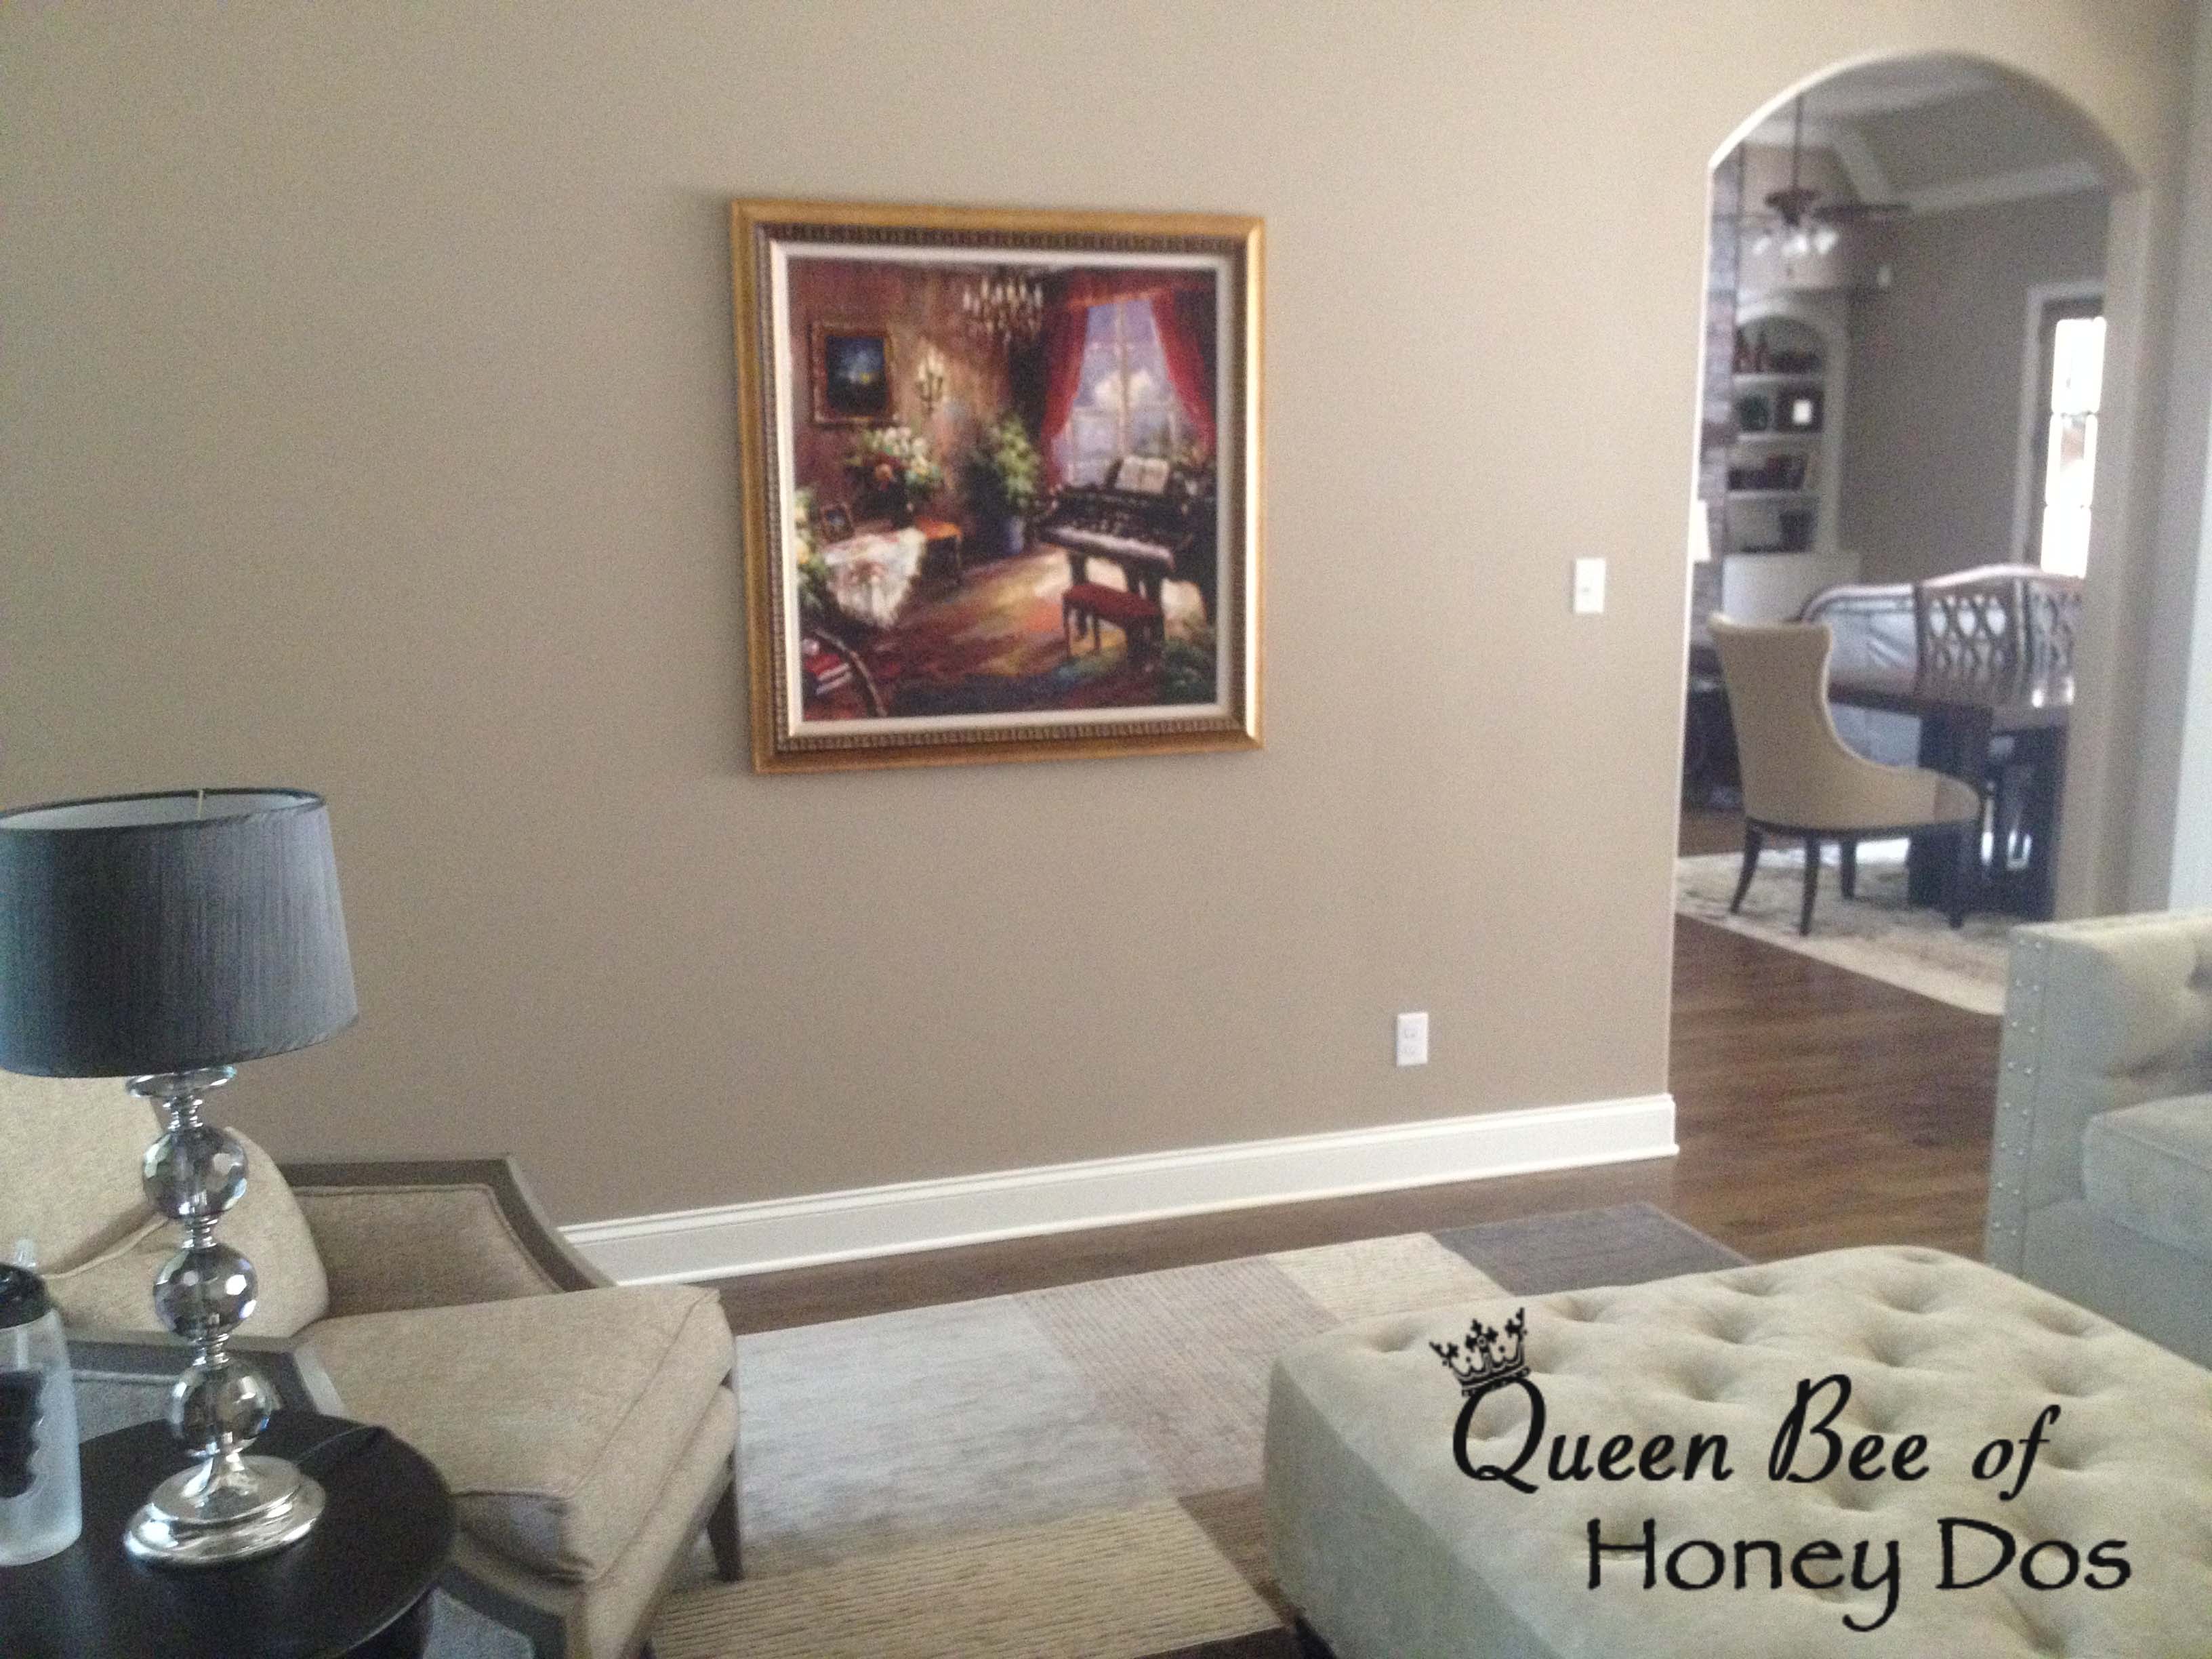
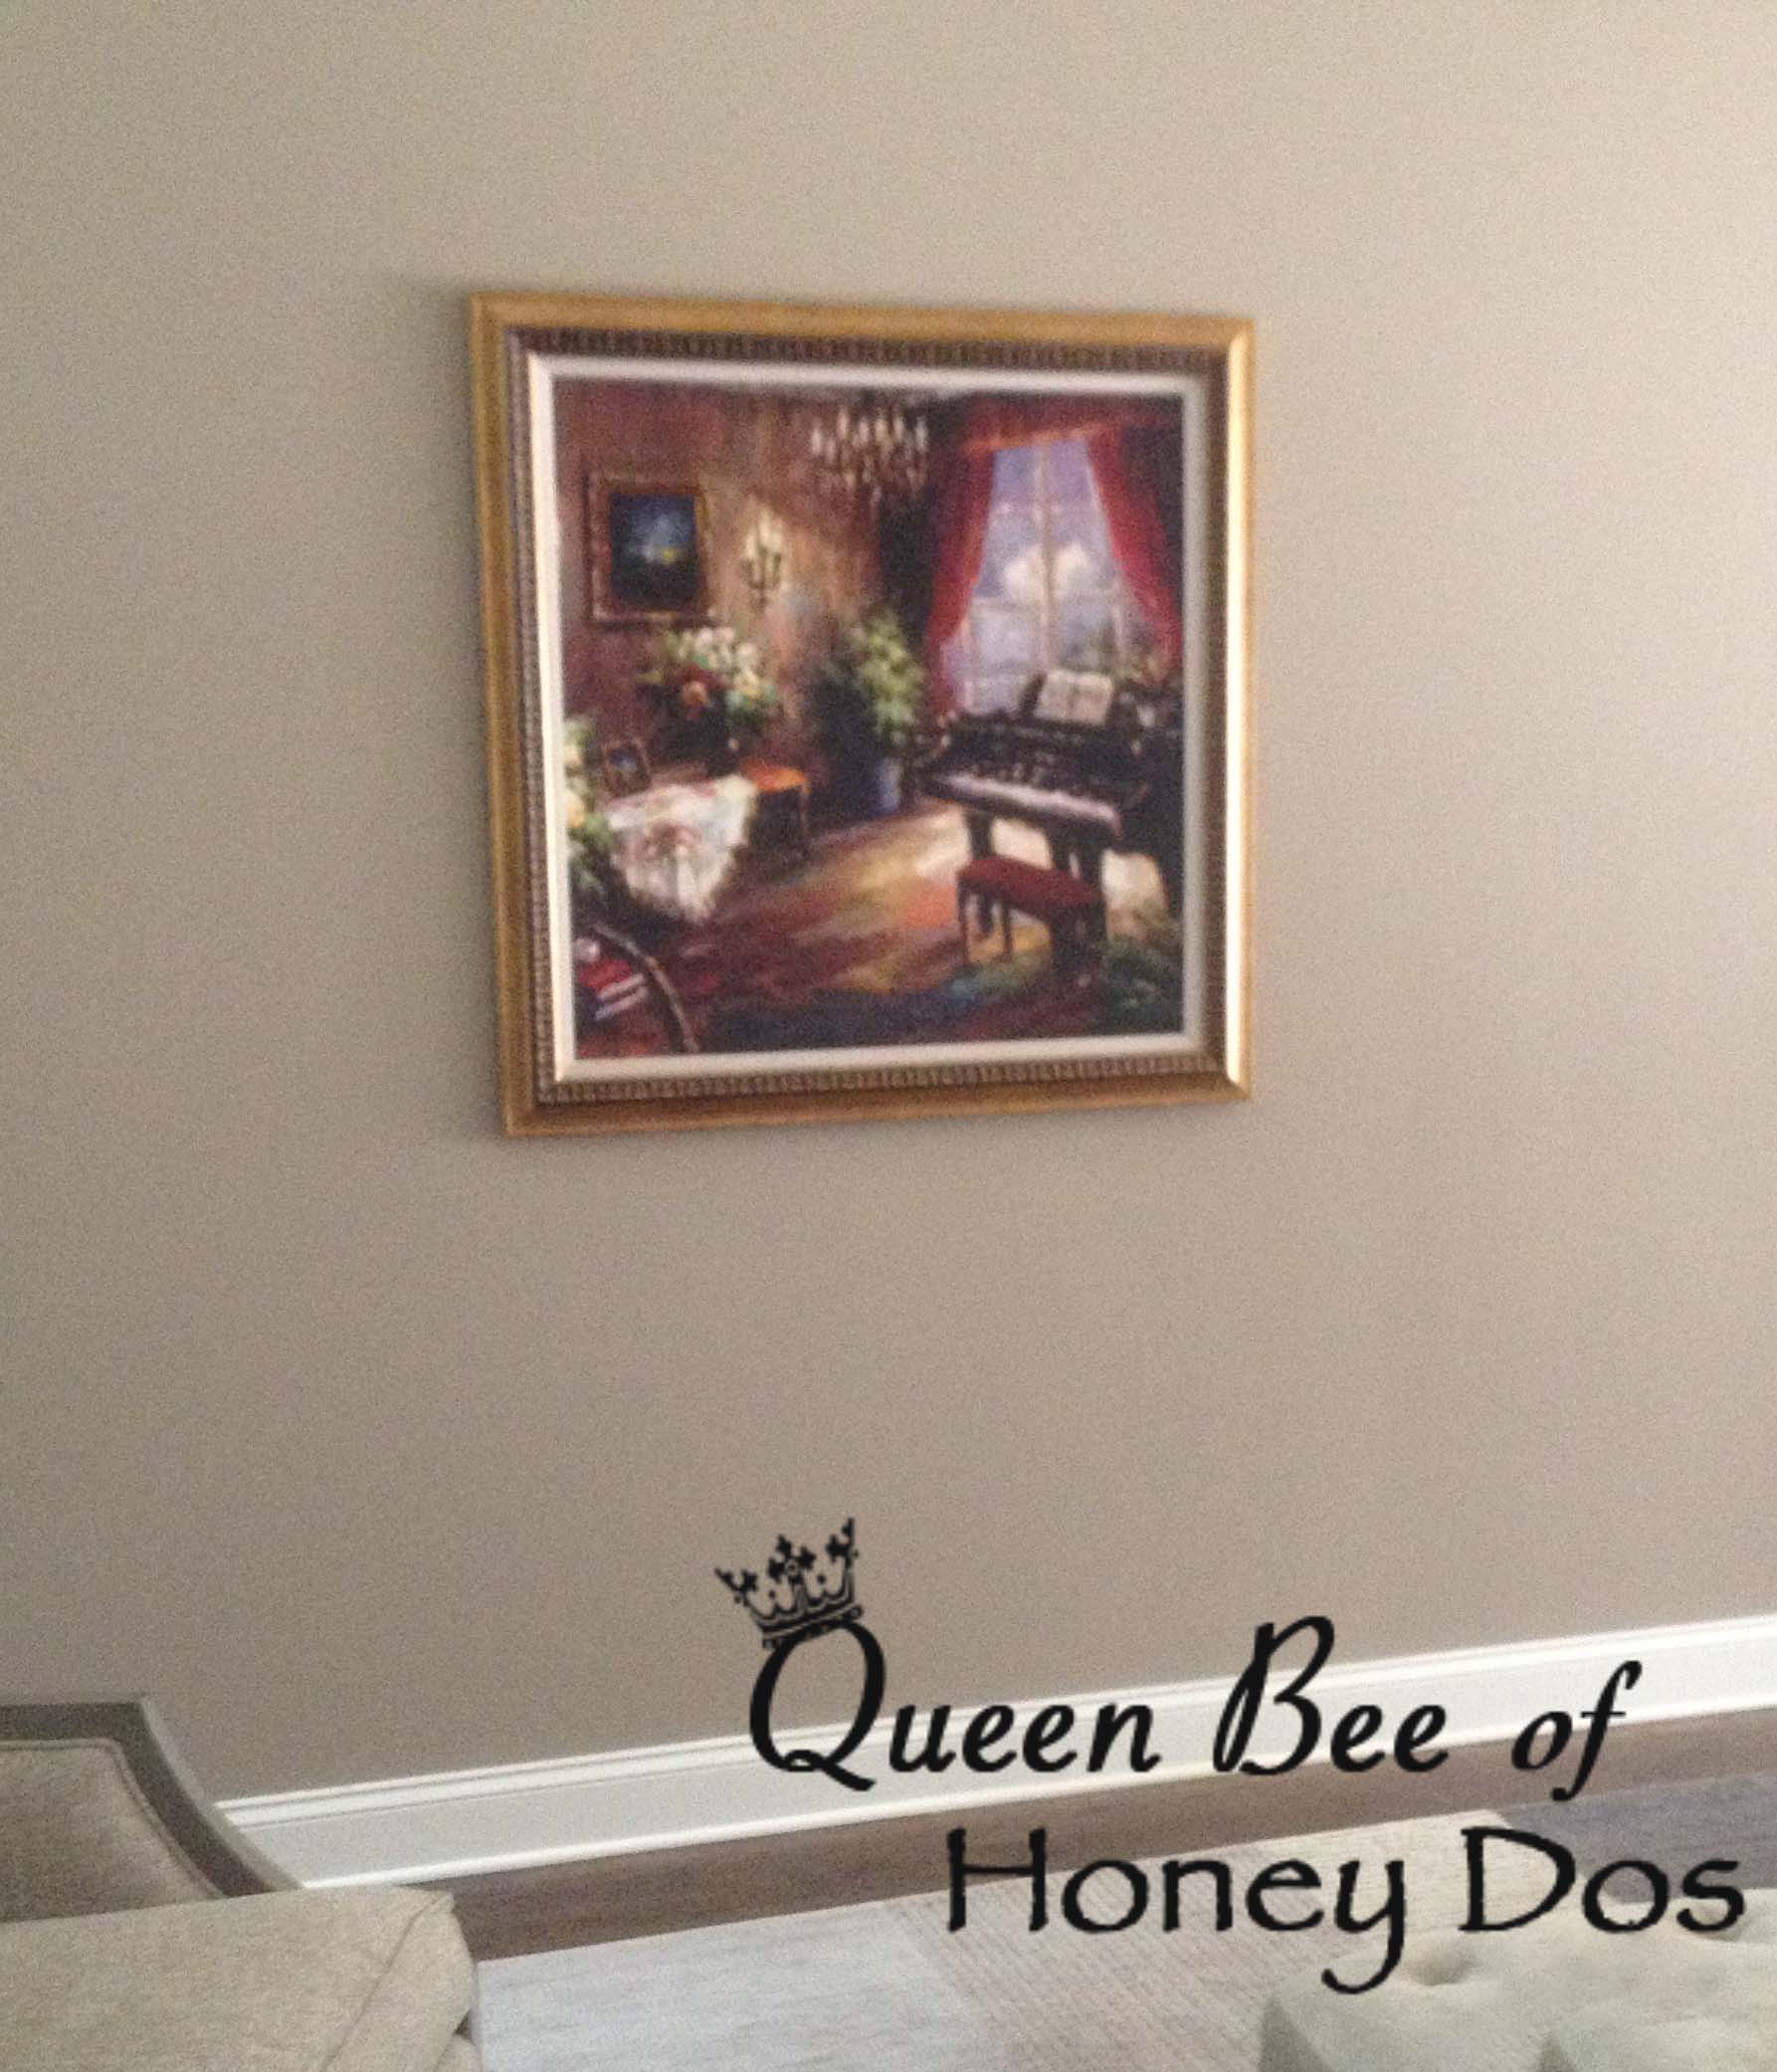
So, this is the space where I needed a cabinet. I had originally hung this painting in this location, hoping that I would be inspired at some point. The painting had this dated gold finish. As you can see at the bottom of the photo, the chairs are gray, as is the rest of the decor in this room. So although the painting looks okay by itself, the combination was not working at all.
On to the makeover……
This makeover was actually pretty easy. All that I used for this were:
- gloss black spray paint
- metallic paint (I used Precious Metals leafing finish in Platinum, which I got from Hobby Lobby. However, any metallic paint will work as long as it is not to spray paint)
- sponge brush (the cheap ones from the hardware store)
- paintbrushes (also cheap one from the hardware store)
- painters tape and paper bags to cover the painting.
- paper towels
The Oil Painting Frame
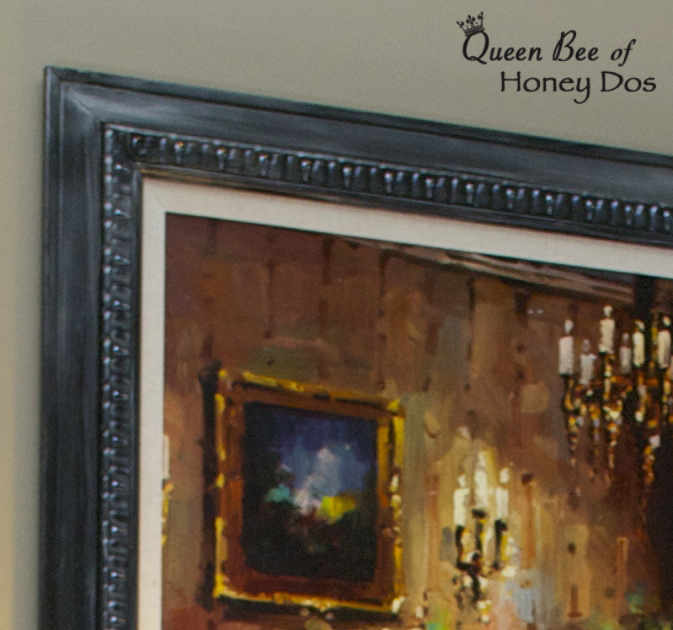
Step 1 – completely cover and tape off the painting to protect it from the paint.
Step 2 – Lightly spray a coat of gloss spray paint on the frame. Let dry. (Repeat until a good uniform finish is achieved).
Step 3 -Lightly dip the paintbrush into metallic paint and blot on a paper towel to remove most of the paint.
Step 4 – Lightly brush across the frame to highlight accent areas, slowly building until the desired look is achieved.
Step 4 – Lightly apply metallic paint to flat areas using the method from step 4, and using a clean brush, quickly swipe over the area to remove excess paint. Repeat until the desired finish is achieved. (For longer work time, a small amount of clear glaze can be added to the paint)
The cabinet
Step 2 – Lightly spray paint a coat with black paint. Allow to dry and repeat until a good finish is achieved.
Step 3 – Using a sponge brush, apply metallic paint. Make sure the entire tip edge of the sponge brush is dipped into the metallic paint. Use firm but light pressure and avoid a back-and-forth motion. The idea is to just cover the raised areas, leaving the recessed area untouched.
Before and afters
Please keep it clean. Comments that do not follow the Comment's Policy may be removed.