There is nothing worse than trying to hand something on a wall only to have it fall, or worse, tear a huge hole in the wall.
Drywall (aka sheetrock) is not made to support the weight of wall art or other necessary wall hangings. This is why using the correct drywall anchors is so important.
Why Drywall Requires Anchors
Drywall (aka sheetrock) is made up of gypsum that has been compressed between two sheets of paper.
When hardware is inserted through the gypsum, the structure of the material is compromised. This makes it difficult for a nail or a screw to provide adequate support for any external force – such as a hanging TV or a piece of wall art.
In order to ensure that externally mounted items are properly supported, a nail or screw must go through a stud. However, this can restrict the location of mounted items and is not always a solution.
To compensate for these issues, anchors are used to help grab and disperse the weight to the back (undamaged area) of the drywall.
Choosing the correct anchor will make the difference between having a proper support wall hanging and having to repair a hole in the drywall.
More Posts You Might Like:
How to Paint Your Walls Like a Pro!
How to Frame Walls!
Types of Sheetrock Anchors
Plastic Ribbed Anchors
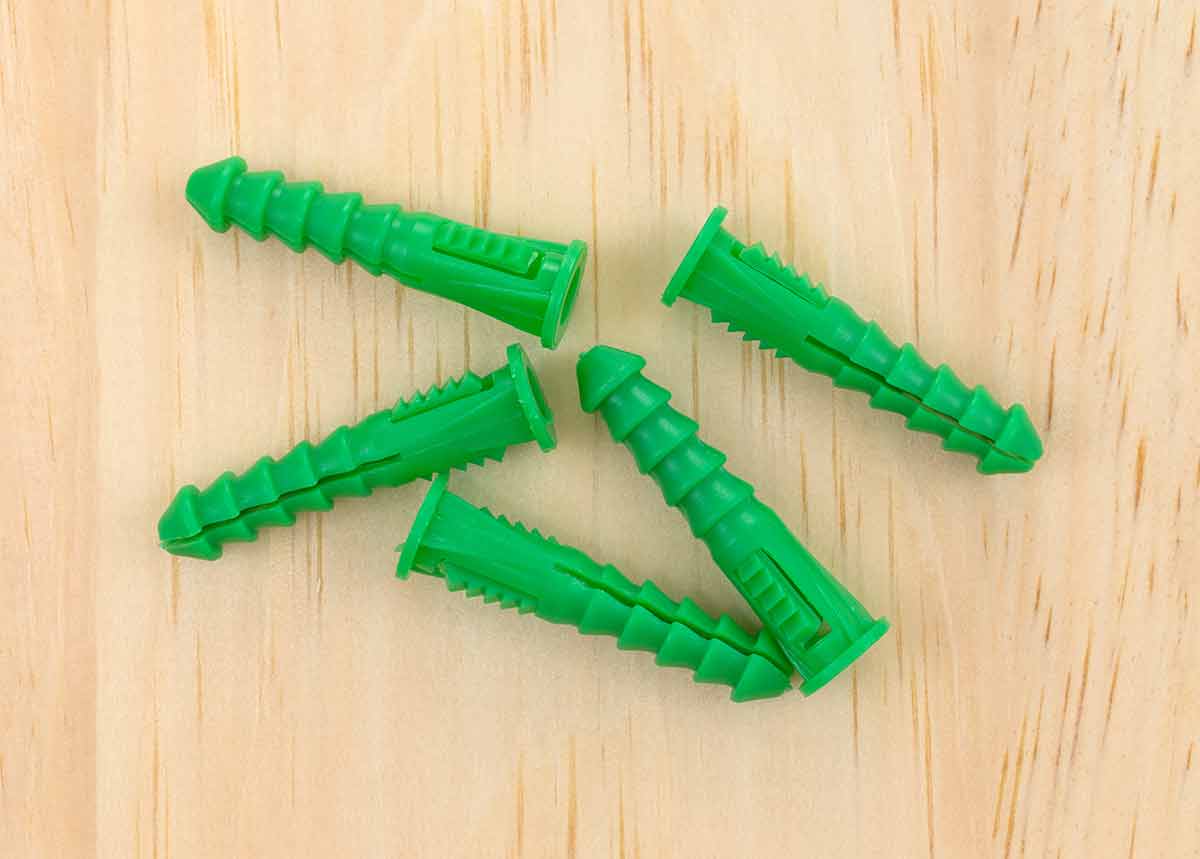
These type of anchors work by expanding and grabbing into the edges of a hole in the drywall.
To use these, you will need to drill a hole to match the size of the anchor. Then, tap it in place with a hammer or mallet.
Pros: These are cheap. You can buy a package of various sizes and weights for a very low price. They work best for lightweight projects.
Cons: If you accidentally drill the hole too large, the anchor will not grab. Mistakes must be corrected with either a larger anchor or drilling a new hole. Removal of the anchor will leave a large hole.
Personally, I prefer to only use these when I want to keep the wall damage to a minimum. If I need a large anchor or something for heavyweight, I use one of the other options.
Ribbed anchors (in my opinion) are just too much of a hassle without very much upside.
Self Drilling
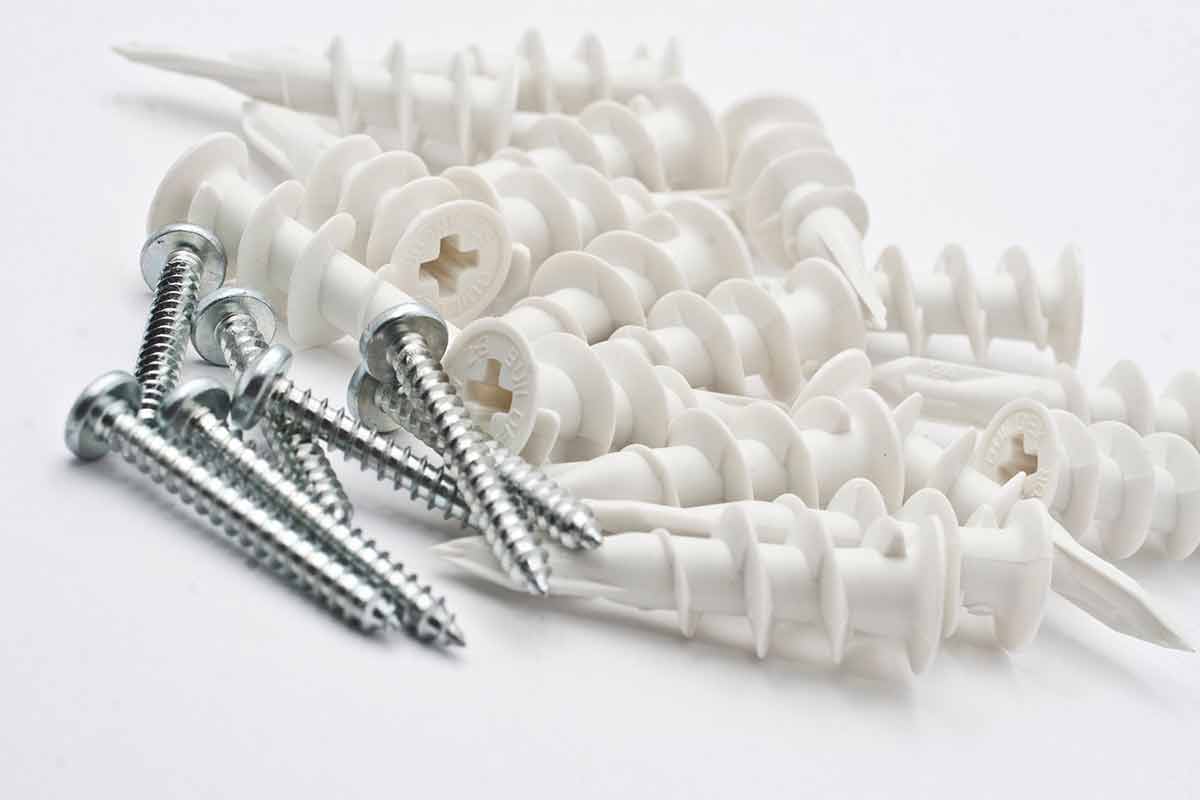
These combine the spreading action of the ribbed anchors with the convenience of a screw. Simply screw these into the wall with a Phillip’s head screwdriver or bit.
Pros: They are easy to use. They are self-tapping which means that you do not have to pre-drill. Perfect for DIYers.
Cons: These leaves large holes when they are removed.
I love these for their ease of use, but not so much for the big holes they leave behind when you remove them. I prefer to use these in locations where I know they will remain for a very long time.
Molly Bolt
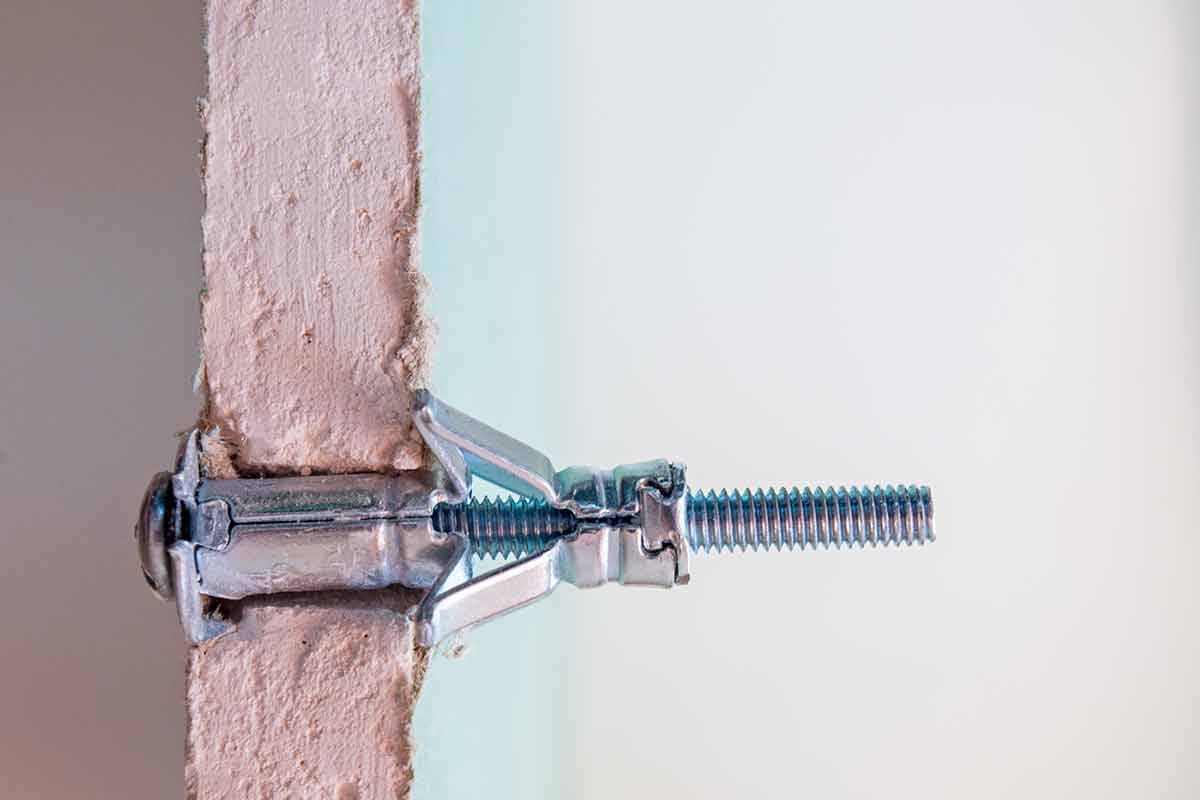
These are medium-weight metal anchors that expand and grab behind the drywall.
To use molly bolts, also known as hollow wall bolts, pre-drill a hole just large enough for the molly bolt to be inserted into the wall. Then, tighten down the screw until you feel the anchor tighten.
Pros: Because Mollies grab behind the wall, instead of digging into the edges of the hole like the previous anchors, they provide a more secure anchor.
The screws can be removed and reinserted as needed. This makes them great for areas where you may need to take down items for future use.
Cons: Because of the way the sleeves work, these are not as easy to remove as the other previous anchors.
Overall, I like the molly bolts the best. They offer just enough strength for most projects and are super convenient. While not as quick as the self-tapping anchors, they make up for it with their removable screws.
Toggle anchors
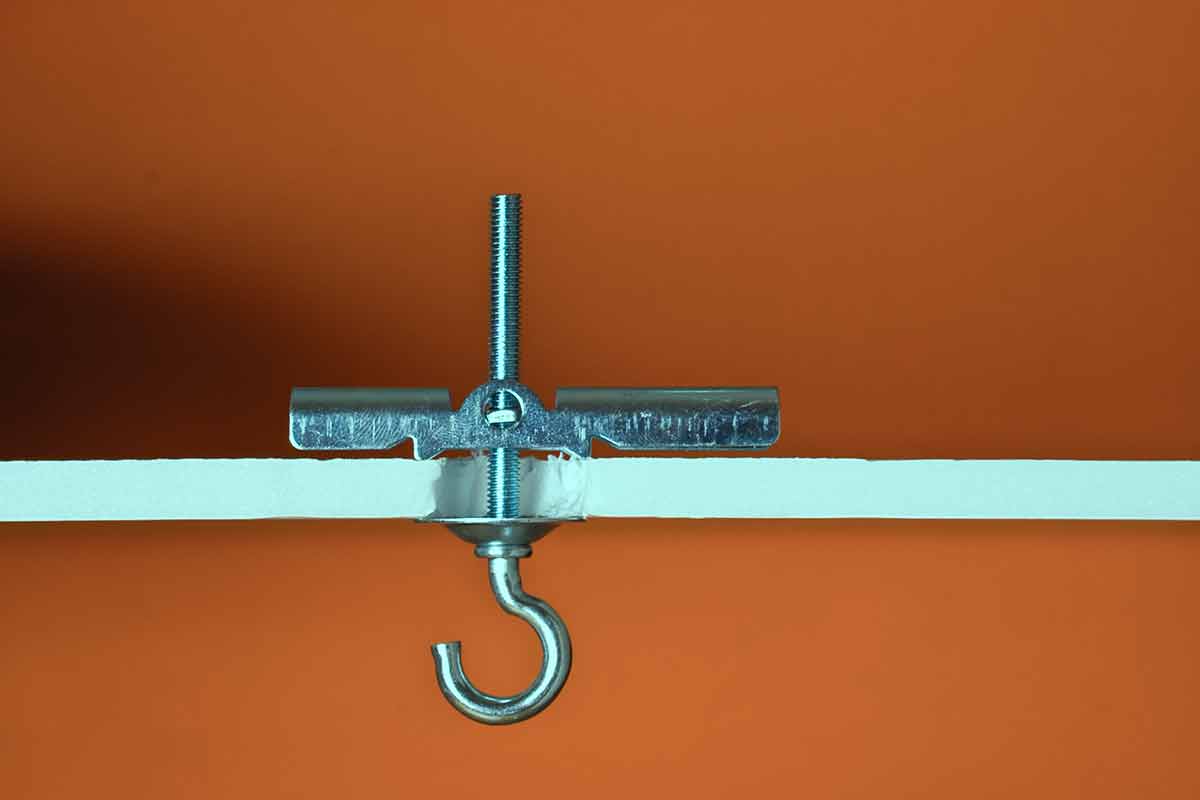
Toggle anchors are the big daddy of wall anchors. Although there are a few plastic varieties, most of these are metal.
To use a toggle anchor, pre-drill a hole to the size indicated on the package. Fold the toggles in and push the bolt and toggle through the hole. The toggle will fold back out behind the wall.
Pros: Toggle anchors can hold the most weight of all the anchors. They are perfect for hanging from the ceiling.
Cons: They require very large holes, often up to three times the width of the bolt.
When is it Okay to Use Nails (to hang stuff on sheetrock or drywall)
Occasionally, a very light-weight item can be suspended from the weight of a nail set into the drywall.
However, in situations like this, it is almost always better to use a surface mounted hanger like a 3m hook.
Nails can also be used when they are driven through a stud for support.
Alternatives to traditional nail hanging kits include 3m adhesive hangers, picture hooks, and claw hook hangers
Mistakes Made when Hanging on Drywall
Using tiny nails/tacks to hang pictures and other wall art. The weight of the item, no matter how small, will eventually widen the hole and cause the nail to become loose. It is usually best to choose the appropriately sized anchor.
Missing the stud when using nails. This is the best way to cause excessive damage to a wall.
Thinking that nails will create a smaller hole. Since gypsum gives way to nails, any weight will only enlarge the hole. You will only end up with a weak support. Plus, anchor holes are relatively easy to repair. FYI – Be sure to spackle all holes before repainting walls.
Expecting surface-mounted hardware to hold excessive weight. Do yourself a favor and use the proper anchors.
Using the wrong weight approved anchor. This is the second-best way to cause excessive damage to drywall. Make sure you are using the correct size/type anchor for the weight that you intend it to hold.
Paul S says
There is also a newer type of toggle bolt that combines a metal toggle and bolt with a plastic sleeve or strip so that the toggle is retained in place behind the wall when the bolt is unscrewed. The plastic component also allows for exact placement of the drill hole which is great for mounting the hidden metal bar assembly used by floating shelves. Two such brands are Toggler (Amazon and Home Depot) and Simpson Strong Tie.
Each bolt can hold 100 pounds or more. Advantages are a smaller mounting hole due to the tilting toggle, and the bolt will not move vertically within the drilled hole when used in a wall installation.
Paul S says
Also wanted to add that the Toggler toggle bolts are also great for installing a flat TV mounting bracket on a hollow gyproc wall where studs are not in the desired location, Some sizes can hold more than 100 pounds per screw.